Good day folks,
After a few weeks of browsing the forum anonymously, I found an abundance of information regarding the bed/tailgate LED bars.
I hope to start this thread as I'm looking to start my installation and hope to get everyone's input and perhaps find tips/tricks on the installation process.
I currently own the Ram 1500 Limited. After looking at the frame and body, I've determined the following issues.
1. Connector for tailgate camera
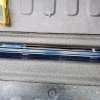
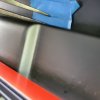
2. Bumps/uneven points on the tailgate
3. Guidance on removal for the tailgate (I was able to remove the two-wire straps but the left side isn't coming out. Even after putting it on the 45-degree angle, I've been having some issues.)
Options:
After scavenging the forums, there are several options that are available from the cheap eBay/Amazon ones which I'm sure everyone has avoided.
The two most popular options are the OPT7 by Redline and the Putco Blade [More on this in a moment].
Due to the redesigned body, everyone's been having some workarounds from using spacers, different styles or "settling" for less.
The OPT7 has been famous for its relative ease of installation in addition to the sequential lighting. However, as many people have noticed, it has a delay in lighting which a lot of people have not been too fond of.
Putco has advised consumers to purchase #92009-18 instead of everyone's preferred model which is the #93009-60 due to the aforementioned issues with the connector and bumps.
The plus that Putco has for the people who DONT wanna cut into the factory harness is that they supply a quick connector (#529004).
Both have had positive reviews with some workarounds and have no issues with the parking sensors/blind spot monitoring system.
My question to you, the people, is that if you have already installed one. Which one was it and how was your experience?
Any questions or concerns, please let me know!
After a few weeks of browsing the forum anonymously, I found an abundance of information regarding the bed/tailgate LED bars.
I hope to start this thread as I'm looking to start my installation and hope to get everyone's input and perhaps find tips/tricks on the installation process.
I currently own the Ram 1500 Limited. After looking at the frame and body, I've determined the following issues.
1. Connector for tailgate camera
2. Bumps/uneven points on the tailgate
3. Guidance on removal for the tailgate (I was able to remove the two-wire straps but the left side isn't coming out. Even after putting it on the 45-degree angle, I've been having some issues.)
Options:
After scavenging the forums, there are several options that are available from the cheap eBay/Amazon ones which I'm sure everyone has avoided.
The two most popular options are the OPT7 by Redline and the Putco Blade [More on this in a moment].
Due to the redesigned body, everyone's been having some workarounds from using spacers, different styles or "settling" for less.
The OPT7 has been famous for its relative ease of installation in addition to the sequential lighting. However, as many people have noticed, it has a delay in lighting which a lot of people have not been too fond of.
Putco has advised consumers to purchase #92009-18 instead of everyone's preferred model which is the #93009-60 due to the aforementioned issues with the connector and bumps.
The plus that Putco has for the people who DONT wanna cut into the factory harness is that they supply a quick connector (#529004).
Both have had positive reviews with some workarounds and have no issues with the parking sensors/blind spot monitoring system.
My question to you, the people, is that if you have already installed one. Which one was it and how was your experience?
Any questions or concerns, please let me know!
")