FarmerJohn
Active Member
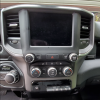
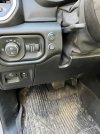
I finally got the time (and courage up) to start working on my led light bar install on the front of my 2020 1500 Bighorn. I like SuperBightLeds because of prior purchases that really work to my satisfaction (cost, durability, effectiveness). The dreaded switch location was my concern, which is why I'm posting this on "interior" because I'm focused on the switch installation here.
I've seen interest in placing a switch here(Light2). If this is you, read on!
I followed the instructions for replacing the radio, which makes the center part you see here, including where I want to install that switch. Two 7MM bolts and the whole thang pops off! (light3)
Once you pry the console away from the rest of the dash, I flipped it upside down and removed the connector for the lower switches group. My lower switches turn off the front and rear sensors and traction control. Remove 2 T10-torx screws where the red arrows point. Then, slide the switch section out by gently prying on the tabs that hold it in. 2 at the top, and 2 more at the bottom. (light5)
Drill a small pilot hole, and then use the appropriate drill bit to get the size you need for the switch. Mine was round, 3/4 inches. Once the hole is done, pop in the switch and secure it with RTV or epoxy. Mine was a tight fit and didn't need anything else to securely hold it in place. (light7 & light8).
Sure wish I could embed pictures as I go, but I think you can get through this with the names listed at each step.
Jump to 2:45 for procedure of removing the dash assembly
Hope this helps the next fellow out!
FarmerJohn

Attachments
Last edited:


