Richard320
Spends too much time on here
- Joined
- Aug 3, 2019
- Messages
- 2,292
- Reaction score
- 2,436
- Points
- 113
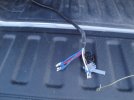
I have one of those 12V refrigerators and I'd like to be able to plug it in in the bed. I gave thought to running a dedicated line from the fuse block back into the bed and finishing it with a 12V plug or some Anderson powerpoles. But who wants to string heavy wires the length of the truck? So... one of these Tees that go into the backside of the trailer plugin. I found a great price on one here. $27.94! And it's pretty good quality, one plug even says Delphi on it.
Which still leaves the question of how to finish it. Cut holes in the sheet metal? Pigtail with powerpoles, or pigtail with lighter socket? Or leave the 7way on it, so as to have easy access to stop lights should I ever add a shell. Then I saw this. Turns a trailer plug into a 12V socket.
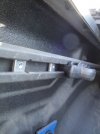
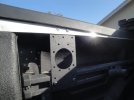
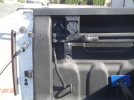
The stuff arrived today, I plugged it all together and it will work. My hesitation comes with cutting a hole in the bed. The obvious spot is right where I normally have my cargo bar. Mounting it higher, so it will be above the stuff sliding around, puts it behind the cargo rail. That won't do. It would be really easy to snip the wires and shove it up through an existing hole and the connect a lighter socket. Or dismantle the plug temporarily, thread the wires through, and mount the 7 way on the cargo bar somehow.
Must ruminate more. But I did want to tip people off to the great price on the wiring harness.

