5thGenRams Forums

Register a free account today to become a member! Once signed in, you'll be able to participate on this site by adding your own topics and posts, as well as connect with other members through your own private inbox!

Laramie sport 8.4 screen surround finish?

mikeru82

Legendary member
Joined
Nov 18, 2019
Messages
5,602
Reaction score
5,263
Location
The Palouse
I actually had it done by a shop that does vehicle wraps. They did it in about an hour and half while I waited so I don’t think it was to difficult to remove it. If you were to use a vinyl wrap you could design anything you wanted. I thought about doing that too but went with carbon fiber to match the subtle accent above the bezel and in the door panels. They charged me $120 to do it.
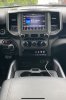
Thanks for the info. Unfortunately there are no shops near me that do vehicle wraps, so I'm on my own with this if I want to change it. I'll probably look into taking that off this weekend when I'm replacing my dash speakers. (y)
 

Jonwiggle

Member
Joined
Mar 23, 2020
Messages
18
Reaction score
6
I search a bit and could not find a good how to on removing that piece. I also would like to put vinyl on this surround piece, but does anyone have a video or notes of how to remove it?
 

GraniteRam

Well-Known Member
Joined
Jul 15, 2019
Messages
420
Reaction score
192
I search a bit and could not find a good how to on removing that piece. I also would like to put vinyl on this surround piece, but does anyone have a video or notes of how to remove it?
 

Attachments

  • Center Stack Removal Wireless Charger Install.pdf
    544.1 KB · Views: 10

MannymanX

5thGenRams Supporter
Joined
Aug 3, 2019
Messages
2,137
Reaction score
1,133
Location
AzZona
I think he's talking about the actual screen bezel.. the whole assembly is very easy to remove, just 2 screws and a good yank.
 

Nickv1214

Well-Known Member
Joined
Nov 14, 2019
Messages
239
Reaction score
163
I think he's talking about the actual screen bezel.. the whole assembly is very easy to remove, just 2 screws and a good yank.
Good to know looks like 2 screws up top and carefully pry out for the bezel
 

Jonwiggle

Member
Joined
Mar 23, 2020
Messages
18
Reaction score
6
Thanks, but yes, I am looking for just the surrounding piece on the screen. Not the whole bezel itself.

It looks like the piece could just come off without taking the entire bezel off, but I am scared to just yank, and break tabs.
 

GraniteRam

Well-Known Member
Joined
Jul 15, 2019
Messages
420
Reaction score
192
I believe it has screws that hold it on from the back side so the entire bezel would need to be removed.
 

Nibis

Well-Known Member
Joined
Apr 1, 2020
Messages
426
Reaction score
293
I have the 12 inch, and today, in the morning, the sun was shining of the top of the bezel, killing my eyes, i think I'm going to have to address that
 

Nickv1214

Well-Known Member
Joined
Nov 14, 2019
Messages
239
Reaction score
163
Thanks, but yes, I am looking for just the surrounding piece on the screen. Not the whole bezel itself.

It looks like the piece could just come off without taking the entire bezel off, but I am scared to just yank, and break tabs.

start at 2:00 very simple .
 

Nickv1214

Well-Known Member
Joined
Nov 14, 2019
Messages
239
Reaction score
163
Went with some KPMF vinyl I had laying around from my wheels on my car , doesn’t really go with anything probably go with gloss black next . Not the worst color but definitely not the best
 

Attachments

  • 2D253626-17EE-426C-94AD-071266A77AC9.jpeg
    2D253626-17EE-426C-94AD-071266A77AC9.jpeg
    134.5 KB · Views: 33

Jonwiggle

Member
Joined
Mar 23, 2020
Messages
18
Reaction score
6
Went with some KPMF vinyl I had laying around from my wheels on my car , doesn’t really go with anything probably go with gloss black next . Not the worst color but definitely not the best

Definitely different. Is there screws in the back then? As stated above? What's the process for taking the piece off?
 

Nickv1214

Well-Known Member
Joined
Nov 14, 2019
Messages
239
Reaction score
163
Definitely different. Is there screws in the back then? As stated above? What's the process for taking the piece off?
The video 2 comments up I posted at 2:00 minutes is very helpful. 2 screws to remove the entire piece , Once you get that off it’s self explanatory after that not much to separating the bezel .
 

Jonwiggle

Member
Joined
Mar 23, 2020
Messages
18
Reaction score
6
The video 2 comments up I posted at 2:00 minutes is very helpful. 2 screws to remove the entire piece , Once you get that off it’s self explanatory after that not much to separating the bezel .
Ok thanks. I am debating what color still. I was just curious if you needed to unhook all the wires and screen itself.

I will attempt it sometime in the future. Thanks for the info.
 

Nibis

Well-Known Member
Joined
Apr 1, 2020
Messages
426
Reaction score
293
I've got the 12 " But I think I need to do some type of wrap on the top part, the sun comes down on that and hits me right in the eyes, that surface needs to be a flat or matte finish
 

Jonwiggle

Member
Joined
Mar 23, 2020
Messages
18
Reaction score
6
Well guys I attempted it. Got a few wrinkles and bubbles. But it took me forever to pick the color, it matches maximum steel almost perfect. Looks pretty cool. IMG_20200529_164247.jpg IMG_20200529_164245.jpg
 

Users who are viewing this thread

Top