5thGenRams Forums

Register a free account today to become a member! Once signed in, you'll be able to participate on this site by adding your own topics and posts, as well as connect with other members through your own private inbox!

Installing "Raptor/ Rebel" Style grille

Livinfast85

Well-Known Member
Joined
Oct 14, 2018
Messages
238
Reaction score
298
Location
Pearland Texas
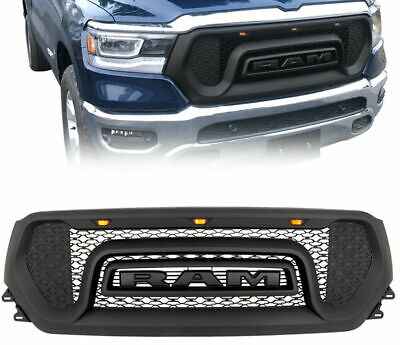
The following will be a write up on how to remove the grille and install a new style grille. The steps can also be used to remove and reinstall the OEM grille.
You will need, AT MINIMUM the following tools:
  • Ratchet (I used an impact driver)
  • 10mm socket
  • 8mm socket
  • Plastic Pry kit
First you will need to removed the clips circled in the picture below, then remove the plastic cowl.
20191212_083155.jpg
Step 2: Remove the circles bolts and 2 plastic clips. Then remove the upper brow.
20191212_083348.jpg
Step 3: At minimum you will need to remove the screws circled below so that you can pry the flare off enough to get to the bolt that holds the plastic pieces under the headlights on. If you want you can remove the entire flare.
20191212_084406.jpg
In the below 2 pictures, these will be the clips that will give you the hardest time when removing the flare.
20191212_084341.jpg
20191212_084349.jpg
Step 4: (in the below picture i have the piece removed for easy reference.) You will need to remove the bolt from inside the fender well first. (this bolt is a PITA to get to!) Once the bolt is removed you will have to pull HARD where shown below to get the piece to come out. After that end comes out, work your way to the end by the grille. You will have to use a little more finesse to get this end out without it breaking, SO BE CAREFUL!
20191212_084507.jpg
See below images for reference.
20191212_084512.jpg
20191212_084523.jpg
Step 5: Once the plastic pieces are removed below the head lights, the 3 screws under each headlight will have to be removed and the grille will finally come out!
20191212_090038.jpg
Step 6: The screws (circled in red) will have to be removed. After screws are removed, work your way around the grille prying the clips (squared in blue). This will separate that grille from the frame.
20191212_085114.jpg
The clip locations can be seen in the separated picture below.
 

Livinfast85

Well-Known Member
Joined
Oct 14, 2018
Messages
238
Reaction score
298
Location
Pearland Texas
20191212_085625.jpg
MAKE SURE YOU RUN THE WIRING HARNESS BEFORE YOU PUT THE FRAME ONTO THE NEW GRILLE!!! Ask me how i figured this one out!
I ran mine like illustrated in the lovely picture drawn below between the frame and new grille.
5515151.jpg
When reinstalled my harness came out of the bottom corner of the grille behind the headlight.
20191212_091636.jpg
Step 7: reinstall the grille in reverse order until you are reassembled.

Screenshot_2019-12-12 alex stovall ( hellhound5 7) • Instagram photos and videos.jpg
After everything was reinstalled I ran the power wire to the fused side of the number 12 fuse(trailer running lights). I plan on ordering a micro fuse add-a-circuit, so dont crucify me for what i did here, IT IS TEMPORARY! EDIT: SEE LINK BELOW PICTURES FOR MY SOLUTION TO THIS!
20191212_171529.jpg
20191212_171537.jpg
Added my ground to one of the OEM grounding locations.
20191212_171917.jpg
To finish it up i added some wire loom to cover the red wire.
20191212_172449.jpg

VVVV THIS LINK BELOW IS TO A SEPERATE WRITE UP I DID ON INSTALLING "KEYED POWER" AND MORE LIGHTS VVVV

 
Last edited:

Dr. Jim

Ram Guru
Joined
Aug 16, 2018
Messages
757
Reaction score
553
Livinfast85, thank you for a very well illustrated explanation. Job well done! (y)
 

_StangPGH

Well-Known Member
Joined
Jun 21, 2019
Messages
214
Reaction score
229
Pic of end result with lights on??

Sent from my SM-G950U using Tapatalk
 

Livinfast85

Well-Known Member
Joined
Oct 14, 2018
Messages
238
Reaction score
298
Location
Pearland Texas
It's so weird.... This pic really just made me want to copy you. LOL

I really didn't know how raptor style lights were gonna look on our trucks, but damn they look good.

How are the barricade bumpers working out for you?

The bumpers are working VERY well! I hit a deer at 70mph and it barely tweaked the right side. I was able to pull it back with a strap and a tree! :sneaky:(y)
 

Neurobit

RAM Sorcerer
Joined
Jul 9, 2018
Messages
5,212
Reaction score
4,299
Location
Texas
View attachment 41722
MAKE SURE YOU RUN THE WIRING HARNESS BEFORE YOU PUT THE FRAME ONTO THE NEW GRILLE!!! Ask me how i figured this one out!
I ran mine like illustrated in the lovely picture drawn below between the frame and new grille.
View attachment 41723
When reinstalled my harness came out of the bottom corner of the grille behind the headlight.
View attachment 41724
Step 7: reinstall the grille in reverse order until you are reassembled.

View attachment 41726
After everything was reinstalled I ran the power wire to the fused side of the number 12 fuse(trailer running lights). I plan on ordering a micro fuse add-a-circuit, so dont crucify me for what i did here, IT IS TEMPORARY!
View attachment 41725
View attachment 41727
Added my ground to one of the OEM grounding locations.
View attachment 41728
To finish it up i added some wire loom to cover the red wire.
View attachment 41729
Outstanding write-up. Thanks for sharing the knowledge!
 

Jingtao

Member
Joined
Oct 24, 2018
Messages
13
Reaction score
7
The bumpers are working VERY well! I hit a deer at 70mph and it barely tweaked the right side. I was able to pull it back with a strap and a tree! :sneaky:(y)

Is your bumper this one ?


from these pics, seems no holes, don't know where to install sensors ? have to drill ?
 

Livinfast85

Well-Known Member
Joined
Oct 14, 2018
Messages
238
Reaction score
298
Location
Pearland Texas
Is your bumper this one ?


from these pics, seems no holes, don't know where to install sensors ? have to drill ?
Yes sir! I drilled the holes and used the factory grommets to install them in the new bumper.
 

Rebel43

New Member
Joined
Aug 14, 2019
Messages
3
Reaction score
0
I have a 2019 Rebel and have this same grill but I can’t find an “ADD A CIRCUIT FOR THE M CASE 20 AMP FUSE. Can you share where you found one? Looks like I will have to do what you did in the picture.
 

Livinfast85

Well-Known Member
Joined
Oct 14, 2018
Messages
238
Reaction score
298
Location
Pearland Texas
I have a 2019 Rebel and have this same grill but I can’t find an “ADD A CIRCUIT FOR THE M CASE 20 AMP FUSE. Can you share where you found one? Looks like I will have to do what you did in the picture.
Here is a write up I did which shows my solution to getting "Keyed" power.

 
Joined
Mar 4, 2021
Messages
14
Reaction score
19
View attachment 41722
MAKE SURE YOU RUN THE WIRING HARNESS BEFORE YOU PUT THE FRAME ONTO THE NEW GRILLE!!! Ask me how i figured this one out!
I ran mine like illustrated in the lovely picture drawn below between the frame and new grille.
View attachment 41723
When reinstalled my harness came out of the bottom corner of the grille behind the headlight.
View attachment 41724
Step 7: reinstall the grille in reverse order until you are reassembled.

View attachment 41726
After everything was reinstalled I ran the power wire to the fused side of the number 12 fuse(trailer running lights). I plan on ordering a micro fuse add-a-circuit, so dont crucify me for what i did here, IT IS TEMPORARY! EDIT: SEE LINK BELOW PICTURES FOR MY SOLUTION TO THIS!
View attachment 41725
View attachment 41727
Added my ground to one of the OEM grounding locations.
View attachment 41728
To finish it up i added some wire loom to cover the red wire.
View attachment 41729

VVVV THIS LINK BELOW IS TO A SEPERATE WRITE UP I DID ON INSTALLING "KEYED POWER" AND MORE LIGHTS VVVV

Where did you buy the grill
 

Patamaran

Active Member
Joined
Mar 21, 2021
Messages
51
Reaction score
44
Location
canada
Curious about doing this, how does the ram emblem hook into the new grille?
 

Users who are viewing this thread

Top