Livinfast85
Well-Known Member
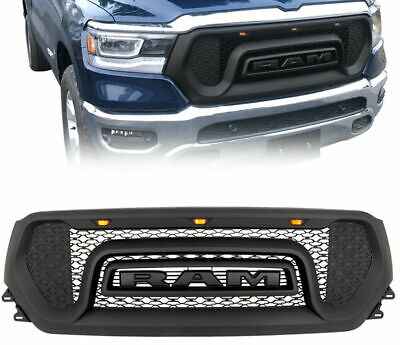
The following will be a write up on how to remove the grille and install a new style grille. The steps can also be used to remove and reinstall the OEM grille.
You will need, AT MINIMUM the following tools:

Step 2: Remove the circles bolts and 2 plastic clips. Then remove the upper brow.

Step 3: At minimum you will need to remove the screws circled below so that you can pry the flare off enough to get to the bolt that holds the plastic pieces under the headlights on. If you want you can remove the entire flare.

In the below 2 pictures, these will be the clips that will give you the hardest time when removing the flare.


Step 4: (in the below picture i have the piece removed for easy reference.) You will need to remove the bolt from inside the fender well first. (this bolt is a PITA to get to!) Once the bolt is removed you will have to pull HARD where shown below to get the piece to come out. After that end comes out, work your way to the end by the grille. You will have to use a little more finesse to get this end out without it breaking, SO BE CAREFUL!

See below images for reference.


Step 5: Once the plastic pieces are removed below the head lights, the 3 screws under each headlight will have to be removed and the grille will finally come out!

Step 6: The screws (circled in red) will have to be removed. After screws are removed, work your way around the grille prying the clips (squared in blue). This will separate that grille from the frame.

The clip locations can be seen in the separated picture below.
You will need, AT MINIMUM the following tools:
- Ratchet (I used an impact driver)
- 10mm socket
- 8mm socket
- Plastic Pry kit

Step 2: Remove the circles bolts and 2 plastic clips. Then remove the upper brow.

Step 3: At minimum you will need to remove the screws circled below so that you can pry the flare off enough to get to the bolt that holds the plastic pieces under the headlights on. If you want you can remove the entire flare.

In the below 2 pictures, these will be the clips that will give you the hardest time when removing the flare.


Step 4: (in the below picture i have the piece removed for easy reference.) You will need to remove the bolt from inside the fender well first. (this bolt is a PITA to get to!) Once the bolt is removed you will have to pull HARD where shown below to get the piece to come out. After that end comes out, work your way to the end by the grille. You will have to use a little more finesse to get this end out without it breaking, SO BE CAREFUL!

See below images for reference.


Step 5: Once the plastic pieces are removed below the head lights, the 3 screws under each headlight will have to be removed and the grille will finally come out!

Step 6: The screws (circled in red) will have to be removed. After screws are removed, work your way around the grille prying the clips (squared in blue). This will separate that grille from the frame.
The clip locations can be seen in the separated picture below.


