Sigfla
Active Member
- Joined
- Dec 29, 2023
- Messages
- 92
- Reaction score
- 59
- Points
- 18
- Age
- 51
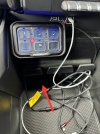
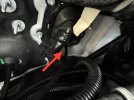
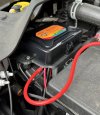
Installed my auxbeam switch today. I routed the remote wire through the firewall via the mopar instructions for the cargo bed led kit. This is different than others have done via YouTube and much easier. There is a small rubber nipple in the firewall you simply need to cut the tip open slightly and pull the wire through there connector and all. I routed my wire behind the console and drilled a small hole just large enough for the connector in the top of the back wall of the storage cubby. I drilled on the drivers side of the wall but I was lucky bc there is a small brace near there. It wasn’t an issue for me but anyone else doing the same I would suggest you feel around and choose the best location for you. I then used a mount off Etsy (Flipit3D) to hold the remote and the switch box. I still would like to clean up my wiring a bit but this is a totally hidden install that can be removed at any time. I can take the remote out and simply hide the wire in my console or leave it plugged in. Removing the plastic covers off the console screws was an annoyance until I realized a tiny Allen key would fit into a small round hole on one side and that allows you to pop them off very easily without any damage. The 2 trim pieces are a bit tougher but starting at the top center corner and working downward to the floor helped get them off. Thanks to all the YouTubers who posted vids of their radio/auxbeam/accessory installs that I was able to use as a reference. If you are doing anything through the firewall use the provided nipple, lol. It makes things much easier. Next up will be my M&R light bars. I forgot I also bought the extended remote wire. After install I doubt I needed it. The extra wire I had I just coiled up in the engine bay by the battery. The owner of Flipit3D who is awesome and helpful btw just told me he has improved the switch box mount and is sending me a new one. It wedges between the body mount bolt and he reinforced it at that location. He also suggested that the mount gets stronger after a few heat cycles. He told me to mount it not too tight at first then after a few hot days to tighten it up more.


