5thGenRams Forums

Register a free account today to become a member! Once signed in, you'll be able to participate on this site by adding your own topics and posts, as well as connect with other members through your own private inbox!

In-depth View of Electrical System for Overlanding and Offroading

boogielander

Spends too much time on here
Joined
Jun 29, 2022
Messages
2,364
Reaction score
4,085
Points
113
This technical post was first posted to Jolly Rogue Co's Blog here on 3/30/2024. You can find all of my instructional and technical postings here

DJI_0150.jpg

Introduction
Electrical systems are critical to a successful modern overlanding trip. Everything that we rely on for a good overlanding experience relies on various reliable electrical systems that are added aftermarket. In this article, I will be going over an in-depth view of the most current version of electrical systems I have installed and explain the logic behind them.

Note: This will overlap sections of Part 2 and 3 of my build journals, but more thoroughly explained.
IMG_4353.jpg

The Basics: Defining What is What
To make things easier to understand, I believe aftermarket electrical systems can be categorized into two major categories: vehicular and recreational.
  • Vehicular:
    • I define vehicular electrical systems as safety related items that determine whether you will get home or not. Examples of vehicular electrical systems such as lights, switches, and air compressors.
  • Recreational:
    • I define recreational electrical systems as leisure items that determine whether you will have a good experience or not. Examples include fridge, camper lights, satellite internet systems, and air conditioning systems.
Both systems are equally important to me, since I take part in many overlanding trips and expeditions (both short and long term, solo and with groups), people do rely on me for satellite internet and food storage. Therefore, there is no one system that I prioritize to spend my hard-earned income on; both systems get big budget items. HOWEVER, I understand that most people are not like me who is lucky enough to be single with no family to feed or chose not to waste time on chasing girls to be able to afford expensive parts, so if you are operating on a budget, PRIORITIZE VEHICULAR SYSTEM.

What is prioritizing vehicular system?
Prioritizing vehicular system means spending money on quality, proven, US branded or made in USA parts instead of saving money on cheap, unproven foreign made parts. These are the components that determine whether you can see (at night) or be seen (both daytime and nighttime). You don’t want your components to fail when you need them to work and end up getting in a collision because other people are not aware of your presence due to visibility issues.

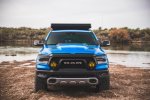
As a professional outfitter and a relatively experienced overlander/ offroader, below are the only brands that I run and recommend:
  • Switch systems: Switch-Pro
    • Found on many podium winning race trucks and professional vehicles. If it’s good enough to handle Baja 1000, it is more than good enough for me since I’ll never abuse it to that level.
  • Lights: Baja Designs (BD)
    • Also found on many podium winning race trucks, professional vehicles, and even heavy industrial equipment. BD also created many tools to help consumers understand what light they need for what application scientifically such as Effective Light Score and Lighting Zones.
  • Compressor: ARB (single or twin)
    • Well-known Australian brand that is expert in overlanding equipment.
If BD is out of budget, consider using Diode Dynamics or Rigid Industries. I am not a fan of Diode Dynamic’s amber color, but they are decent lights. Never use lights that look like BD but sold cheaply on Amazon (I call them Jaja Designs or Beijing Designs). Use good judgement when purchasing lights, Diode Dynamic should be the lowest price benchmark. Anything sold cheaper than that needs to be avoided.

For switch systems, many people elect to use Auxbeam or some other cheap systems. Of all the systems available on the market, the only other system I recommend is sPod. sPod is also found on podium winning trucks and professional vehicles. Again, use common sense when choosing systems: why is Switch-Pro 9100 a $650 system but an Auxbeam is only $170? If a system can be sold that cheaply while retaining profit margin from parts, labor, transportation cost from China, and administration costs, I can only assume the parts used are of least amount of quality that will not stand up to years of usage.
IMG_5050.jpg

Vehicular System
There are three critical areas on my vehicular system: Switch, Lights, and Air Compressor.

Switch System
The key component here is Switch-Pro 9100. This is a reliable and high-performance item that I’ve been running since 2017. For more information on this panel, please visit Part 2 of my build journal here.
Switch system is critical. It is what enables you to turn lights on and off. As previously mentioned, functioning lights are critical for you to see and be seen to avoid possible collisions and therefore, makes it a safety item.

Lights
Lights are what let you see and be seen. To this end, you need something that is proven to be reliable and performs. Lighting output can be categorized into a few areas: close range, mid range, long range, signal, and peripheral.
  • Close range:
    • These lights are for areas immediately to the front of your truck. Think of areas that your headlights light up or closer. Fog lights are part of the close range.
DJI_0140.jpg
Stock Low Beam and Fog Light
DJI_0141.jpg
Baja Designs LP6, Driving Combo, Low Beam (close range)
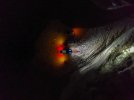
  • Mid range:
    • These are for areas further than your headlights and should give you ample distance to slow down if obstacle approaches. For speed under 40MPH mid range is plenty enough
DJI_0142.jpg
Baja Designs, LP6, Driving Combo, High Beam (with Spot Light), Mid Range
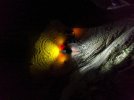
  • Long range:
    • These are areas way ahead. This is important if you travel at high speed on the trail, so you have more than enough distance to slow down. For speed between 40MPH to 100MPH+ you want to have long range.
DJI_0143.jpg
Baja Designs, Squadron XL Racers Edition, Spot Light, Long Range (notice the hot spot on the right)
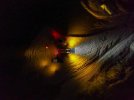
  • Signal:
    • These lights are used to signal others of your presence and should be used both during day and night time. Chase lights, or rear mounted auxiliary lights, fall into this category. When choosing signal lights, you want to use lights with amber lenses so the light output can penetrate through dust or other things that affect visibility. Using Switch-Pro 9100, I can either leave them constant on or set them to burst strobe to grab attention from vehicles behind me.
DJI_0145.jpg
Baja Designs, S2, Wide Corner, Amber Lenses, Chase Lights (Signal)
  • Peripherial
    • These are used for side and secondary locations. Many people use ditch lights to help them see areas close to their fenders when navigating tighter trails, mount them on the side for scenic lights, or even as rock lights for when rock crawling. These lights are secondary and completely optional in my opinion and experience.
DJI_0132.jpg
Diode Dynamic SSC1 Pro, using my friend’s truck as reference. These supplement the areas that forward lights do not focus on.

Air Compressor

Airing down is a must when hitting trails. By reducing tire air pressure, your tires will have more grip and your truck will give you a more comfortable ride quality. In addition, airing down also protects your tires from sharp rocks and edges found on the trails as the tires now have a bigger surface area to work on those objects. When you are done with the trails and ready to hit pavement to go home, you will need to pump air pressure back into the tires. This is when a reliable air compressor comes in handy. Driving on pavement with underinflated tires is dangerous and can lead to premature wear, damages on the tires and wheels, and even cause fatal accidents.

In addition, having a reliable air compressor is beneficial if you know how to plug punctured tires. Plugging punctured tires allows you to keep the spare as spare, and essentially gives your tire a second chance instead of putting it out of commission for the trip. This is very important when participating in long-term expeditions or going to places that do not have a steady supply of tires of your choice. Remember, two is one and one is none.

Because of these benefits, I categorize air compressors as part of the safety items that should be prioritized.
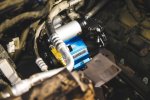
IMG_2903.jpg
ARB Single Compressor, Mounted in Engine Bay using NH Overland Compressor Mount.

continue below
 
Last edited:
Recreational System
There are two separate, stand alone recreational systems in my build: one in the cab and the other in the camper. Both systems utilize their individual circuits and breaker, so in case of shortage or any other circumstances that I need to turn off one circuit, the other is not affected and can be used as a backup.

Cab Side Recreational System
In-cab system was the first recreational system that I installed. The purpose of this system is to power the fridge and provide charging solutions for various USB-powered accessories such as trail map tablet, headlamps, and drones. In addition, this system also provides power for my mobile HAM radio for communication. In the later stage of the build, in-cab system also powers my Starlink for off-grid internet connectivity.
  • Blue Sea Fuse Block with Ground
Everything for in-cab system relies on Blue Sea Fuse Block with Ground. This serves as a distributional block that all other components are built up on. From here, power gets distributed to Ham Radio, fridge (for hardwired connection while driving), and Ecoflow solar generators.​
qTABaufSS1yc_AkR_J7VoA.jpg
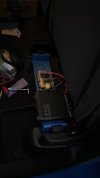
Blue Sea Fuse Block with Ground Before Victron was installed.
  • EcoFlow Delta 2 + Add-On Battery
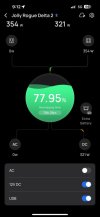
EcoFlow Delta 2 + Add-On Battery is the brain of my in-cab system. Having 3000WH of combined capacity, this solar generator can power the fridge for 3 days without recharging. When I need to recharge, I have multiple options to choose from: via alternator when the vehicle is running, via AC input from wall outlet, or via solar panels. Of all three options, solar panels are only used when I establish “base camp” mode where I park at a certain location for more than a day.​
I chose to utilize EcoFlow solar generator simply for its app integration capability and ecosystem. I also have an EcoFlow Wave 1, a compressor equipped camping air conditioning unit that is also controlled via the EcoFlow app. In addition, with the special harness provided by EcoFlow, I can recharge my Wave 1 quickly and efficiently while driving. The ability to control both the solar generator and AC unit within one app and being able to fast charge using Ecoflow proprietary harness makes this system very easy and convenient to use.​
In addition, Delta 2 is also equipped with multiple common outlets that makes it very versatile. USB outlets located in the front of the unit allow me to charge multiple USB-powered accessories without needing another power bank. This is very useful for my trail navigation tablet since the truck’s onboard USB and USB-C outlets are not producing enough power to charge and run the tablet at the same time. In addition, multiple pure sine wave AC (alternate current) outlets can be found in the rear of the unit and eliminates the need for separate inverters. This enables me to run a suite of equipment that utilizes AC plugs, such as Starlink and drone charger.​
This system is not perfect though. At 3000Wh capacity, it is barely enough to power the fridge and Starlink for a night, especially in colder temperatures. This is because when temperature drops below its predetermined threshold, Starlink’s satellite dish automatically starts to heat itself up to prevent freezing due to possible frost or snow buildup. When this happens, EcoFlow’s battery drains quickly, and I had to put it in “sleep mode” when I go to bed to conserve energy. Unfortunately, the only way for me to “fix” this issue would be to upgrade to a Delta 2 Max with add-on battery, and that would only get me an additional 1000Wh of capacity.​
ktlU8ru6QhmpAvAjNVRVvA.jpg
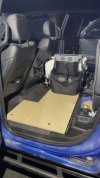
EcoFlow Delta 2 + Add-On Battery, mounted on my prototype floor panel
  • Victron 12/24 DC-DC Charger
EcoFlow includes a 12v cigarette plug for car charging, but it is extremely slow. It would take more than 10 hours to charge all 3000Wh. The truck is equipped with a 400w AC outlet, but EcoFlow pulls way too much amperage for that outlet to handle. Therefore, I had to create my own “fast-charging solution.”​
I had a Victron 12/12 DC-DC charger before I installed the add-on battery to expand capacity, and it worked great. With 12v input, at 15A, I can push about 180w of power into EcoFlow via XT-60i which charges 1000Wh in about 3 hours. However, 180w is not enough when I need to charge 3000Wh of capacity. So, I had to find a way to increase the charge rate. My first attempt was to increase output, but once I overclocked it, the input draws too much amperage and pops the fuse.​
My second attempt was to change 12v output to 24v output, which increases the voltage capability of the unit while remaining at 15A. This gives me about 360w constant output, while peaks at 400w. This gives me more than double of charging power, and therefore allows me to fully charge my EcoFlow in as little as 3 hours.​
epOBydFgS_GlCCiRhIwbzA.jpg
EcoFlow is being charged at normal rate while engine’s running. The time remaining is not accurate since it adds the time it takes to charge the main battery while the main battery is charging the add-on.

IMG_4385.jpg
Camper Electrical System

Camper System

The primary purpose of my camper electrical system is to provide ample power to run my camper lights. When I first got my GFC, the camper lights were powered by the starting battery. But I had my doubts. I didn’t know if the starting battery could power the camper lights for hours on end while remain enough juice to start the truck the next day, so I decided to make a camper system.

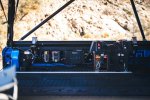
Again, starting with a Blue Sea Circuit Breaker near the starting battery, I ran a 6 gauge power and ground harness along with a trigger to the bed. There, I utilize the following parts to complete the system:
  • All-Top Battery Box
    This battery box is a true all-in-one solution. Originally, I just needed a battery box to keep the LiFEPO4 out of elements and secure to the bed. However, the battery box is equipped with TWO 50A fused Anderson connectors, USB plugs, 12v cigarette plug, and voltage readout in addition to spaces left for wiring. For nearly the same cost as other battery boxes, I figured I’d be better off with one that’s more feature packed.
  • LiTimes 100AH LiFEPO4 Battery
  • When I was in the market for a house LiFEPO4, this company showed up. I bought the most basic LiFEPO4 from this company simply because it had the lowest price I found. There’s not much to explain about this battery though. Simply buy whatever LiFEPO4 you can afford and call it a day. 100AH roughly translates to about 1000Wh of capacity.
  • Renogy 50A DC-DC Charger with MPPT
  • When I put the system together, I thought about reusing the Victron 12/12 charger I have. Afterall, it is just sitting in the garage doing nothing. However, with a Renogy 175W Flexible Solar Panel also sitting in the garage, I figured I may want to utilize that at some point in the future, so I need a charger capable of charging via alternator and solar. Luckily at the time, Black Friday was around the corner so I picked up this 50A DC-DC with MPPT for nearly half off. At 50A peak, that translates to 600w of power output, and technically could charge the 100AH LiFEPO4 in a bit over an hour. However, I’ve yet to drain the LiFEPo4 completely to test that.
  • In order to let the charger know when to stop charging, I ran a trigger wire to the backlights of my LP6 which are ignition triggered. That way, if I want to stop charging while driving, all I need to do is turn off the LP6 backlights and the charger will cut off power to the battery.
  • Blue Sea System Fuse Bar, Blue Sea Fuse Block with Ground, Nilight 5-Gang Switch
  • Honestly, I could probably get away with using one of those Auxbeam panels instead of building my own switch system. However, my goal is to stay away from Chinese products as much as possible and put another Switch-Pro 9100 here later down the line, so for now, this is fine. The way how it works is simple: Fuse Block with Ground serves as a distribution panel for accessories grounding and anything that I want to be constant on. Power is sent to the switches, then to the fuse block, then to the accessories. I chose to use fuse bar because I like to fuse everything.
  • Custom Mounting Plate
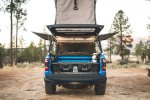
  • I needed a way to mount everything above, so I fabricated my own mounting plate and attached it to the bedrail since I don’t use my bedrail. This is a proprietary plate that I am prototyping and may be available later in the year.
  • Custom Anderson plug for other accessories
  • The biggest reason I added a house battery is to run my diesel heater. Conventional diesel heaters use 12v cigarette plugs, which draws a lot of power when warming up. By swapping the plug out to Anderson plug and direct wire to the battery (or in my case, to a switched and fuse source) I can have reliable start every time I run diesel heater. To be fair, I could leave this constant on, but since I have blank switches I decided to utilize it.
  • Accessories
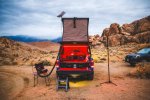
  • I have two separate circuits of camper lights in my GFC: one for downstairs and one for the tent area. Both have their individual switches and fuses, and both feature their individual controllers with one remote. The logic behind is simple: I want to have the ability to control each individual system without interference. For instance, after setting up camp, I want to have the tent area illuminated with red light to not attract insects, while have the downstairs area with warm white when I’m cooking or simply just working inside. In addition, I also want to be able to turn off downstair lights when I’m in the tent before going to bed. During normal time when the tent is closed, I can turn on lights in the camper without having the tent lights on with individual switches, and I can simply switch the tent light off with the switch if I forget to turn it off with the remote before closing tent.
  • I am also adding in an inverter for if I choose to power my laptop or Ecoflow Wave via the house battery.
IMG_4427.jpg

Conclusion

Vehicular electrical work is not as complicated as many may think. By separating electrical systems into vehicular side and recreational side, you simplify the problem and can tackle them separately. Based on my experience, when facing limited budget, vehicular side should always take precedent over recreational, since the build quality of vehicular system determines whether you will safely return home or not. Recreational systems are important as well, but with a limited budget, it can be delayed.

Like many things in life, always start with a plan. When I first started with this truck, I already had a plan in mind: I want to go to Alaska with it and my systems must be able to handle the power consumption of my overlanding equipment when I setup camp, while the build quality of the systems must be able to handle the harsh environment that Alaska can throw at them. As a result, I opt for the parts that are trusted and fill my needs, then create systems with double or even triple layers of safety. In addition, the systems I created are also easy to upgrade: each individual component can be isolated and replaced without removal of the entire system.

Whatever you choose to do, choose quality products from proven brands. And most important of all, if there is one thing I want you to learn from this article, it is to stay away from Chinese branded products because they are not up to standard!
IMG_4680.jpg
 
Just read the entire thread, really impressive set up. Just as an FYI, the link for the switch system doesn’t work.
 
Awesome write-up! I am planning on doing something similar with a camper shell. Did you buy the new or old version of the Renogy dc-2-dc mmpt? I heard the old version won't let you charge the battery simultaneously I am not sure if the new version does or not. I have the Ram CAI so I am trying to find a battery tray for where the old CAI used to be. I have a Hart portable air compressor that works off a 20v rechargeable battery so I was thinking about using that. I also have other Hart tools like the portable rinser, fan, dry/wet vacuum so I have a few batteries for the same ecosystem. What diesel heater did you get and are you happy with it?
 
Just read the entire thread, really impressive set up. Just as an FYI, the link for the switch system doesn’t work.
which link? thanks!
 
Awesome write-up! I am planning on doing something similar with a camper shell. Did you buy the new or old version of the Renogy dc-2-dc mmpt? I heard the old version won't let you charge the battery simultaneously I am not sure if the new version does or not. I have the Ram CAI so I am trying to find a battery tray for where the old CAI used to be. I have a Hart portable air compressor that works off a 20v rechargeable battery so I was thinking about using that. I also have other Hart tools like the portable rinser, fan, dry/wet vacuum so I have a few batteries for the same ecosystem. What diesel heater did you get and are you happy with it?
i just got the DC-DC w/ MPPT later last year around November, so I'm guessing it's the newer version?
I haven't hook up my solar yet (simply because I really don't do basecamp mode and usually by the time I start using the camper battery it's after dark anyways)

i also thought about doing the CAI and use that space for secondary battery, but ultimately decided against it since i'm still waiting for someone to make snorkel kits for our trucks (at this point, hopefully AEV or Ironman 4x4 would make one... if ARB makes one then that'd be the best) and snorkel would require stock airbox. Also it makes it easier for me to add the second DC-DC charger too. You can use the 20v rechargeable one for airing up, but there's also CFM, run time, etc to consider. Not sure of your experience, but typically as the compressor gets hot due to working hard, the less air it pushes. That's why we all use 4 tire inflation/ deflation kit in our group. Filling all 4 tires together is actually less stress on the compressor. when i first learned that it was a mind blown moment lol just need to take that into consideration especially if you go high teens and run 35s.

i actually don't know what heater it is... i took my friend's since he's not using it lol. i think it's the hcalory and he bought the DIY kit. Performance has been good so far, aside from the small tank that holds like a gallon or so. At max output it'd go dry in like 12 hours or so, but I actually never run it at max. When it's around low 40s high 30s, running it for 12 hours I got about half a tank left. Leaking from the tank where the fuel line connects is pretty normal with these chinese ones, so I always empty the holding tank before putting it in the truck. Aside from those two... it's been decent. just remember to do the shutdown procedure because i've heard people got soot or clogging issue without shutting it down properly.
(as someone who hates chinese replicas, i'm ok with it because it's not life dependent. it's only for comfort. If it dies then i still have my 0 degree sleeping bag so it's not a big deal)
 
which link? thanks!
Switch System
The key component here is Switch-Pro 9100. This is a reliable and high-performance item that I’ve been running since 2017. For more information on this panel, please visit Part 2 of my build journal (insert link here).
 
Switch System
The key component here is Switch-Pro 9100. This is a reliable and high-performance item that I’ve been running since 2017. For more information on this panel, please visit Part 2 of my build journal (insert link here).
ahh! thanks for catching it!
 

Users who are viewing this thread

Back
Top