
Waterfowler41
Ram Guru
The following is a quick walk-through of how to install Core4x4 lower control arms. Even if you are just replacing like for like, this walk through will apply.
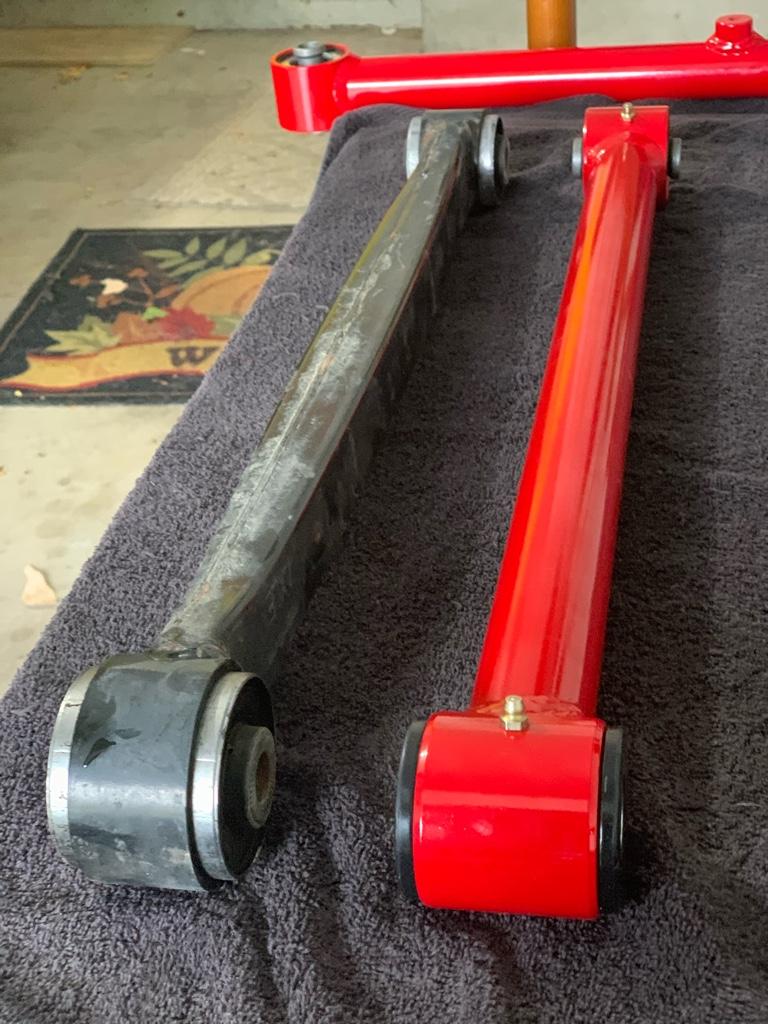
I installed some fixed length lower control arms on my 2020 Ram Rebel the other day. These will beef up the rear suspension and reduce wheel hop when I start to through more power at my truck. These function very similar to ladder or slapper bars. They are there to resist axle twist. Added bonus you can get these in some pretty awesome colors!
Link to parts: Core 4x4 Rear Lower Control Arms
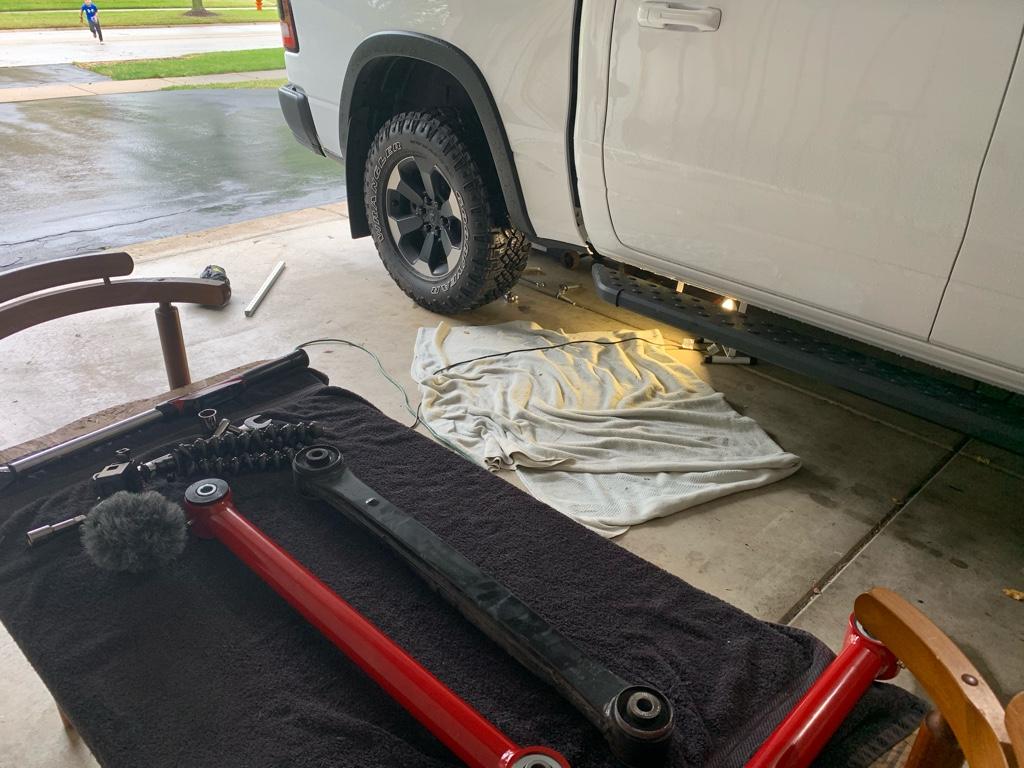
Tools:
a. 21 and 24MM sockets, wrenches, extensions
b. 8 mm socket, wrench
c. breaker bars
d. Car jack
e. safety glasses (You're working under your truck, don't forget PPE!)
Process:
1. Put parking brake on and chock your front wheels.
2. Using a car jack, gently lift the rear end slightly by placing the jack under the diff. Raise truck 1/2" to 1" inch. This will relieve some of the tension in the lower control arms.
3. Install zerk fittings if they did not come preinstalled using an 8 mm socket.
4. Start on the passenger side. Remove and replace the passenger side control arm before starting on the drives side.
5. Remove the front bolt and number with your 21/24mm tools. I needed a breaker bar and a huge hammer to free up the bolt. Its really on there so don't be afraid if it takes awhile. Leave the bolt in the front mount hand tight.
6. Loosen the rear bolt and nut. Again this was on there good so be prepared for a fight.
7. Once both bolts are removed, you can pull the old LCA out.
8. Verify the OEM LCA length is the same as the new Core LCA.
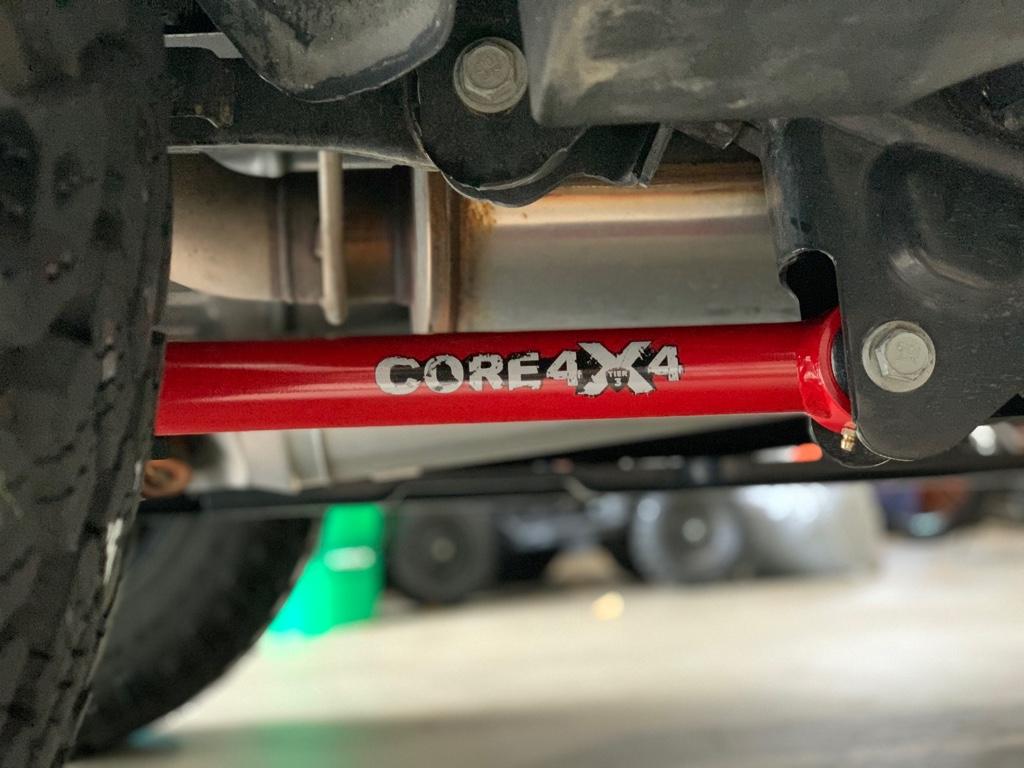
9. Reinstall the LCA by reversing steps 3 through 5.
10. I torqued everything down to 175-190-ish foot-lbs.
11. Repeat steps on the drivers side. You will need to have an adjustable wrench or even better, a 24 mm wrench to remove the nut from the front moutning bracket because the fuel tank was very close.
12. Most important step, install Core4x4 stickers. These add HP so don't forget them.
13. Using a grease gun, inject some chassis grease into the fittings. I prefer marine grade as its a little more resistant to salt from the road.
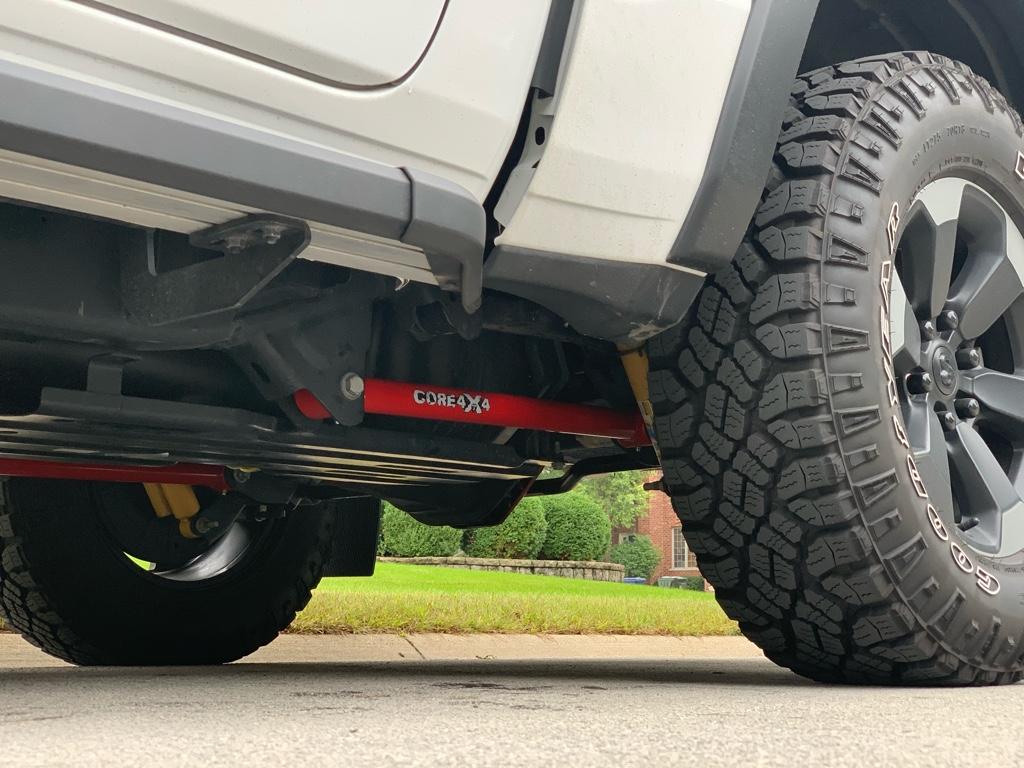
14. Enjoy your new LCAs!
For those looking for my video of this install, here you go!
I installed some fixed length lower control arms on my 2020 Ram Rebel the other day. These will beef up the rear suspension and reduce wheel hop when I start to through more power at my truck. These function very similar to ladder or slapper bars. They are there to resist axle twist. Added bonus you can get these in some pretty awesome colors!
Link to parts: Core 4x4 Rear Lower Control Arms
Tools:
a. 21 and 24MM sockets, wrenches, extensions
b. 8 mm socket, wrench
c. breaker bars
d. Car jack
e. safety glasses (You're working under your truck, don't forget PPE!)
Process:
1. Put parking brake on and chock your front wheels.
2. Using a car jack, gently lift the rear end slightly by placing the jack under the diff. Raise truck 1/2" to 1" inch. This will relieve some of the tension in the lower control arms.
3. Install zerk fittings if they did not come preinstalled using an 8 mm socket.
4. Start on the passenger side. Remove and replace the passenger side control arm before starting on the drives side.
5. Remove the front bolt and number with your 21/24mm tools. I needed a breaker bar and a huge hammer to free up the bolt. Its really on there so don't be afraid if it takes awhile. Leave the bolt in the front mount hand tight.
6. Loosen the rear bolt and nut. Again this was on there good so be prepared for a fight.
7. Once both bolts are removed, you can pull the old LCA out.
8. Verify the OEM LCA length is the same as the new Core LCA.
9. Reinstall the LCA by reversing steps 3 through 5.
10. I torqued everything down to 175-190-ish foot-lbs.
11. Repeat steps on the drivers side. You will need to have an adjustable wrench or even better, a 24 mm wrench to remove the nut from the front moutning bracket because the fuel tank was very close.
12. Most important step, install Core4x4 stickers. These add HP so don't forget them.
13. Using a grease gun, inject some chassis grease into the fittings. I prefer marine grade as its a little more resistant to salt from the road.
14. Enjoy your new LCAs!
For those looking for my video of this install, here you go!


