5thGenRams Forums

Register a free account today to become a member! Once signed in, you'll be able to participate on this site by adding your own topics and posts, as well as connect with other members through your own private inbox!

Custom Night Edition build (Chrome Delete)

LessDodgeMoreRam

Active Member
Joined
Jul 10, 2020
Messages
46
Reaction score
116
I had a couple projects over the weekend.

First, I jumped on board the Lasfit LED upgrades.

f8d9543c62e97626cc5cd7460a58601d.jpg


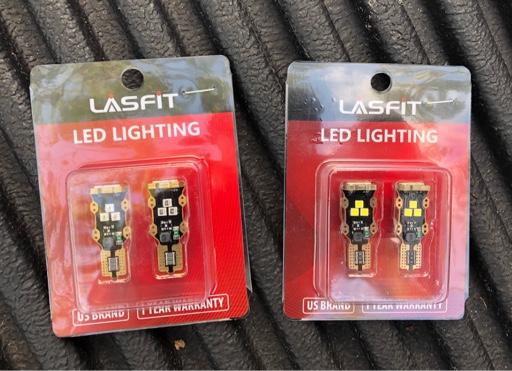
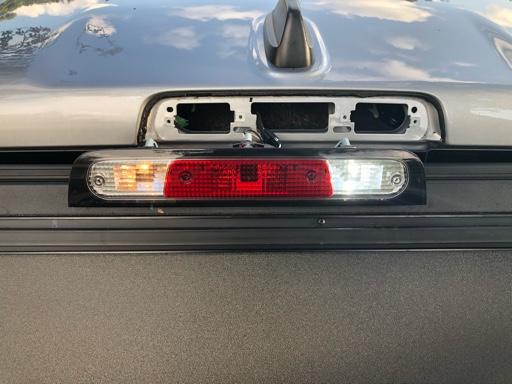
This is the set for the cargo bed light and the third brake light. For anyone wondering, the LED type is T15 and of course a red T15 for the third brake light. Extremely easy install with 4 screws, twist, plug, and play, less than 10 minutes. Here’s a contrast between stock and Lasfit.

e1b0d835cee9fc1fb3c106409a08e5bc.jpg


Already, it looks pretty great. I wanted to make sure I got a night shot to see how bright it gets. I waited until dark, popped outside, and pulled down my tailgait. After I regained consciousness from the flashbang, I took the pics, and headed back inside with a massive grin on my face.

cf709a4b8adcc68637fc805d63ded350.jpg


ed94320a31073f2646b9f8cac39ab3bf.jpg


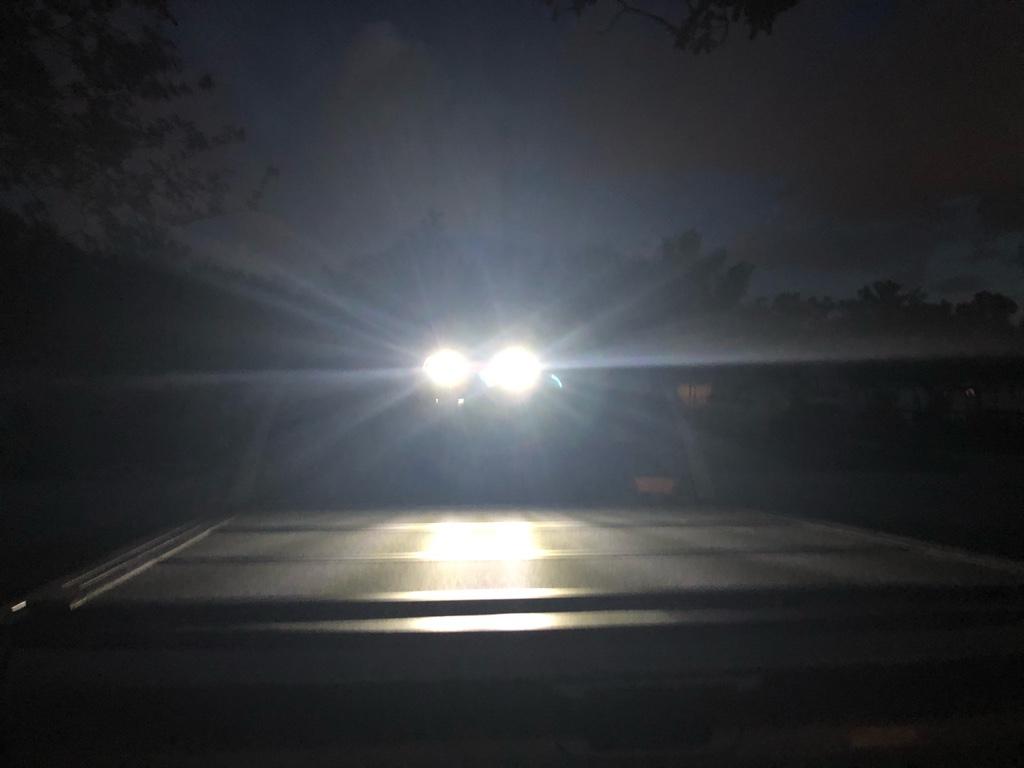
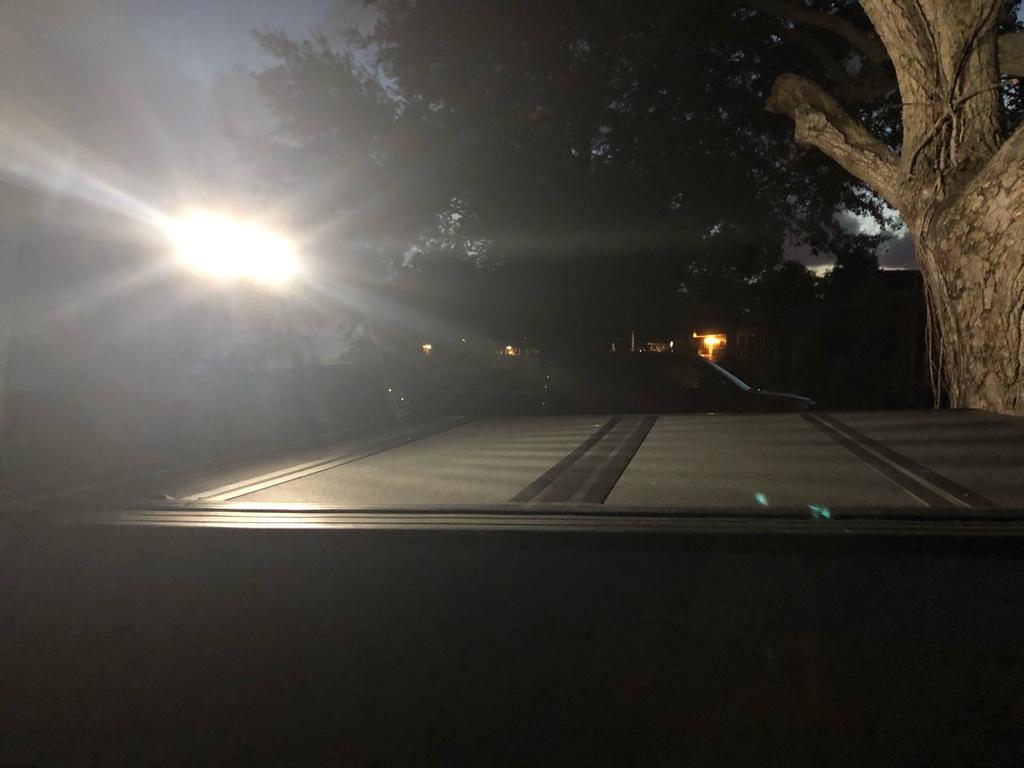
The picture doesn’t even do it justice. It may be a little obnoxious but I can’t help but love it anyway. - $28.50 total on amazon. Had it the next day.

I intended to get some colored LEDs for the footwell lighting, but it seems that the Laramie trims and higher have a different housing for the lights that would require a little more research and possibly soldering. I think bighorns still have the lamp housing for the plug and play if someone wants some new footwell lights. Those sizes or T10.


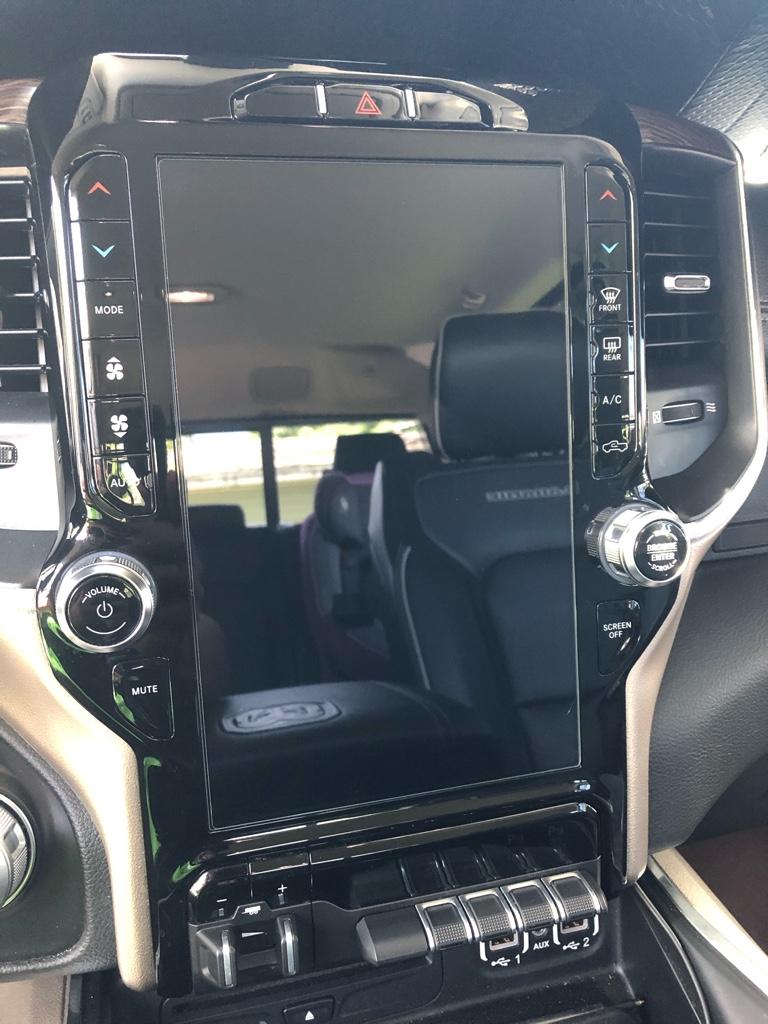
Second, I invested in a screen protector. It fits well. Anti glare and anti scratch. It said it was fingerprint resistant. It definitely helps with fingerprints but not completely resistant. I’m plenty happy with it. Easy to install and the bubbles smoothed out easily. Brand was Flyingchan - $21.99 on Amazon.

af4d89ff2624ad84915798d2627aeb30.jpg


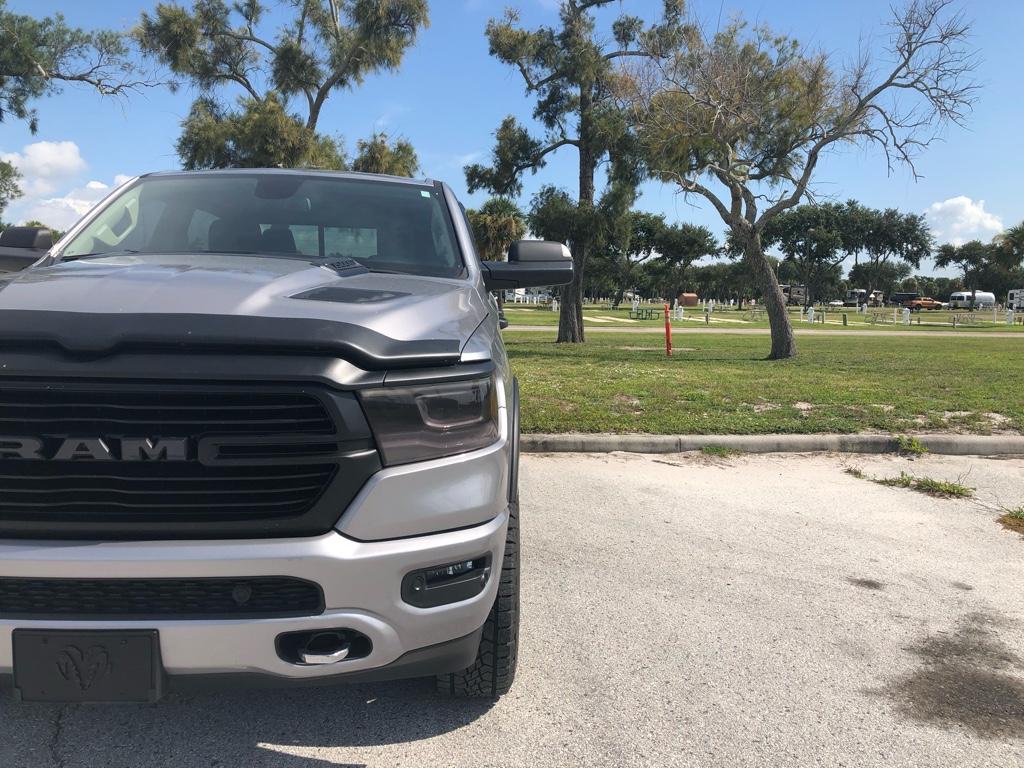
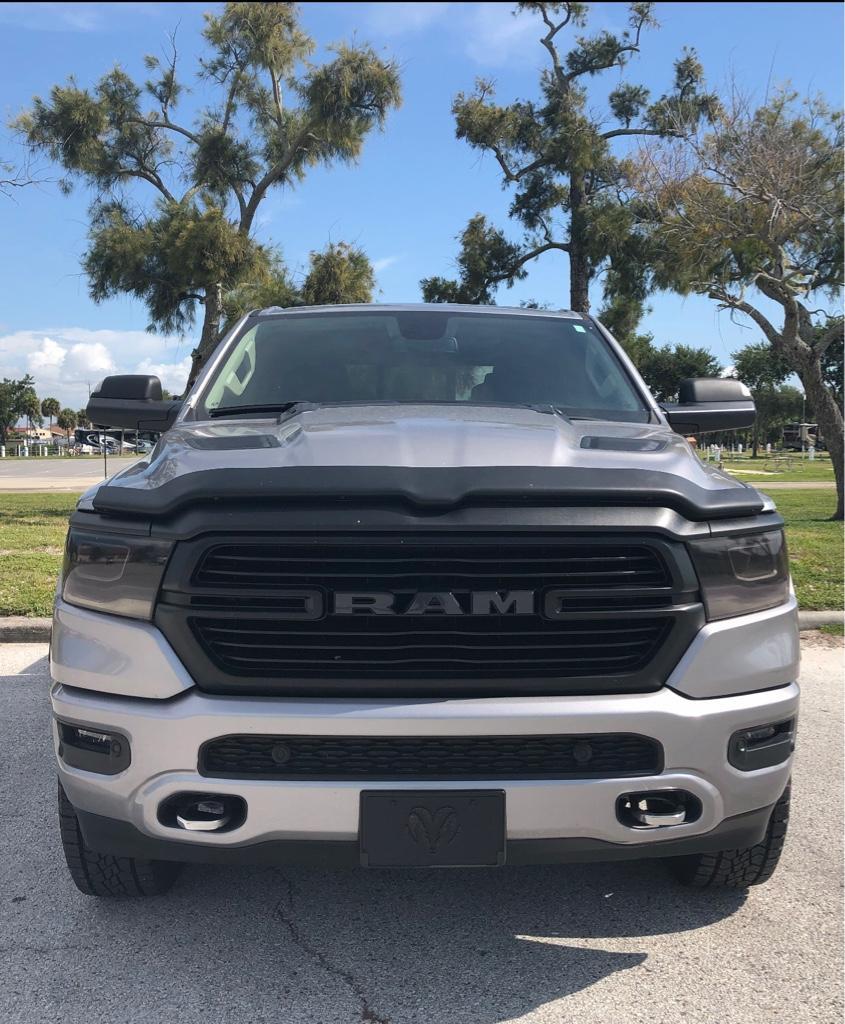
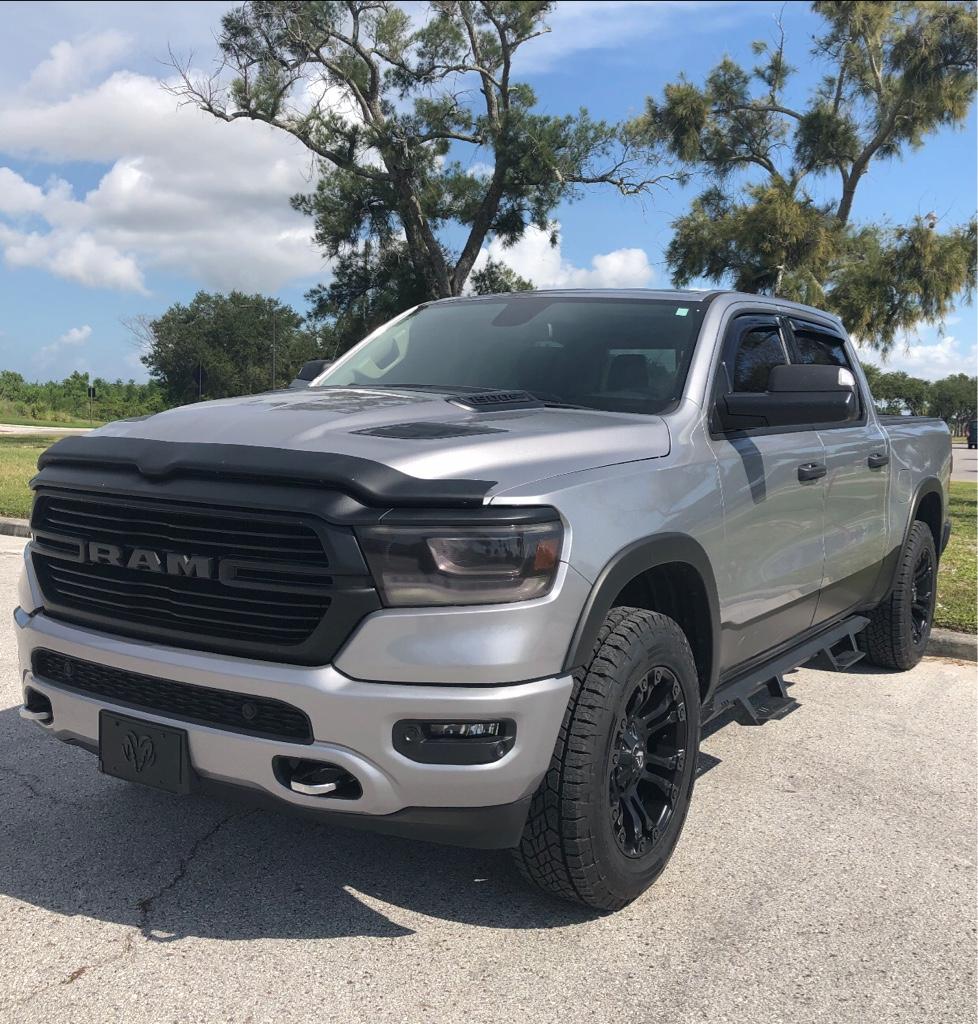
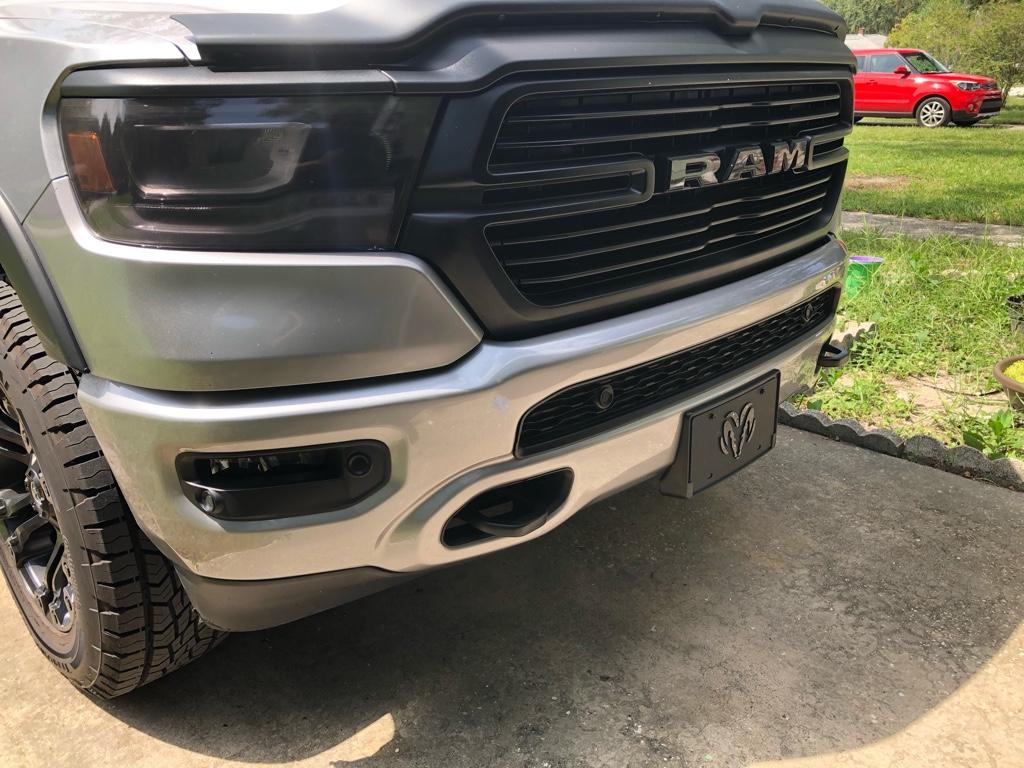
Lastly, I started working on getting rid of the chrome painted grille area. I bought a new cover that’s located on top of the grille, called the applique. Mine was chipping really badly and it was one of those things that most people wouldn’t notice at first glance but I know it’s there so it needs to be remedied.

dbcec7bfd990e426fbecc31178c3624c.jpg


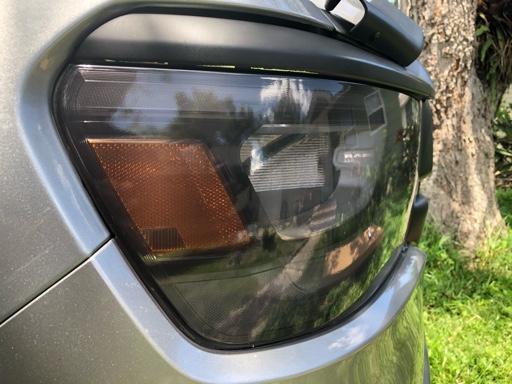
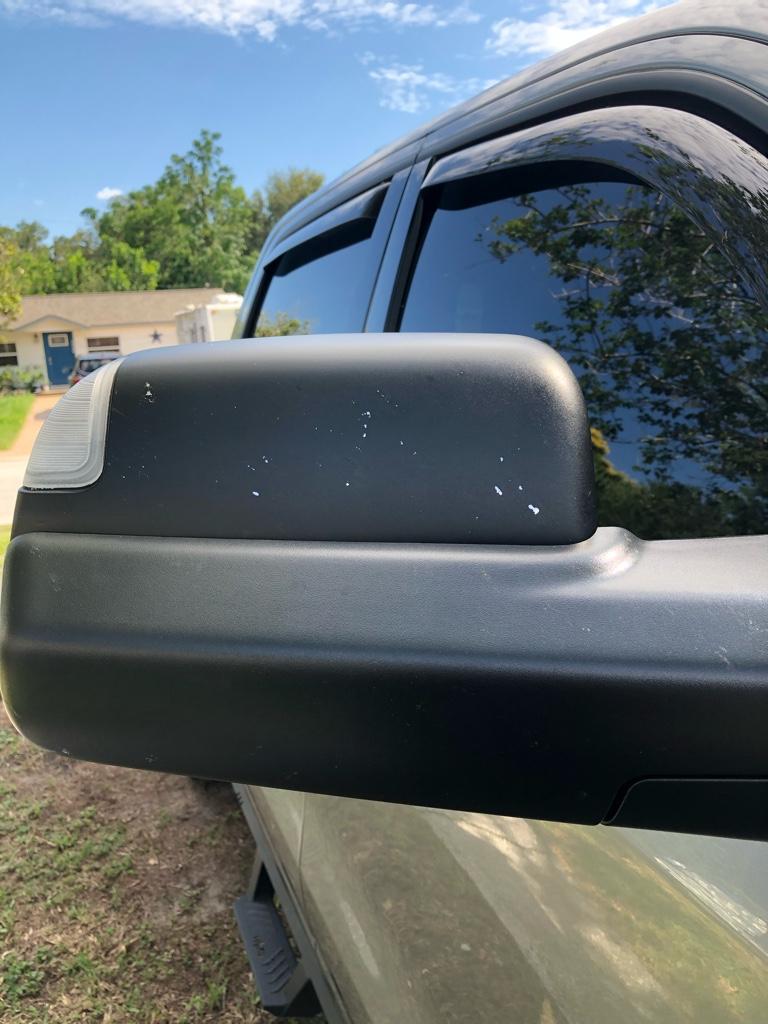
It’s chipping in the front as well and it just doesn’t clean up nicely. It probably doesn’t need to be said, but just in case, don’t bother painting chrome.

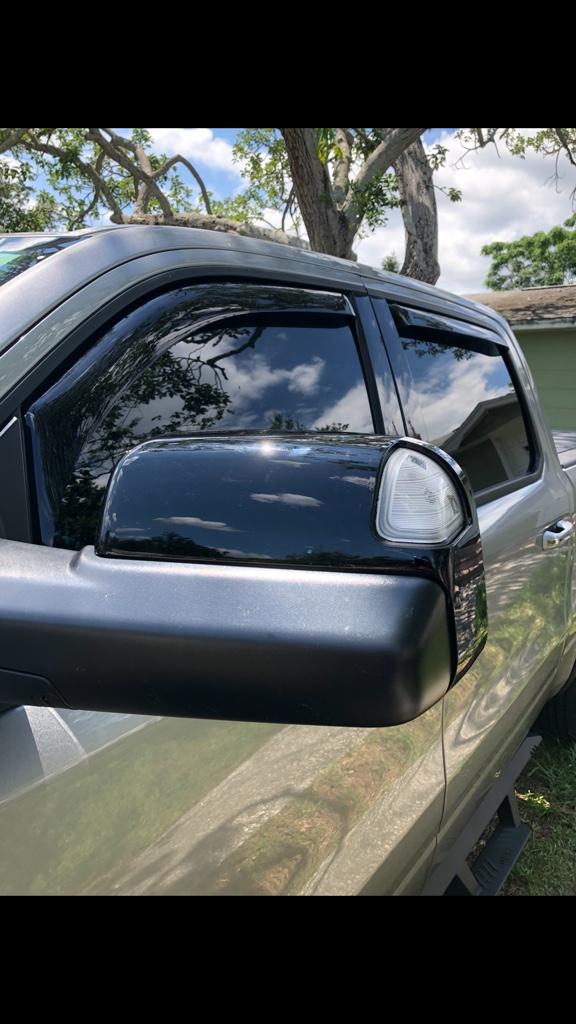
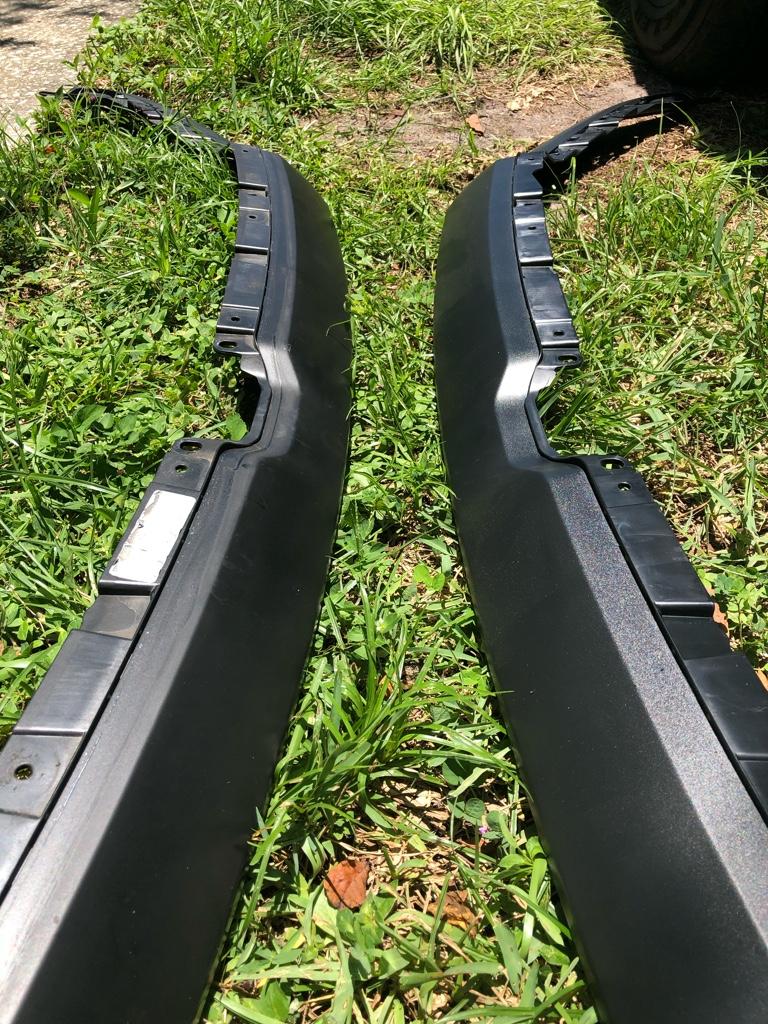
I bought the applique that is on the Rebel and it fits just fine. The part number is 68293107AH. It’s a textured plastic look, the same as the sport hood bezels. New one on the right side.

1b231d22d5f84f25ed8a475ed545c133.jpg


If you want a primed applique ready for painting, the part number is 6BT18TZZAH.

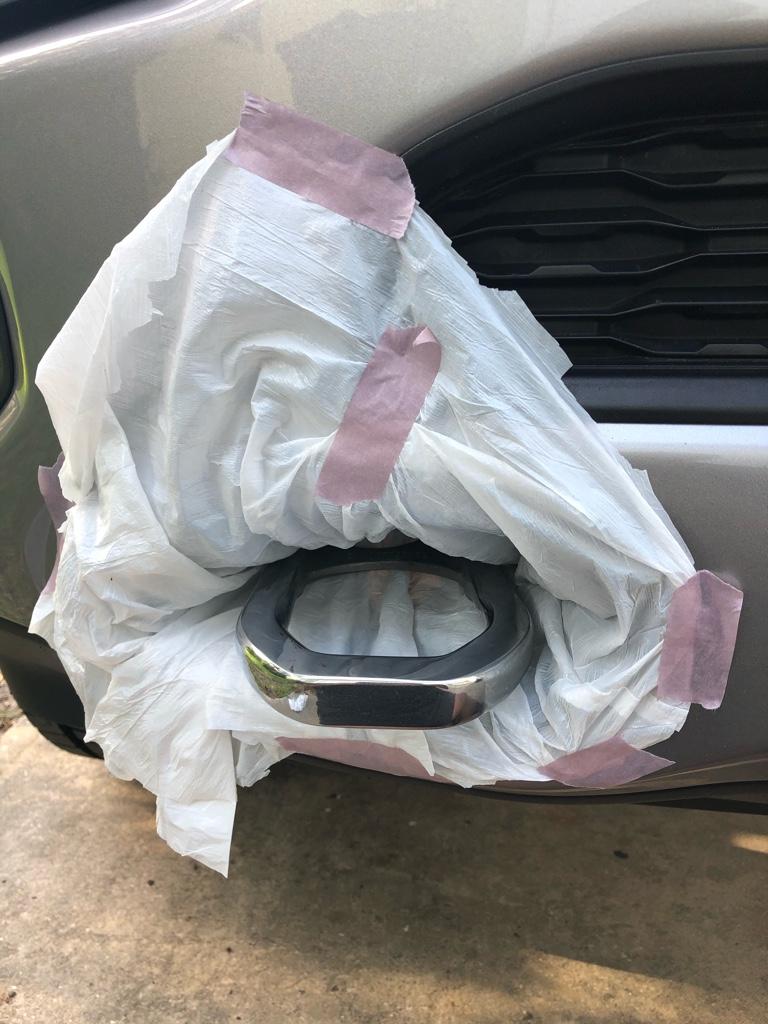
Install was pretty simple. Just remove some pushpins and some bolts. The pushpins on the radiator cover that says RAM on it, when you first open the hood are a good design that won’t break when you pull them out. There’s a cap on top of the pin and you can see an indentation where you can stick a screw driver in to lift the cap. After the cap’s out, the remainder of the pin pulls out easily. After the cover is removed, it’s just bolts and 2 more pushpins that hold the applique on. Took 35 minutes, probably less time if I didn’t drop a bolt that landed inside the bumper.

1b31545f57abd96a5cb3813c2efd7949.jpg


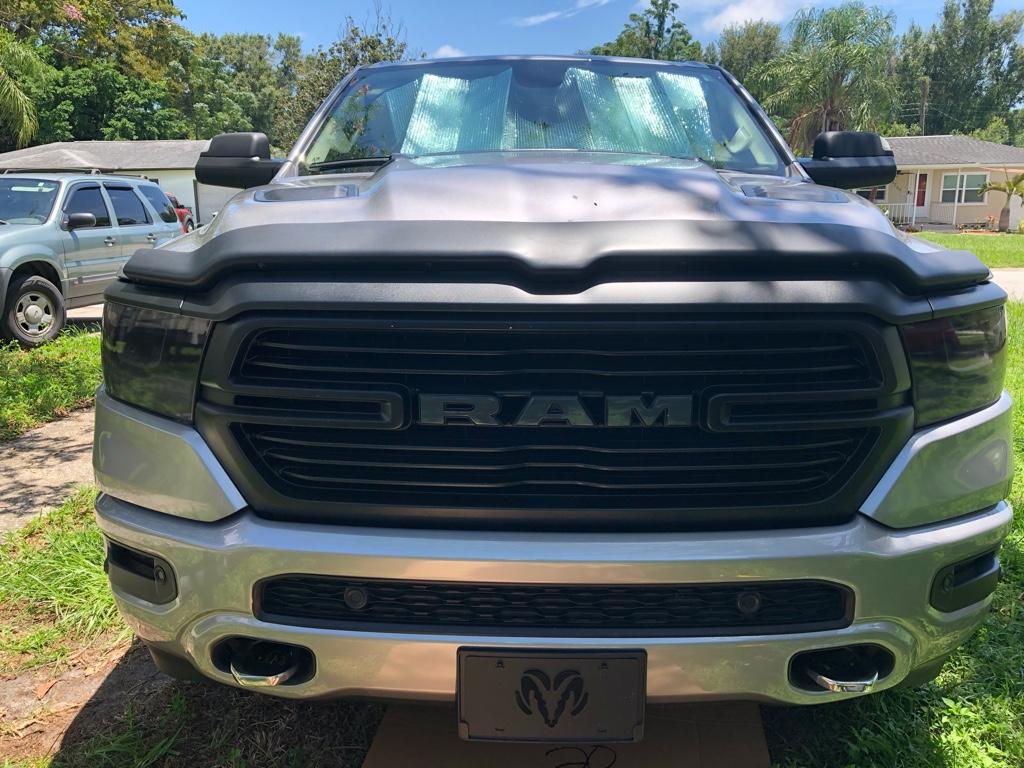
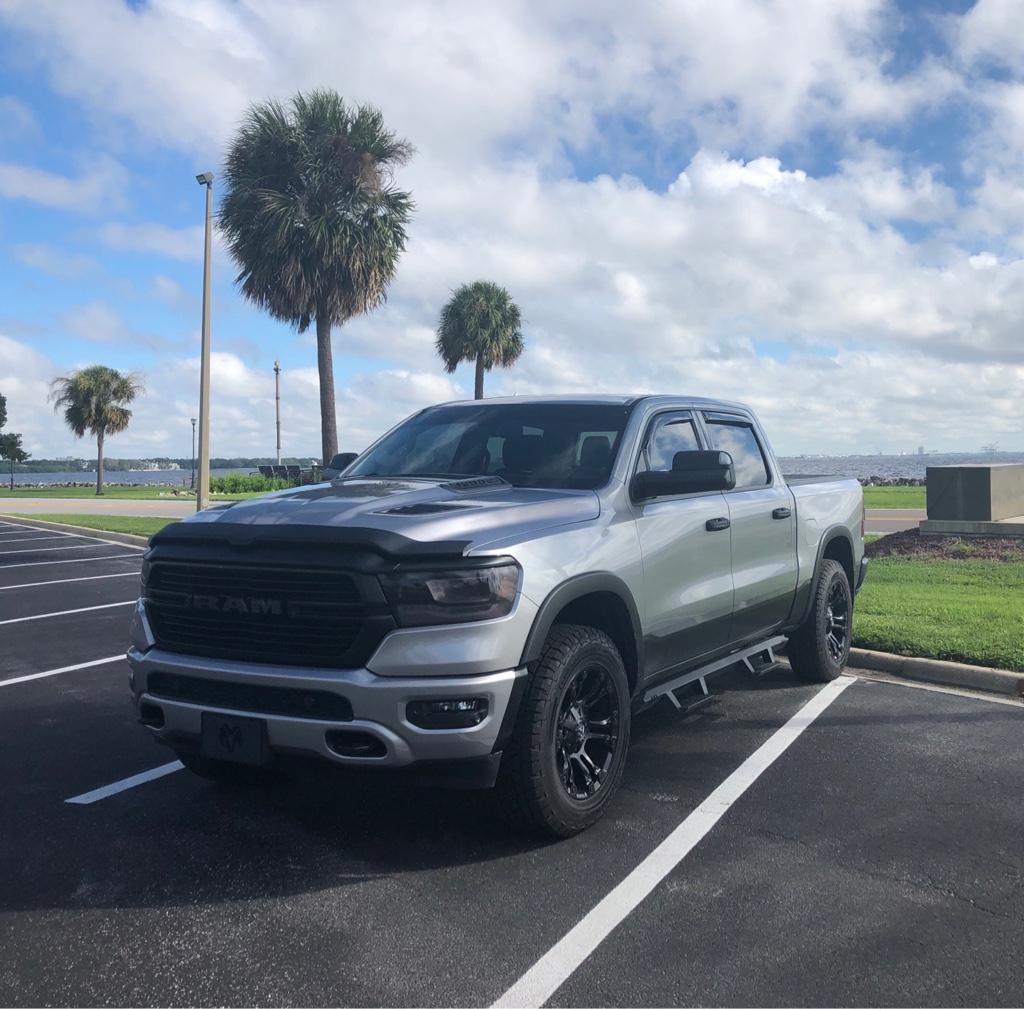
Honestly, it looks the same from afar. But it was worth it for me. - $104.00 through my dealer.

There are some at mopar overstock stores for $65, but they wanted to charge almost $200.00 in shipping to mail it in a box that weighed more than the applique itself. And I only lived 2 hrs away from them. So, if you live within driving distance and don’t mind driving to pick one up, It’s a no brainer if you’re chrome deleting. The primed version is more expensive though.

I plan to tackle the grille much later, after the main upgrades for my build. I can still tolerate the chips that it has as of right now.
 
Last edited:

Mopar_maxi

Ram Guru
Joined
Feb 22, 2020
Messages
646
Reaction score
1,178
What did you use around the roof where the 3rd brake light seals?
 

LessDodgeMoreRam

Active Member
Joined
Jul 10, 2020
Messages
46
Reaction score
116
What did you use around the roof where the 3rd brake light seals?

It’s Permatex adhesive silicone I got from autozone. After hearing about people having issues with leaking from the 3rd brake light, I decided to take a precaution and seal it up. It’s like $9 or so with tax.

You have more energy, talent and money than I do but the results are impressive. Nice job.

Thank you! YouTube, help from friends, and this forum has helped me do things I didn’t think I could. This definitely became more of a money pit than what I was hoping for though...
 

LessDodgeMoreRam

Active Member
Joined
Jul 10, 2020
Messages
46
Reaction score
116
After waiting 2 and a half months for my bilsteins to come in, a week for Mopar upper control arms, and another week to wait for the dealer to do some repair work, I finally have my wheel set up on and it was well worth the wait!

4a2896a2ca4b7d787957192cc92472d5.jpg


20x9 Fuel Vapor D560 Matte Black +1 offset
275/65r20 Continental TerrainContact A/T
34.1 inches tall and 10.8 inches wide.
No rubbing or trimming.
Leveled with adjustable Bilstein 5100s on the 5th setting. Bilsteins for the rear as well. Mopar upper control arms.

Mopar Upper Control Arms: last minute decided to order these. It seems there is still a long debate on if these are any different from the stock UCAs. Also mixed views on if UCAs are needed or not for a 2” level. I’m not going to take a side and instead just pay for some peace of mind. If the Mopar leveling kit uses these, they can’t hurt especially for the price. It’s a little weird though how the Mopar are almost 50% cheaper than OEM. $48 per arm on Mopar wholesale. - $124 w/ shipping and taxes.

a1eb1b12e5e254cea2fee52bc715eb3c.jpg


Bilstein 5100 front and rear - 5th setting on the adjustable fronts. From some angles it still looks like there’s a rake but I don’t mind it. Probably just the lines of the truck design.

Lots of recommendations for these when leveling and a great price in my opinion. It’s hard to review these while also replacing tires and wheels at the same time. It’s also hard to compare these to stock as it’s a completely different type of ride. Do I feel more bumps in the road? Yes, but it’s not off putting. I’m driving a truck after all. But the recovery from the bumps is amazing. You hit the bump, you feel it in the instant, and it’s done. With stock, I felt like I’d hit a bump and the truck would bounce around or shake side to side for awhile before settling down again. I really, really, really had to slow down just for speed bumps so as not to shake my family or the contents of my truck. With the bilsteins, I can hit these speed bumps comfortably at the speed limit or faster and everyone and everything is where it was. - $315 total front & rear with a 10% discount code through 4WheelParts.

542ccdbc0305971ed7e0b1ca4868c88b.jpg


20x9 Fuel Vapor D560 Matte Black +1 offset - what can I say? They look great and match the color scheme I’m going for. My first choice was 20x10 -18 offset but they were sold out at the time. If I had known I’d be waiting so long for the bilsteins, I maybe would have waited for these to come back in stock. I wanted the wheel to sit about an inch or less outside the fender. This offset puts it flush with the fender which I actually really like. Also, the 10 inch wide wheel would have yielded a greater depth to the wheel design... if that makes sense. But honestly, no remorse or FOMO what so ever with the 20x9.
$1020 ish w/ coupon code through 4WheelParts.

8c04161c9d45d343a4292f668a1f12f9.jpg


Continental TerrainContact A/T - I don’t know how to talk about these tires without sounding like I’m being paid to review these. They’re perfect.

Hows the road noise? What road noise? Just as quiet as stock. Possibly better. The only thing I hear is the wind from my Mopar rain guards.
Editing after some more driving. I can hear slight road noise but it’s very hard to hear over the wind noise from the rain guards.

Comfort? Like I said, it’s kind of hard to really know what I’m feeling when I put the bilsteins on at the same time. I feel the bumps and holes. But on a smooth road, these tires are floating. With how these glide on the smoother roads that I remember from stock, I think it’s safe to say the comfort is on par with stock maybe a little worse.

Rain performance - my stock tires were garbage in the rain. Huge improvement over stock. I feel much safer and planted on the road.

I can’t say anything about off roading since I don’t really go off of pavement. I do back into my front yard to park. Sometimes my stock tires would slip and kick up dirt especially during rain. With the continentals, I back in smoothly every time.

bc91caa17933ed6c0432235c4c0b77a2.jpg


I don’t get how these aren’t more popular than they are. A huge dealbreaker is probably the lack of tire sizes and no 35x12 option. I really don’t mind my skinny tires though. They look just fine for me.

I was sold on BFG KO2 before my friend recommended these. And I was sure I’d try them as my next set. Depending on how the durability goes, I don’t think I’d want to try anything else. I may try the H/T 33 inch version which would give nearly 50% weight reduction, just to help the 3.21 gearing.

0adcf1a7fcf72b3e1df456b78188f6dc.jpg


So how is my 3.21 handling the new weight of these tires and wheels? It’s not horrible... it’s not good. I’m definitely more sluggish. MPG definitely took a hit. Before the set up, I was getting a good 19-22 mpg (according to the truck). I mostly highway drive to work. Now I seem to be staying in the 17-18 mpg range. I would get anywhere from 450-510 miles per tank (26 gallons). I’ve filled up twice since the new set up. 410 and 390 on those tanks. If I stay above 400, I’m happy.

The dealer said they’d recalibrate to 34 inch tires for the price of an hours worth of labor. Definitely going to need that. She has some trouble figuring out which gear to stay in right now. I’m hoping that might help the mpg loss. The speedometer is anywhere between 3-6 mph off depending on how fast I’m driving (street vs highway).

That mostly wraps up my exterior build. I still need to figure out my tow hooks. And I want to do something about the bumper in regards to the rest of the truck’s two tone look. Hellwigs, RamAir, air bags, some interior comforts are still to come. For now, my wallet needs a break. Damn, I love this truck.
 
Last edited:

LessDodgeMoreRam

Active Member
Joined
Jul 10, 2020
Messages
46
Reaction score
116
4e3ac78b338ec0c028f4ad1dfe9ad128.jpg


Officially completed the chrome delete today. Decided to plastidip my chrome recovery hooks. Hopefully I’ll never have to use them but if I do it’s not like I broke the bank to do this.

So... I couldn’t, for the life of me, unscrew the bolts on the hooks and this is what kept me from doing this for so long. I gave up and embarrassingly enough, this is how I went about doing it...

5f01b6bb14cceb38197fdb4915e98676.jpg


Cut a hole in the bottom of a trash bag and slid it over all the way to the end of the hook. Taped the top of the bag to the bumper. Embarrassing but it worked lol

d145b37c6841182433644782037b64ea.jpg


Can’t even see them anymore. Thinking about switching to red hooks, red hood bezel inlays, and red caliper covers to match the random red tail lights. Part of me thinks that look is for sports cars. But we’ll see.
 

LessDodgeMoreRam

Active Member
Joined
Jul 10, 2020
Messages
46
Reaction score
116
ad1f5e8e9d3e2e79bb31e240a3ad2afc.jpg


Got a small wrap job done on the bumper to continue the fender line down to the air dam. It helps the two-tone look a bit more complete in my opinion.

Also got a brow tint. Didn’t want it too thick. And I got it for free since the shop saw they’re headlight tint was starting to peal.

Really excited for my next mod. It’s something similar that I liked on the Raptor and was something that I had a little FOMO on the TRX but it didn’t actually look that great on the TRX once I saw the reveal. It should get here in the next week and then I’ll have to schedule a time to get it installed.
 

lukeadair

Member
Joined
Nov 29, 2020
Messages
16
Reaction score
7
Hey man, sorry if this has already been discussed, I didn't see it when I looked....but where did you get your color match bumper? I'm really wanting to ditch the chrome bumpers. TIA
 

mrb2bcarshow

New Member
Joined
Feb 17, 2021
Messages
3
Reaction score
0
Borla S-Type black tips - coming from a v6 to an electric to a hemi, I wanted to hear that I was driving a hemi so I needed an exhaust. I debated between Carven, Magnaflow, Borla S-Type/Atak. I had a magnaflow on my V6 eclipse and the sound clips that I listened to from Rams had something similar that reminded me of my eclipse. It just didn’t seem like enough rumble or growl or something. I had to keep in mind that sound clips don’t really do an exhaust justice but I found better sound on other exhausts. Carven sounded great maybe a bit loud, but the installs looked a little more than what my abilities and equipment would allow. I was left with Borla. Great sound and easy looking install. I read that the touring, s-type, and atak were all much louder in person. I live in a neighborhood so I wanted to take my neighbor’s sanity and sleep schedule into consideration. I pulled the trigger on the s-type, had a buddy who knows this stuff better than I do come over, bought him lunch and a 6-pack and we spent an hour and a half on it. Even though I read so many times about how much louder these exhausts are in person, I was still shocked after my first start up. Driving around, I thought I’d ruined the in cab comfort with the new sound. After driving it around about 500 miles, it settled down and it is an absolutely perfect note, sound, and growl. Even hearing it rev down and kick in and out of MDS is nice. The cold starts are still pretty loud (you can’t have a conversation standing outside the truck). My neighbors probably don’t like it but it’s a sacrifice I’m going to have to make (could have gotten an Atak). $928 from autohance. They didn’t charge tax or shipping. Had it in 5 days somehow.


A quick cold start. Maybe I’ll get some revs when I’m in a more remote area.

In my 5 years of living in Florida, I’d never participated in Lovebug genocide, so it’s only natural that I would partake in this... right of passage, directly after a new wrap job. Because of my lack of experience, I didn’t realize how detrimental bug guts were to wraps or paint. After cleaning them off, I was left with this

89e83727614cad1dddb7e5c68ac78086.jpg


Had some permanent marks and chips on the painted grille also, but I’ll tackle that much later in the trucks life. Quick story for anyone debating ceramic clear coats. When I got my bumper and hood painted, they threw in ceramic coating. When I was cleaning off all the lovebugs, the panel under the headlights, the mirrors, everything took some intense scrubbing to get them out. There are a bunch of marks, rock chips, and scratches on that panel under the headlights, but when it came to my coated bumper, the bugs came off much easier. No chips, no scratches. Safe to say I’ll be coating the rest of my truck soon.

For the mirrors, I decided to get some mirror covers. I couldn’t find anything for tow mirrors in this gen but I found some on eBay for around $40 that were labeled for 2012-2018. Had them in 3 days. They looked similar enough so I gave them a shot. Turns out they fit perfectly but they were also extremely glossy.

8c0ffdd8d602926c80ff21b1b58d43d0.jpg

They matched the tint and the rain guards well but it looked weird coming off of the plastic arms of the mirror so I dipped them.

7e89176b5fdfa830e878e06990c12616.jpg


Better, not great. I may look into a glossifier which I hope will match the plastic a little better. There is a terrible whistle coming from them that happens above 30mph. I’m going to get some silicone to fix the gaps that must be causing the whistle.

Door handle covers - there’s some chrome trim on the door handles that was bugging me so I contemplated dipping the handles, just the trim, or buy handle covers. I can’t give any reasoning behind getting covers. I just wanted to.

fc033c76cca9063839ba2252999b098a.jpg


They came in from China after about 2 weeks. The edges looked kind of jagged and sharp so I sanded them down a bit just in case those edges may harm the paint. Dipped them and put them on. The handles took a little bit of force to put on which more than likely ended up scratching the paint. Because of that, it’s probably best just to skip the covers and directly dip or wrap the handles. But I’m actually surprised at how much I like the look of the handles after the mirror cover disappointment.

8b83776fab35f96d41d4727eb642b709.jpg
Hi! interested in the door handle covers, would you know where I can get those online? I tried to order last month but it did not fit well. Yours look fitted. Thanks!
 

Users who are viewing this thread

Top