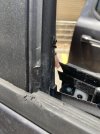
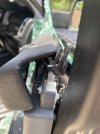
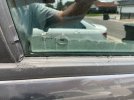
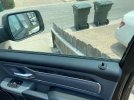
Haven't seen much for window replacement DIY tips for our 5th gens. Hope this helps. Video here:
I want to point out that you do not need to remove the carrier plate to do this. I spent the bulk of my time trying to figure out how to do this because I figured it was easier to install the window with the carrier plate removed. This is not true because it is so easy to install the window from above by angling the glass in the channel and lowering it into the door. If you have a broken window and a ton of broken glass inside the door, I recommend removing the T27 torx screws from the door latch to loosen the carrier plate, but that's it. This will allow you enough of a gap to vacuum up any loose glass pieces and to also reach in and remove what's remaining of your broken window.
Ordered my replacement window from eBay. Many sellers out there, I got a 3rd party replacement for $225 that is a perfect replacement, except for not having the OEM logo.
I messed up a couple of clips removing the door panel:
Door Interior Trim Panel Retainer (Yellow): 6510747AA
Door Interior Trim Panel Retainer (White): 6510359AA
Prep: If you have a broken window, I recommend taping what's left to make removal easier and safer
Step 1. Remove inner door panel. Great writeup here, post #7, see the PDF attachment provided by Billet1500 4x4: Door Panel Removal - Tricks or Tools . Be careful with the door handle cable, it's possible to mess up that clip. Also, I don't like removing the window switch assembly from the door panel. I left it in and just unplugged the electrical connector from the back. Good videos here:
Step 2. Remove speaker. I did it, but probably not necessary if you don't have broken glass.
Step 3. (Only do this step if you need access to the inside of the door because your glass is broken / shattered.) Loosen the carrier plate by removing a bunch of 10mm bolts and the 3 T27 torx screws securing the door latch. No need to remove the entire carrier plate. If you do this step, then disconnect all electrical connectors to the carrier plate to allow for more play and better access to the inside of the door. Vacuum every loose piece of glass because you don't want to hear it rattling around months later. Some of those shards can also block small drainage holes at the bottom of the door so it's important to get every last piece vacuumed up.
Step 4. Undo the 2 silver dollar size rubber plugs that allow for easy access to the bolts securing the window
Step 5. Roll your window mostly down to the point that the 2 bolts securing the window are aligned with the access holes (it's about 75% down with some of the unbroken window still sticking up and easy to grab). If you have a taped up broken window, be careful here and roll the window down slowly in increments. This will hopefully prevent shards of glass from catching something as you roll it down. You'll need to remove both the inner and outer weather guard that sits tight against the window when it is rolled up (window sweeps). This was easy to remove ... one screw holds the outside in place, and trim remover helped me pry up the inner strip. Removing the window sweeps make the channel a lot wider, but you lose protection for your new glass during the install process since there's the chance of contacting metal surfaces ... a little painter's tape might help in those spots.
Step 6. Loosen the bolts holding the window but do not remove these bolts completely. You just want to loosen enough to remove the clamping force on the window's attachment points. No need to mess with clips as in previous generations. The mounting clips are permanently fixed to the glass, and your new window will have new clips there.
Step 7. Remove the window. If it's intact, you can simply grab the top and pull it up the channel, then angle it so the forward edge of the window nearest the dash tilts downward and the rear edge tilts upward. You'll feel the window ease its way out of the track and you can lift it up and out of the door. If the window is broken then there's probably nothing sticking above the door. You'll have to carefully reach in and remove it through the gap between the carrier plate and the door.
Step 8. If you loosened the carrier plate, tighten it back up by replacing all 10mm bolts and the 3 T27 torx screws at the door latch. Remember that you will have 3 holes for the very first 3 screws that you removed when you took off the inner door panel.
Step 9. Installing the window was the easiest part of this whole evolution. (Sorry for the lack of video.) Lower your new window into the channel from the outside of the door by tilting the front edge downward and the rear edge upward. You'll be able to easily lower the glass down the channel, then slowly and carefully straighten the glass out so it fits cleanly into the window channel / window tracks. There is nothing to force here. This process should be very easy and effortless. You'll know you did it right because the glass will easily slide up and down its tracks as if it were installed. Once it's set in the tracks, lower the glass slowly until it rests on the attachment points that secure the window. Remember, these bolts are visible through the silver dollar sized access holes. Make sure that the attach points for the window slide in between the clamping surfaces held by the bolt. I initially had one attachment point that did not rest cleanly between these surfaces but seemed to be more on the outside of them both. Once the window is in place you can finally release your grip from the glass.
Step 10. Tighten the 2 bolts to secure the window. Reinstall their respective round access point covers.
Step 11. Before putting everything back together, reconnect your electrical connections and test the window. It's easy to test the passenger side using the driver's switches. Otherwise, if you're replacing the driver side window, you'll need to temporarily reconnect the driver's side door panel (or just remove the window switches from the panel) just to use the window switches.
Step 12. Reinstall the inner and outer window sweeps that sit on top of the door channel.
Step 13. Reinstall the inner door panel. The hardest part for me was the pop-up door lock that kind of floats around freely. There is kind of a slot on the inside of the door panel that holds it securely so make sure that you have it seated properly before popping the whole panel into place. Make sure to test your lock / unlock switch to make sure you've got it set properly.
Good luck.


Last edited:


