5thGenRams Forums

Register a free account today to become a member! Once signed in, you'll be able to participate on this site by adding your own topics and posts, as well as connect with other members through your own private inbox!

Adding blindspot rear view (and Passenger side dimming) mirror glass

1.21gigawatts

7-Stringer
Site Supporter
Joined
Dec 29, 2021
Messages
980
Reaction score
1,322
Location
Boston, MA
Hey peeps,

Background:
I'm about to embark on my quest to add the blindspot/cross path detection feature to my 22 Rebel. I already have all the parts sourced and the only shortfall is going to be the wiring harness between the right and left tail lights and then to the front of the truck, and making sure there is connection for the light in the mirrors. But the parts themselves total about $640 as i only need the sensors themselves and the mirror glass with the indicators. To make the harness i'm going to have to find a few connectors but i pretty much always have a crap-ton of wire on hand. I know that what i am expecting is that the blind spot wiring from light to light and to the front is NOT there... and that the blind spot wiring from mirrors into the truck is also not there. But i have not opened stuff up yet to confirm about the wiring as i am less worried about that currently.

Observation:
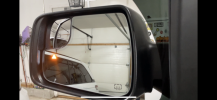
What i have noticed in sourcing these parts is that the elements you can get on the rear view mirror glass are heat, dim, and blindspot. I already have the auto dim feature inside, and on my driver's side rearview mirror only, and both of my existing non-blindspot mirrors are heated. But looking at the available replacement glasses, I found a driver's side with heat, blind spot and auto dim, but i'm finding passenger side mirrors with blind spot, heat and with and without auto dim.

Question:
Does anyone out there (of any trim level) have a passenger side mirror that dims? and does anyone out there with knowledge of Alpha OBD know if these things are separately dealt with in that? like do the outside mirrors dimming get enabled separately, or is it just if it's on, it's on and whatever's wired will all dim with the main mirror? cuz i might as well add that whilst i'm doing this since its just another 2 wires to add from the passenger side mirror into the truck, and i'm gonna be in there anyway. but i guess what i'd be curious to know is; can i just jump on to the driver's side dim wires, or do i need to find out where that would have to plug up?

Really i guess what i'm asking is do we have connector/wiring harness/wiring diagram guru on 5th Gen haha?
 
Last edited:

1.21gigawatts

7-Stringer
Site Supporter
Joined
Dec 29, 2021
Messages
980
Reaction score
1,322
Location
Boston, MA
excellent, thanks! I knew we had a guy.... hahaha

i'll message him after work tonite.
 

1.21gigawatts

7-Stringer
Site Supporter
Joined
Dec 29, 2021
Messages
980
Reaction score
1,322
Location
Boston, MA
Ok so I have installed and activated the blind spot sensors in the rear light housings, wired the underwear connector to the Star connector with an awesome harness I bought from @Jimmy07 , and enabled just the sensors and tones for the system with JScan. I have been using it like that for a little while til I could get the stuff to do the mirrors.

My truck originally had both mirrors heated, no blind spot lights and only the driver’s auto dimmed.

I found a set of mirrors with features as follows (on eBay brand new)
Right one (passenger) is 68402094AA
left one (driver) is 68402095AA

These mirrors BOTH have heat, blind spot lights and they both can auto dim.

Here are some photos

B91531BC-AB42-42D2-AF69-0718A1223977.jpeg
(Watch out, my ceiling fan is closer than it appears. 😀)


31144B9C-CA96-4BE0-9310-639696749B86.jpeg
 
Last edited:

1.21gigawatts

7-Stringer
Site Supporter
Joined
Dec 29, 2021
Messages
980
Reaction score
1,322
Location
Boston, MA
So, for both sides I have realized I needed to know where to wire the non-existent features.

I have learned on here (and mostly thru posts by Jimmy07 in threads I've found) that the auto dimmer wires go from this connector on the glass:
6FEAFDB3-F772-4ACC-B610-C5ADCB1EF034.jpeg

6FEAFDB3-F772-4ACC-B610-C5ADCB1EF034.jpeg
to this mating connector, and get wired down into the door module in positions 5&7 of the C2 connector

And thanks to another post from Jimmy I have the molex number for that connector and pins:

The connector for the mirror glass is Molex 03-06-1023. The terminals for that connector are molex 02061101. The terminals for pins 5&7 on the door module C2 connector (white) are TE Connectivity 5-963715-1

So that’s the auto dimming part.
 
Last edited:

1.21gigawatts

7-Stringer
Site Supporter
Joined
Dec 29, 2021
Messages
980
Reaction score
1,322
Location
Boston, MA
So now what I need to do, is if possibly find a way to get the connectors and pins for the blind spot led connector. I’d like to do this all with factory connectors if I can, but some things just aren’t findable sometimes. I just like that they are small and snap into the back of the mirror glass and won't be bounding around in there. (otherwise i'll have to do it with some generic connectors, or just solder them all - which i'd like to avoid.)

This is the connector on the mirror glass for blind spot:
1B5DF8C5-EF32-49BB-AAA6-989B41989C98.jpeg

Recently got some help from @JayStein, And I now know this is what the mating connector looks like.
6FC43E3D-8267-4190-8432-A6D1EAF4570E.gif

And it’s listed with this part number as a repair kit that doesn’t exist anywheres:
A8073C69-0B39-469F-813E-0DDE5F5AE37A.jpeg

So I'm wondering if @Jimmy07 or anyone has a molex part number for this connector... or a way to find it with this... I'm not entirely sure how to obtain that info with this info haha.
 

1.21gigawatts

7-Stringer
Site Supporter
Joined
Dec 29, 2021
Messages
980
Reaction score
1,322
Location
Boston, MA
ok i think i may have found them...

Literally scrolling through every connector on the site where i found all the other stuff, I came upon these, and their associated socket-pins...
Screen Shot 2022-11-25 at 4.56.50 PM.png

Screen Shot 2022-11-25 at 4.54.06 PM.png

So i'm gonna buy em with the other stuff right now and report back when they show up.
 
Last edited:

1.21gigawatts

7-Stringer
Site Supporter
Joined
Dec 29, 2021
Messages
980
Reaction score
1,322
Location
Boston, MA
Update, the above mentioned connectors and pins are the correct ones!! Just waiting on the set of pins for the mirror auto-dim connector as those were back ordered, but they are sposta ship tomorrow or Friday. so possibly could be doing this this weekend. But i'll definitely be wiring/crimping the connectors, so i'll post pics of that before the actual installation.
 

1.21gigawatts

7-Stringer
Site Supporter
Joined
Dec 29, 2021
Messages
980
Reaction score
1,322
Location
Boston, MA
ok... this AM i crimped the pins and wired the connectors for the BSM LED's in the new mirror glass with the following:

  • Molex Connectors (x2) 52213-0211
  • Molex socket pin (i got 6 for practice, but it was easy once i learned the connector)
  • A good length of thin jacket 22-24 awg wire, mine was solid but you can use stranded too.
    • I have a spool of dual wire and when i have the choice i always go "red-right, left-white" so thats how i wired it but it doesn't matter until you get to the door module pins, just make sure the correct wire goes to the correct position in the door mod.
I was told by Newark techs that this is a "pull thru" style connector... it is not. it actually - as small as it is - disassembles and is a typical push-thru style. and probly in better conditions than my dining room table you can do it w/o disassembling, but i found this easier:

So, here's the exploded drawing of the connector, pins and how i laid them out:
BSM LED mirror connector expl.png IMG_1213.JPG IMG_1214.JPG IMG_1215.JPG IMG_1216.JPG BSM mirror connectors LED wired.JPG

Pins are typical crimp on so get a tool (it's worth it) and crimp the wire, then the jacket. And try to orient them the same when you crimp so you don't have to twist anything when you push them in (unless you're using 2 separate single wires, then it doesn't matter.) But they push into the connector flat side up, crimp wings down as above. I actually fed the little black lock collar and the silicone gasket onto the wires before crimping but again, thats just the way i chose to do it. Pushed the pins into the connector so they locked, pushed in the gasket, and then clicked in the little lock collar.

When putting these in the truck (i'll do pics of that too) i plan to run them into the mirror arm alongside the heater wires, and down to the door module... more to come when i do that.
 
Last edited:

1.21gigawatts

7-Stringer
Site Supporter
Joined
Dec 29, 2021
Messages
980
Reaction score
1,322
Location
Boston, MA
ok,

So driver's side is complete as of yesterday... but it was an absolute beeeeyotch gettin the wire thru the rubber grommet with the stuffed wiring harness that comes from the mirror and down into the door. And that had mostly to do with angles and that I was too stubborn to just take the whole mirror arm off the truck and get it all done on a bench.... Which i WILL do for the passenger side. hahaha

But here are some pics of that process. And on this side, remember I was only adding the Glass with the BSM LED in it.. my truck already had auto dim and heat on this side, so it was literally just to run 1 double wire. My steps were:
  • Pull off the old mirror glass (suction cup method) video of me doing it here:
  • pull off the mirror cap
  • pull off the bottom mirror cap
  • pull off the interior door panel
  • eventually pop out the thermometer, and remove the bolts that hold the mirror to the door
so I fed the wire for the BSM LED into the open face of the mirror housing pulled it out thru the back, toward the truck, and sent it down the hole (which is the mirror folding pivot point) and the next step was to get thru the rubber grommet and into the door... so I ended up forcing it thru its own hole in the grommet and it's pretty tight, but i feel like if I disconnect the harness from the door module and pulled the whole mirror arm off (AFTER taking out the glass and removing the caps, I'll have a better time of it with the passenger side.)
IMG_1227.JPG IMG_1228.JPG IMG_1226.JPG IMG_1229.JPG

Once I knew the length I needed and had enuff slack up at the mirror I zip tied my new wires to the mirror harness and followed the same path down to the door module. So.. once here the connector you're looking for to add the BSM LED is the BLACK connector in the B slot (top right for me)
IMG_1230.JPG
So I then terminated the WHITE wire I was using with the pin for this connector. This connector has sort of a "sleeve" on it that slides out to the side and then you can remove/add pins to it. On my connector there was no pin in position 7, but 5 was already populated so I decided to t-tap that one vs trying to crimp 1 pin to both wires. maybe I'll change my mind on that later, but getting the door panel off is super easy, so imma not worry about it rn. So, pin in to slot 7 with white wire, t-tapped red/white wire to the brown wire in slot 5.
Mod Door Drv-C1 pinout.png IMG_1231.JPG IMG_1235.JPG IMG_1238.JPG
Now it was time to test the workins... so I plugged in all of the mirror wires to the new mirror, heat, dim and led... and used some masking tape to hold it in place and not snap it back in yet in case anything was squirrelly. I used JScan on my iTelephone and my Veepeak OBD interface and ECRI gateway bypass, put the truck in run, went to the doors settings and activated the "blindspot mirrors present" setting. Started the truck up and the light came on for a second as part of the test it does on startup... 'til soon after getting the code "Blindspot system unavailable" because I only had a light in the driver's side. But it worked as far as all the wiring.
 

Attachments

  • IMG_1242.PNG
    IMG_1242.PNG
    440.1 KB · Views: 153
Last edited:

1.21gigawatts

7-Stringer
Site Supporter
Joined
Dec 29, 2021
Messages
980
Reaction score
1,322
Location
Boston, MA
Part 2: Passenger side temporary fix to make sure the system works until i get the parts i'm waiting for.

so today i decided since i have a ton of extra pins for the door modules and ultimately i'll only need 6 at the most, i decided to use one of them and another T-tap to add a simple LED and stick it to the door sail at the front of the passenger door. this is not permanent.. this is just so i can test the system on the road and not have to shut it all back off in JScan again.

so the pins I'm waiting for are the ones that go to the auto dimmer connector, which i have, but the pins went on back order. so everything but those came in for it. and when that happened i did a little more digging and turns out the one i bought, that i listed above as 02061101 from Jimmy07's previous post are correct... but seem to be back ordered on a few sites. but i found out on Molex that this part number refers specifically to a reel of these.. that you cut from similar to the pins i bought for the door module connector. however what IS in stock is part number 02061103 which is the loose version of the exact same terminal. so tomorrow i'm gonna call Newark and just have them sub the back ordered one from my order with these and hopefully i'll have them before next weekend.

So today i just popped off the passenger door panel and took a random 12v LED i had sitting around from an LED strobe kit i had on my ATV a while back when i plowed with it. sized it up and cut the wire to length. This time i first took the wires and poked them into the black connector and turned the truck on to see if it activated... not the first time ( 50-50 shot but i always guess polarity wrong :ROFLMAO: haha whatevs). Anyway, swapped them and did the same thing and it lit up. So I T-tapped the position 5 to the brown wire again and then terminated the other wire with one of my extra terminals for the black connector and inserted that into spot 7. Same connector just in reverse on this side so black plug bottom left for me.

IMG_1243.JPG IMG_1244.JPG

Stuck the LED to the door sail with something removable, put the door panel back on and fired up the truck and went for a ride. I set it to Lights only and they came on anytime anyone was in my blindspot on both sides, regardless of my blinker being on.

What i did notice is this... that when someone is in my blind spot and i activate my turn signal... nothing happens... so the mirror LED and the other LED just stay solid until that vehicle is gone. and i'm now wondering "is that just the way the Ram BSM system works?" since like every other system i've seen in that condition the BSM led flashes either slowly or rapidly to get your attention especially when you have the chime off. So I'm hoping anyone with that info will chime in here and let me know, but this has been kind of a lonely thread hahaha. In the meantime i'm gonna go look around on the interwebs and see if that info is out there.

EDIT: so it looks like by what i cn find that it is working as it should.
 
Last edited:

Wirerat

Active Member
Joined
Apr 18, 2021
Messages
118
Reaction score
120
Part 2: Passenger side temporary fix to make sure the system works until i get the parts i'm waiting for.

so today i decided since i have a ton of extra pins for the door modules and ultimately i'll only need 6 at the most, i decided to use one of them and another T-tap to add a simple LED and stick it to the door sail at the front of the passenger door. this is not permanent.. this is just so i can test the system on the road and not have to shut it all back off in JScan again.

so the pins I'm waiting for are the ones that go to the auto dimmer connector, which i have, but the pins went on back order. so everything but those came in for it. and when that happened i did a little more digging and turns out the one i bought, that i listed above as 02061101 from Jimmy07's previous post are correct... but seem to be back ordered on a few sites. but i found out on Molex that this part number refers specifically to a reel of these.. that you cut from similar to the pins i bought for the door module connector. however what IS in stock is part number 02061103 which is the loose version of the exact same terminal. so tomorrow i'm gonna call Newark and just have them sub the back ordered one from my order with these and hopefully i'll have them before next weekend.

So today i just popped off the passenger door panel and took a random 12v LED i had sitting around from an LED strobe kit i had on my ATV a while back when i plowed with it. sized it up and cut the wire to length. This time i first took the wires and poked them into the black connector and turned the truck on to see if it activated... not the first time ( 50-50 shot but i always guess polarity wrong :ROFLMAO: haha whatevs).Anyway, swapped them and did the same thing and it lit up. so i T-tapped the position 5 to the brown wire again and then terminated the other wire with one if my extra terminals for the black connector and inserted that into spot 7. Same connector just in reverse on this side so black plug bottom left for me.

View attachment 145246 View attachment 145247

Stuck the LED to the door sail with something removable, put the door panel back on and fired up the truck and went for a ride. I set it to Lights only and they came on anytime anyone was in my blindspot on both sides, regardless of my blinker being on.

What i did notice is this... that when someone is in my blind spot and i activate my turn signal... nothing happens... so the mirror LED and the other LED just stay solid until that vehicle is gone. and i'm now wondering "is that just the way the Ram BSM system works?" since like every other system i've seen in that condition the BSM led flashes either slowly or rapidly to get your attention especially when you have the chime off. So I'm hoping anyone with that info will chime in here and let me know, but this has been kind of a lonely thread hahaha. In the meantime i'm gonna go look around on the interwebs and see if that info is out there.

EDIT: so it looks like by what i cn find that it is working as it should.
With the bsm notification set to light only, it doesn't do anything extra when I use blinker in that direction.

I have mine set to chime + lights. It's such a rare occurrence for me to hit the blinker before checking the mirror that I don't mind it being on. Thats the only time the chime comes on.
 

1.21gigawatts

7-Stringer
Site Supporter
Joined
Dec 29, 2021
Messages
980
Reaction score
1,322
Location
Boston, MA
With the bsm notification set to light only, it doesn't do anything extra when I use blinker in that direction.

I have mine set to chime + lights. It's such a rare occurrence for me to hit the blinker before checking the mirror that I don't mind it being on. Thats the only time the chime comes on.
Thanks for the reply, and yeah from what i can find that's exactly the case... they don't say it anywhere but if you watch reviews of it and the FCA vids it sort of shows it happening that way.
 

1.21gigawatts

7-Stringer
Site Supporter
Joined
Dec 29, 2021
Messages
980
Reaction score
1,322
Location
Boston, MA
Thanks guys. Passenger side stuff coming this weekend and that is adding auto dim and BSM to that mirror, but I have a different method I’m gonna do with fully removing the mirror assemble and feeding the wire on a bench.

And yeah it kinda looks like a lot but I also had to sort of piece together all the connectors and info from different threads. If I knew all the parts and processes before I started it woulda been way quicker. So Hopefully now it’s in a spot where if someone wants to do it, it’s only a few pages and combined with the “is it possible to add blind spot” thread there’s not as much hunting for whomever.

But it has been working like a charm (in my temp setup for the passenger side, so hopefully after this weekend I’ll be donezo and it’ll just be like it was always there. Haha and I think it was worth it, personally.

And I think (as far as I know) the only thing I’ll potentially have to do is deactivate the BSM sensors, mirrors and the passenger auto dim if/when I get any system updates, as I’m told those set everything back to your factory options by VIN, but we’ll see. I don’t think I’ve had one since the sensor activation so I cannot confirm yet.
 

1.21gigawatts

7-Stringer
Site Supporter
Joined
Dec 29, 2021
Messages
980
Reaction score
1,322
Location
Boston, MA
Also tonite, the final pins for the auto-dim** passenger connector showed up so I terminated those wires and popped the pins into it so I’m ready to go this weekend.

The one thing I’ll say about these pins is that they are made to crimp to an 18awg wire, and this is all 22-24awg so I went a little tight on the crimping, and for good measure I soldered a little drop at the crimp spot contacting the wires.

286D9A31-298F-43A0-8016-6C0DA111084F.jpeg 3D02340A-CDB7-4909-BD8E-91D7727D372B.jpeg
 
Last edited:

1.21gigawatts

7-Stringer
Site Supporter
Joined
Dec 29, 2021
Messages
980
Reaction score
1,322
Location
Boston, MA
Ok peeps... it is donezo.

Friday night i finished the passenger side adding the wiring for both blindspot and auto-dim. and i was right... it was like 20X easier having the mirror just completely off the truck. Steps this time were: (pics below)
  1. open the passenger window
  2. Remove mirror glass (on truck)
  3. Remove upper mirror cap (on truck)
  4. Remove lower mirror cap/directional/puddle light section (on truck)
  5. Remove pass door panel
  6. unplug mirror connector from door module B and C slots (one blk one wht)
  7. carefully remove cable tacks from module up to mirror hole then remove 2 nuts and 2 bolts (10mm) while supporting the mirror to free it (doing this with the window all the way down makes it a lot easier for one person)
  8. pull off the mirror and pull the cable out thru the hole in the door.
  9. now (off truck) feed the 2 wire pairs (mine are wht/rd-wht for blindspot as on the driver's side and wht/blk-wht for auto-dim) thru the mirror starting from the glass side and feed/pull "toward the truck"
  10. i then ran the new wires along the existing harness +1' (just for slack adjustment) and cut em.
  11. with an ok amount of slack at the glass end (cuz these will not move once fed) i folded the mirror toward and away in my hands just to see if the wired pulled or got tight in either position, they seemed good.
  12. then... Feed the old/new wires back thru the door hole, hold the mirror in-place and spin on the two nuts by hand to hold it (again - window open is key)
  13. re-tighten the 2 nuts and 2 bolts
  14. reassemble the mirror by putting the bottom cap/blinker puddle light on followed by the upper cap (on truck)
  15. plug in the blindspot and auto-dim wires on the back of the mirror glass and then place the mirror glass in position but DO NOT SNAP IT IN YET... (i used masking tape to hold it there so i could wire it then test it)
  16. on the inside of the door, i then snapped all the cable tacks back in where they were around the speaker to the door module
  17. ran my new wires along the same path and zip tied them to the existing wire every like 5" or so, so they weren't stickin out
  18. then, i did the blind spot terminations first... white wire to pos #7 in the black connector with a pin, and red/wht wire T-tapped to the brown wire in pos 5
  19. next was the Autodim terminations to the white connector... same style as the black one, the white sleeve slides off to the side, then you can pin it. white to pos #7 and then blk/wht to pos #5 (both of these were empty in my connector so both got pinned)
  20. plugged em back in, and then plugged my OBD interface and gateway bypass in and put the truck in run (with the engine off)
  21. since i had already activated the "blind spot mirrors" in the door settings that was all set
  22. then also in the door settings i activated the "Electro-Chromatic Passenger Mirror Present" setting - (even though it's Electro-Chromic*** 🤓🤓🤓)
  23. Test for the blind spot - put the truck in run again, both mirror LEDs illuminate for a second on startup. ✅
  24. Test for the auto-dim - Turn off the lights in the garage or cover up the headlight sensor on the dash and shine a light into the back window - All mirrors dim ✅
  25. shut off the truck, disconnect the OBD and bypass and plug the connectors back into the gateway
  26. pull off the masking tape on the mirror, check the new wire slack and that the new connectors are properly seated one more time, and then snap the mirror glass back in carefully, but firmly.
  27. Last thing i did was check the mirror adjustments ⬆️⬇️⬅️➡️, and then fold in/out the mirrors (if you have power fold) a couple times.
I Know this sounds like alot but even without this list, it took me maybe 2 hours just taking my time and thinking about it. totally worth it to me since it's really the only part of the Advanced Safety group i REALLY wanted and could not order when i ordered my Rebel.

Been working fine the last 2 days on two long road trips, so hopefully it stays that way!

IMG_1319.JPG IMG_1330.JPG IMG_1324.JPG IMG_1326.JPG IMG_1327.JPG IMG_1328.jpg IMG_1336.JPG IMG_1338.JPG
 
Last edited:

1.21gigawatts

7-Stringer
Site Supporter
Joined
Dec 29, 2021
Messages
980
Reaction score
1,322
Location
Boston, MA
a little more info:

follow these circuit #'s and you won't have to play around with pinning/depinning connectors

Driver Door BSM:
BSM Drv-mirror led pinout.png Mod Door Drv-C1 pinout.png

Passenger Door BSM:
BSM Pas-mirror led pinout.png Mod Door Pas-C1 pinout.png

Passenger door Auto-Dim:
Auto Dim Pas Mirr pinout.png Mod Door Pas-C2 pinout.png

Screenshots of menu's in JScan (for iPhoners)
IMG_1352.jpg IMG_1354.jpg
 

Users who are viewing this thread

Top