
I just put mine in offroad mode, crawled underneath and did the work. No need to drop the spare or remove the heat shield. And, yes, I did cut on the driver's side to remove it in two pieces.Good luck. Did mine last Friday and it wasnt too bad. If you are doing it from the floor, recommend dropping the spare and taking the driver side heat shield off. Also depends on if you are trying to not cut the stock one off and remove it in 2 pieces like i did.
5thGenRams Forums
You are using an out of date browser. It may not display this or other websites correctly.
You should upgrade or use an alternative browser.
You should upgrade or use an alternative browser.
What did you do to your Ram today???
- Thread starter 19BlkRam
- Start date
SkittleRam
Ram Guru
Great looking tire!Finally had time to get the Laramie sport rims on the truck and the falken 285/60r20s.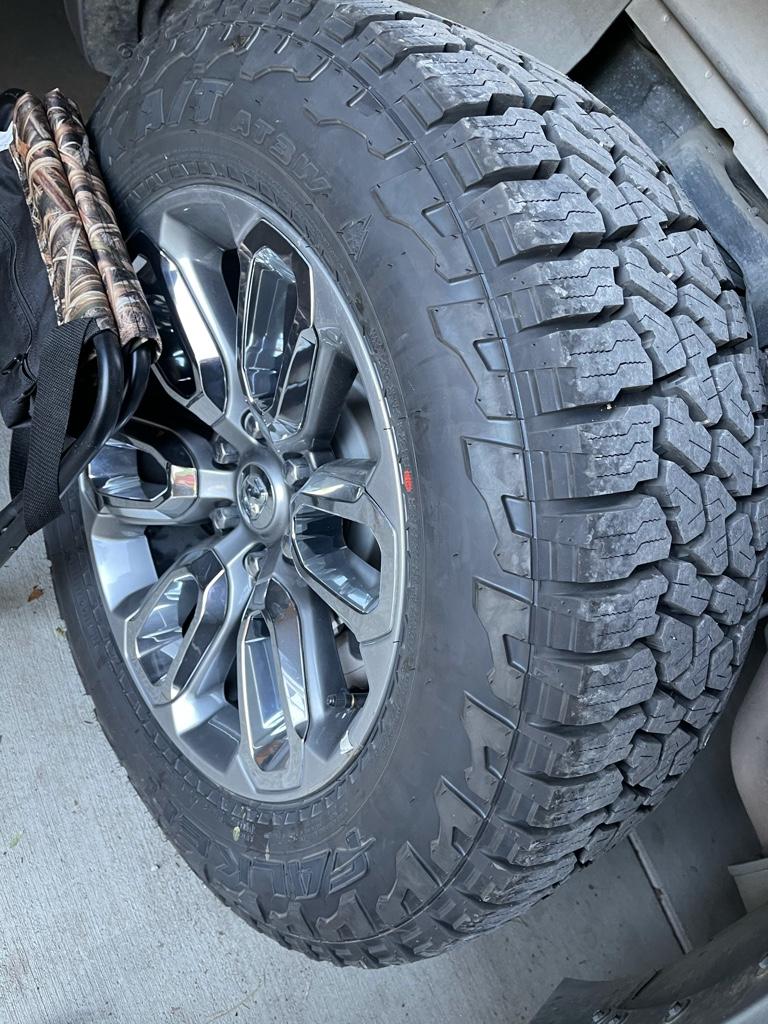
Looks good. Need to level the front. The front end on mine seems to be insanely heavy.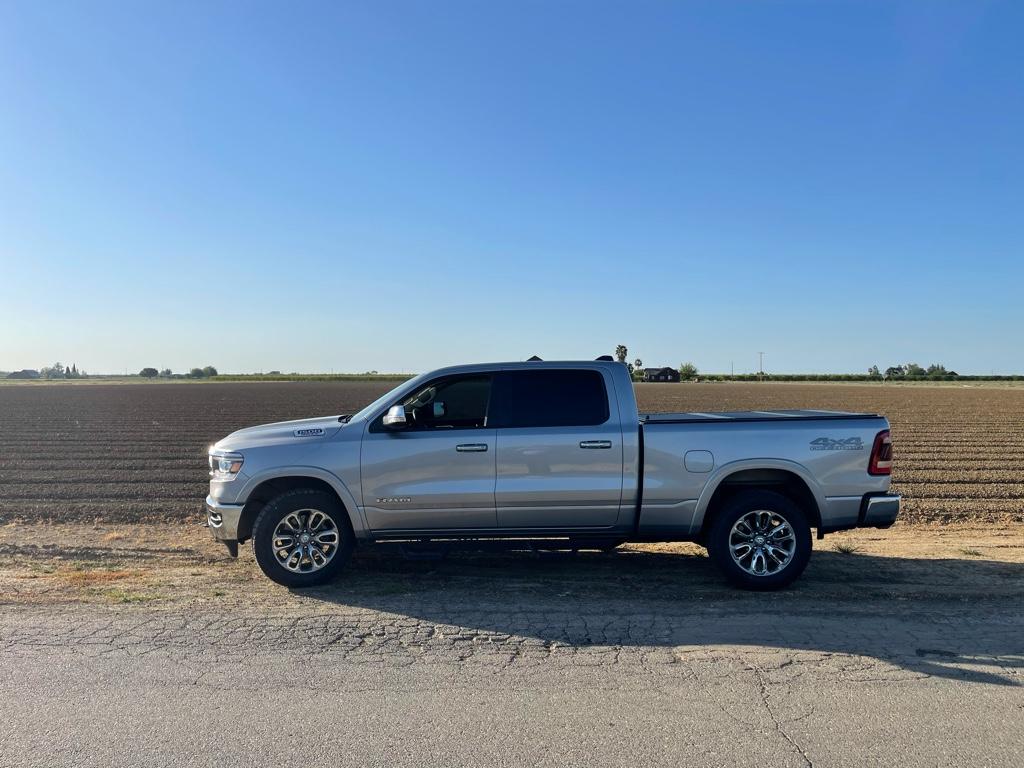
Sent from my iPhone using Tapatalk
mcp6530
Active Member
are those the oem LED tails?Parked it next to a similar one at the grocery store.. still love those taillights.. obviously left some space between us out of respect. View attachment 90467
DONZILLA
Active Member
- Joined
- Jul 19, 2020
- Messages
- 99
- Reaction score
- 59
- Points
- 18
- Age
- 64
Good job man! You would be surprised by how many people don't recognize that. It's great the amount of customization available for these trucks. I keep reading and wanting!Parked it next to a similar one at the grocery store.. still love those taillights.. obviously left some space between us out of respect. View attachment 90467
‘19ramlveryeha
Well-Known Member
- Joined
- Jun 9, 2019
- Messages
- 343
- Reaction score
- 226
- Points
- 43
- Age
- 45
Great looking tire!
I had a difficult time deciding between this and the ko2. Mine came with the falken originally and I got 40k out of them. I drove it hard and plenty of burn outs. So far these feel great. My Speedo is off a bit and I need to raise the front but I like them so far. Chose these because my buddy has the ko2 and his was noisy after about 15k. I know proper rotation will avoid it but eh.
Sent from my iPhone using Tapatalk
z0n3
Ram Guru
- Joined
- Jun 16, 2019
- Messages
- 1,722
- Reaction score
- 1,378
- Points
- 113
- Age
- 33
The black and red ones? Yeah those are the night edition LED taillights.are those the oem LED tails?
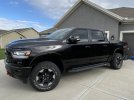
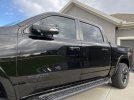
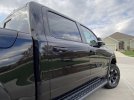
Did my own paint correction and ceramic coat over the weekend. Never done anything like this before, so I definitely gained an appreciation for why folks pay so much for this process to be professionally done. I’m super happy with the results, but probably have 10hrs+ into it from start to finish.
Much thanks to those who helped guide me along!

Much thanks to those who helped guide me along!
z0n3
Ram Guru
- Joined
- Jun 16, 2019
- Messages
- 1,722
- Reaction score
- 1,378
- Points
- 113
- Age
- 33
You'll have to take some photos of it out in the sunlight to share. Black looks fantastic once its corrected and coated!Did my own paint correction and ceramic coat over the weekend. Never done anything like this before, so I definitely gained an appreciation for why folks pay so much for this process to be professionally done. I’m super happy with the results, but probably have 10hrs+ into it from start to finish.
Much thanks to those who helped guide me along!
I mean, I you are going to cut it to remove, then no need to even jack it up. Some of us want to keep the stock exhaust uncutI just put mine in offroad mode, crawled underneath and did the work. No need to drop the spare or remove the heat shield. And, yes, I did cut on the driver's side to remove it in two pieces.
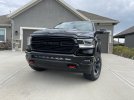
Pictures simply can’t do justice to how much different this looks in person from where I started. Really satisfying results from ceramic coating. I’m excited to see how it performs and holds up over time now
Attachments
z0n3
Ram Guru
- Joined
- Jun 16, 2019
- Messages
- 1,722
- Reaction score
- 1,378
- Points
- 113
- Age
- 33
This looks fantastic! Solid work. You have the bilstein 5100s at setting #4 right? How much rake did you retain? If I remember you left the factory UCA's? Can we see a side shot of your truck? Curious to see what setting #4 looks like.Pictures simply can’t do justice to how much different this looks in person from where I started. Really satisfying results from ceramic coating. I’m excited to see how it performs and holds up over time now
Snicklefritz_76
Active Member
Can you provide more info on that switch? I don't have the same bed that you do, so I'd have to look to see if I have that hole, but I like your switch.
Also, can you describe your wiring method, "wired it to the existing bed lights"?
I've been avoiding wiring up mine, while I consider how I want to do it. I would like to avoid a T-tap. I also don't know what the wires look like behind the OEM switch. The left light is the light AND the switch, for the OEM kit.
I measured that hole at ~ 18mm so I went with a slightly smaller diameter switch (16mm):

The previous switch simply had 2 wires, the switch just made a connection for the wires.
For the new switch, red/green was wired to hot side of the previous switch wire, black was wired to the second wire.
Below: the black wire on the right hand side of the pic is the switch wire that runs into the bed and to the switch.
The left side is the fuse for the LEDs and you can see where I spliced into the factory LED bed lights.
The thick braided wire is the wire that goes to the factory LED that has the built-in switch

To get the switch to light up, the blue switch wire was ran to the same wire I spliced into. I used a posi-tap this time around.

For the LEDs on the front of my truck I used a fuse tap and a replay to trigger the LEDs to go on and off. A fuse tap saves you from having to tap into factory wiring. You can probably do the same for the bed lights but you would need to run wires from the fuse box under the hood to the truck bed.
Klicht87
Well-Known Member
Did you do the ceramic coating yourself or take it somewhere? I've had it done on two other vehicles and thought it really helped but I didn't want to pay the price from the dealer again.Pictures simply can’t do justice to how much different this looks in person from where I started. Really satisfying results from ceramic coating. I’m excited to see how it performs and holds up over time now
Apettit13
Active Member
- Joined
- Oct 6, 2020
- Messages
- 93
- Reaction score
- 92
- Points
- 18
- Age
- 31
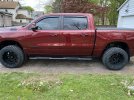
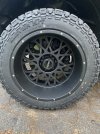
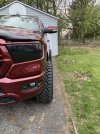
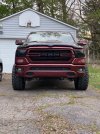
New wheels and tires today.
Vision Rocker 20x12 -51mm offset, wrapped in Kenda Klever 33x12.5R20
very pleased with the look, turned out great.
Slight rub on my mudflaps at full turn, will remove those tomorrow.
3 Inch front and 2 Inch rear motofab lift.
Vision Rocker 20x12 -51mm offset, wrapped in Kenda Klever 33x12.5R20
very pleased with the look, turned out great.
Slight rub on my mudflaps at full turn, will remove those tomorrow.
3 Inch front and 2 Inch rear motofab lift.
Attachments
Did you do the ceramic coating yourself or take it somewhere? I've had it done on two other vehicles and thought it really helped but I didn't want to pay the price from the dealer again.
I completed the process on my own. It’s definitely not perfect, but I’m pretty well pleased with it. The paint correction process was pretty straight forward, but I could have done a bit better on the coating application. Have a couple small areas of high spots, but probably not at a level anybody but me will notice. All in, I probably have $325 and 10hrs of work. Might cost me $125 or so if I were to do another vehicle... much of the cost was in the tools.
You can follow my learning process here:
New to Paint Correction - Questions

New to Paint Correction - Questions
I’ve decided to give DIY ceramic coating a try and have a list of items inbound to begin the process. Hoping to find a free weekend within the next few weeks to devote to the project. I have never buffed or polished a vehicle, so I have a few questions before I get started. Hopefully I can gain...
 r.tapatalk.com

Last edited:
Rambro1776
Active Member
- Joined
- Apr 5, 2021
- Messages
- 113
- Reaction score
- 127
- Points
- 43
- Age
- 32
Pictures simply can’t do justice to how much different this looks in person from where I started. Really satisfying results from ceramic coating. I’m excited to see how it performs and holds up over time now
Looks fantastic! Great job! That light bar integration is suhweeet!

Sent from my iPhone using Tapatalk
Rambro1776
Active Member
- Joined
- Apr 5, 2021
- Messages
- 113
- Reaction score
- 127
- Points
- 43
- Age
- 32
I added a bed step. Love it.


Sent from my SM-N970U using Tapatalk
Didn’t realize I had that option when I bought the truck; I use it every time I go on a fishing trip! Very useful
Sent from my iPhone using Tapatalk
Swapped out the start button for the red TRX version, didn't give me 700 hp but looks good!View attachment 90484
Did you order from Steve White Parts? If so, how long did it take for you to get it? Ordered mine on April 10th and I've yet to receive any tracking updates.
Users who are viewing this thread
Total: 17 (members: 0, guests: 17)
Site Vendors


