Krootz
Active Member
- Joined
- May 18, 2020
- Messages
- 169
- Reaction score
- 99
- Points
- 28
- Age
- 43
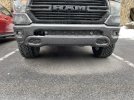
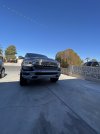
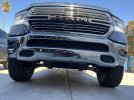
I searched the forum for before/after pics of the lower Front bumper valance and didn’t quite find the info I was looking for. I did see how it would look, but not the process involved.
I decided to give it a go today and take the lower piece off of mine. I left the “active air dam” in place (mostly because I was surprised I even had it, I thought it was only on higher trims.)
As far as the removal process...what a pain in the a$$!!
16 nuts (circled in red)
3 plastic push rivets (circles in blue)
2 plastic pop rivets holding the brackets (arrows)
It took every bit of an hour of finagling to get to some of these nuts/rivets.
After I got it all out of there I saw a couple of wire looms (shrouded wiring) dangling and zip tied them up using one of the rivet holes.
All in all it’s not hard to do, just tedious getting to all the fasteners and digging them out. It definitely wasn’t “4 bolts” like I expected.
Just wanted to post this up for anyone looking to do the same, so they know what to expect.


