5thGenRams Forums

Register a free account today to become a member! Once signed in, you'll be able to participate on this site by adding your own topics and posts, as well as connect with other members through your own private inbox!

Intro thread turned random progress updates

Shots

Ram Guru
Joined
Jun 27, 2021
Messages
735
Reaction score
727
Location
N.E. Ohio
Latest update.
I just swapped out my 275/70/18 Wrangler Duratrac (33.2") for a set of 285/75/18 Cooper AT3 XLT (34.8").
Not a significant difference, but it didn't cost me much so why not go bigger.
I bought the tires of craigslist for a smoking deal, and picked up another set of Rebel wheels the same way. I have $1290 into the whole thing (including sensors and mount/balance). I sold my OEM 20's for $1100 so the only had to come out of pocket for that last $190. If this would have been a more expensive endeavor I wouldn't have done it since it isn't really noticeable. I think it's more noticeable getting in/out of the truck than it is too look at it.

FWIW, they clear just fine with the 2.5" leveling kit on Rebel wheels, but then I also prefer a narrower tire. If someone is using a 12.5" tire on different wheels they may have different results.
Another worth while note is that YES the spare tire fits. More on this later, but you can squeeze a 35" spare under the truck.

As usual, not the best initial photo, but here is it for now.
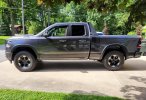
Cooper installed.jpg
 

Biggiehorn

Ram Guru
Joined
Jun 12, 2021
Messages
989
Reaction score
1,367
Location
Saint Cloud, FL
I've somehow overlooked your thread for the last year, but nicely done! The fact that the side view of the rack aligns with the decals makes my OCD happy lol.
How are those flares holding up for you so far?
 

Shots

Ram Guru
Joined
Jun 27, 2021
Messages
735
Reaction score
727
Location
N.E. Ohio
LOL yeah I was pleased with that as well. It's funny because after initially making and applying the decal I considered re-cutting it with the flag about an inch or so back so it was centered in the gap between the wheel well and the front of the bed. I kept procrastinating and never actually did it (obviously). After putting on the rack I don't see a need to do that now.

The flares are holding up great. They fit much better than the first set of OEM style that I tried. These are clearly designed for the correct truck. They follow the contours well. Nice snug fit, but not so snug to be difficult to install. Very happy with them.
 

Shots

Ram Guru
Joined
Jun 27, 2021
Messages
735
Reaction score
727
Location
N.E. Ohio
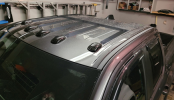
I did a no-drill install on the cab lights. I tired various configurations, and still may adapt it a bit, but one thing I've learned from designing and fabricating various products over the years is that the first take is rarely the final take. You typically find ways to make it look or function a little better after some use. That's why we have focus groups and test runs. That said, I know this isn't perfect and can probably be improved upon. Some people will absolutely hate it, but here's a link to the thread I made on the install → Cab light install thread

I've been meaning to revisit the vinyl overlay in lieu of the looms to see if I can make it more discrete, but it's inconspicuous enough now that I never think about it until my install method come up on the forum. If I eventually do that, I'm going to try a closer matching color than I tired the first time. It was gray but noticeably darker gray. I think a better color match may look better, and worth the revisit, especially if I change the layout a little.
 

Shots

Ram Guru
Joined
Jun 27, 2021
Messages
735
Reaction score
727
Location
N.E. Ohio
What did you use for that, and how did you install\wire it?
Short answer though to keep the response on this thread.
I used tape to mount the lights. Ran the wires (in looms) to the rain channel, then down into the engine compartment where I tapped into the corner marker power.
 

Darksteel165

Legendary member
Joined
Dec 16, 2021
Messages
5,834
Reaction score
3,431
Location
Massachusetts
Short answer though to keep the response on this thread.
I used tape to mount the lights. Ran the wires (in looms) to the rain channel, then down into the engine compartment where I tapped into the corner marker power.
Read the other thread too.
Appreciate the detailed info.
I always hate the through of wires outside on my truck that's why I got a regular hood wind deflector (vs one with lights) as I didn't want to run wires into my hood and back down to tap into something.

Did you tape the wires on the roof after wrapping them in loom and putting clips on top?
1655397593316.png
I like your install but I don't think I would like the results if I did it on my truck, I have the sunroof and air suspension so I have a feeling I would see the wires too often on top.
Paint and wires scare the crap out of me...
 

Shots

Ram Guru
Joined
Jun 27, 2021
Messages
735
Reaction score
727
Location
N.E. Ohio
The taped method (above) was done directly on top of the wires. No looms or clips.
As described in the other thread, I think if I routed them back to a central point and joined them all there, they could be covered with a cap of some sort. You should be able to find a cap to look like any other gps or similar type antenna which wouldn't look out of place. With the appropriate color vinyl, the leads going back to that hub and the one coming from it should be nearly imperceptible.

I wish I had taken better photos of the tape method, but I did a poor job with the application of the vinyl and didn't plan on posting anything about it, so I only have the one crappy shot.
It's hard to tell from that angle, but the vinyl/wires are extremely low profile. It was only the height of the wire since there were no clips or looms. As a result it was less than 1/16" of a bump, which really isn't much different than the ridges already on the roof.
The issue I had was at the unions, where it stood up quite a bit more. Not only did those locations stand up more, but I also had a hard time getting the vinyl flat there and the wrinkles bugged me (this is the poor application I was referring to). The hub idea prevents that extra bulge and won't be susceptible to the wrinkling since you don't have to go over anything but a straight wire.
If I ever get around to revisiting or updating the wiring, I'll take a bunch of photos and update both threads.
 

Shots

Ram Guru
Joined
Jun 27, 2021
Messages
735
Reaction score
727
Location
N.E. Ohio
As for the sunroof, I don't think that will cause you to see the wires at all. The air suspension certainly could, especially if you're tall and/or you use entry/exit mode. I have a 2.5" leveling kit and 35" tires so my roof isn't exactly at eye level, which makes it more discrete.
 

Darksteel165

Legendary member
Joined
Dec 16, 2021
Messages
5,834
Reaction score
3,431
Location
Massachusetts
Do you happen the have the original picture you could re-post of the tape method?
The one you uploaded is 434x250 resolution so it's kinda hard to see.
Could definitely put another shark fin maybe same exact one as the rear one with cutouts for the cables and then route out behind it

I was just referencing the sunroof as I do need to go up there to clean and stuff. When I had a truck without a sunroof I would just randomly spray up there and not even bother to dry it so I could have anything up there and not know or care.

My truck is the metal flake black so i'm sure black tape of some kind would almost all blend in.
Another option which might look jank is using a wire conduit and painting it body color up top (before applying it)

I love how you used the weather stripping on the side of the windshield, that's really smart. Actually have a new set of the same exact stuff sitting 3 feet away from me for a job that I don't think i'm doing to use that exact kind anyways.
 

Shots

Ram Guru
Joined
Jun 27, 2021
Messages
735
Reaction score
727
Location
N.E. Ohio
Sorry, I can't find the original. Actually, I can't even find that or any of the others from the install thread either. I keep folders on my computer with everything organized. Such as a specific folder for each vehicle, then sub folders with mods and stuff. I must have inadvertently deleted the cab light install folder, because I don't have any of them.

I suspect a gloss black vinyl would be all but invisible on the roof of black metallic when viewed from the ground, even when in entry/exit height. Good call on the shark fin. That should have plenty of volume to house the wiring connections and if you place it symmetrically on the roof to the original, it should blend right in to the look of the truck.

PS, I rarely dry my roof either, which is probably obvious in the photos from above. 😬
 

Shots

Ram Guru
Joined
Jun 27, 2021
Messages
735
Reaction score
727
Location
N.E. Ohio
Super minor "modification" but I put 1/4" spacers on my wheels. By bumping the tires up to 35's my scrub radius was obviously effected. I put the spacers on to correct the angle and bring it back closer to stock. Technically I needed 3/8" to get back to where it started but doing that would prevent the hub from engaging the wheel (or very near it), and I didn't want that.
Not only am I within spec again, but the "heavy" feel while turning slow is gone. It wasn't bad, but if felt a little stiff after adding the tires, when I was moving the truck in/out of the garage. I've noticed this on other trucks I've change tires on and never worried about scrub radius before. I always assumed it was the extra weight causing it to feel a little heavy/stiff, but it feels like normal again so it must have been the geometry. Wish I had done this on my last truck now.
Not something I would have done for a lot of money, but thin spacers are cheap enough that it's worth it.
 

Shots

Ram Guru
Joined
Jun 27, 2021
Messages
735
Reaction score
727
Location
N.E. Ohio
Another worth while note is that YES the spare tire fits. More on this later, but you can squeeze a 35" spare under the truck.
Well I finally got around to mounting my spare. I have a matched spare, so it's another Rebel wheel with the same 285/75/18 Cooper AT3 XLT tire.
I should mention that the test fit I did to confirm they fit was a bit misleading since the shop only had them at 28 psi. Yes the 35 fits, but with it aired up to 40 psi it took a little more work.

My plan was to simply adjust the heat shields a hair like I did on my '14. I had 35's on it and I didn't have to do any modifications, although I did adjust the heat shields a bit.
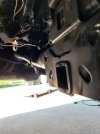
While mounting the spare on my current truck, I had to trim the back of the hitch a bit. I didn't go flush with the rear plate because I didn't want to get into the weld and weaken the hitch (I actually use it). What I did instead was trimmed as close as I could to the weld, which took about 1/4-3/8 off the back. I didn't measure it so that's a ballpark number.

1657576947353.jpeg
After trimming it, I sprayed it with black paint so it doesn't rust. This was more than I wanted to do, but I didn't want to drive around with an underinflated spare either. A spare is no good to you if it's flat. Although I did consider keeping the spare at about 25 psi and using a portable compressor to fill it if I needed it. That would have saved me the above step, so may be worth it if you don't want to do this.

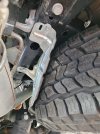
The only other thing I had to do to fit the spare was shift the heat shield about 1/2". I left the front mounts alone and drilled new holes for the two seen here. By pushing the shield out 1/2" and forward 3/8" I have a gap around the tire, the whole way around. I didn't realize until posting this that I took the photo before tightening the shield back down. It's snugged to the frame like it should be.
Do this to both sides. And for some reason the passenger side had 3 fasteners instead of 2 but the adjustment is the same.
1657577162629.jpeg 1657577191642.jpeg

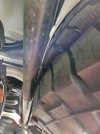
With the shields adjusted and the hitch trimmed I fit the fully aired 34.8" tire under the truck with about a 1/16" to spare.
1657577497726.jpeg 1657577475048.jpeg

There you go. Confirmation a 35" spare can fit.
 

FuriousFuria

Member
Joined
Aug 17, 2023
Messages
19
Reaction score
41
Nice build! How did you do the rocker panel vinyl all the way to the rear bumper? I really want something like this to break up all the white of my truck but seems like a PITA to cut it yourself
 

Users who are viewing this thread

Top