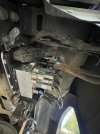
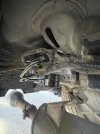
Just replaced the suspension compressor in my 2019 Limited and took some pictures along the way. I've posted parts of this in a few other places here, but figured a step by step guide could be useful since I've seen a lot of other people on here lately dealing with air suspension issues. I am not a mechanic, just a DIYer who hates bringing his car to the dealer. It really wasn't that hard of a job and if I had to do it again I could do it in under 2 hours I'm guessing.
-First, lower the truck to entry/exit and drain the system of nitrogen. I used AlfaOBD to empty the system. After the system is drained of nitrogen pull the fuse for the suspension compressor (F17). Jack up the rear passenger side, and remove the tire, and all the wheel well moulding. This will give you full access to the compressor.
-Remove the dust shield from around the compressor. There are 2 clips and 2 10mm bolts that hold the dust shield in place. It's practically made of dust at this point and will be dropping dirt on you the whole time, so eye protection isn't a bad idea here. I washed it off before I reinstalled it.
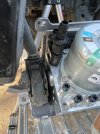
-With the dust shield off, you now have full access to the compressor. Make sure the color coordinated labels are still on the air lines, and if not make sure to label them yourself. There a 5 total lines running out of the compressor assembly, and each of them should have a color corresponding to where they run to (Reservoir, Left Front, Right Front, Left Rear, Right Rear). The in and out lines for the compressor to draw in air when needed and release it when needed are labeled as well.
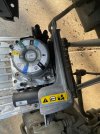
-After checking the labels, use a 13mm wrench to remove the air line fittings from the compressor assembly.
-Pull off the in/out hoses from the compressor assembly. There are a few fittings here but just take them off at the end and you'll see a barb fitting when they are off.
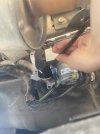
-Remove the wiring harness from the compressor. The plug is held into place by a locking mechanism on a hinge that'll free the harness when you rotate it all the way down
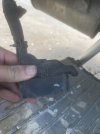
-There are a few clips on the top frame of the compressor assembly holding the wiring harness into place. Once removed you're ready to unbolt the compressor.
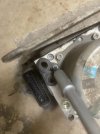
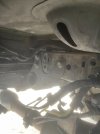
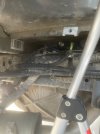
-I didn't get a good picture of the compressor before I took it off the truck, but there are 4 bolts holding it into place. It was very easy to remove with a 13mm socket and extension. You can see the bolt holes here:
-First, lower the truck to entry/exit and drain the system of nitrogen. I used AlfaOBD to empty the system. After the system is drained of nitrogen pull the fuse for the suspension compressor (F17). Jack up the rear passenger side, and remove the tire, and all the wheel well moulding. This will give you full access to the compressor.
-Remove the dust shield from around the compressor. There are 2 clips and 2 10mm bolts that hold the dust shield in place. It's practically made of dust at this point and will be dropping dirt on you the whole time, so eye protection isn't a bad idea here. I washed it off before I reinstalled it.
-With the dust shield off, you now have full access to the compressor. Make sure the color coordinated labels are still on the air lines, and if not make sure to label them yourself. There a 5 total lines running out of the compressor assembly, and each of them should have a color corresponding to where they run to (Reservoir, Left Front, Right Front, Left Rear, Right Rear). The in and out lines for the compressor to draw in air when needed and release it when needed are labeled as well.

-After checking the labels, use a 13mm wrench to remove the air line fittings from the compressor assembly.
-Pull off the in/out hoses from the compressor assembly. There are a few fittings here but just take them off at the end and you'll see a barb fitting when they are off.
-Remove the wiring harness from the compressor. The plug is held into place by a locking mechanism on a hinge that'll free the harness when you rotate it all the way down

-There are a few clips on the top frame of the compressor assembly holding the wiring harness into place. Once removed you're ready to unbolt the compressor.
-I didn't get a good picture of the compressor before I took it off the truck, but there are 4 bolts holding it into place. It was very easy to remove with a 13mm socket and extension. You can see the bolt holes here:


Last edited:

