Motor only replacement writeup
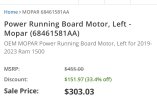
I replaced the driver's side motor (motor only, not entire hinge assembly) with an aftermarket motor from ebay. The motor cost about $120.
Tools needed: 13mm socket, 10mm socket, 6mm hex wrench, blue threadlocker
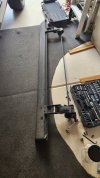
I found that it was very easy to remove the entire running board assembly in one piece and then work on the motor separately.
Get the board to the fully deployed position
1) On my Limited, I raised the truck to offroad2 height.
2) Get the running board into the fully deployed position. I opened the door while stepping on the board to force it all the way down.
3) With it in the down position, unplug the motor.
Remove entire running board
4) Use a 13mm ratchet to remove the 3 bolts on each side holding the front and rear hinge assemblies to the body. They came off very easily.
5) lift the entire assembly which includes the front motor and hinge, running board, and rear hinge off the bolts and place on floor. A box or two positioned in the appropriate places can help, but it can easily be done by one person even without an assistant.
Remove motor
6) Remove the 10mm bolt from the bottom of the front hinge - it connects to a metal block that is used to hold the flat part of the motor shaft in place. The block will fall out once the bolt is removed. Keep the bolt together with the metal block which has a specific shape (bolt attaches to narrower side)
7) Remove the three 6mm hex screws that hold the motor to the hinge. There is blue threadlocker on these screws. I was able remove all three screws manually using some force with a good quality 6mm hex wrench, but you may need to heat up the screw with a heat gun or torch if they are really stuck.
8) Pull the motor out. Note of the position of the flat part of the shaft relative to the motor housing, as this is the the position that is required to hold the metal block in place when the step is in the deployed position. Remove as much dried threadlocker as possible from the three screws.
Get the shaft of the new motor into the same orientation as the shaft in the old motor
9) Plug the motor in loosely. You will need to rest the motor on something tall enough for the cord to reach.
10) Having a helper here will make this step easier. When either opening or closing the door, unplug the motor when the flat part of the shaft approaches the position you noted in step 8 above. Close enough is good enough - the point of this is to make it easier to put back into hinge assembly with the step in the fully deployed position.
Reattach the motor
11) Slide the motor into the hinge assembly. If step 10 was successful, the flat side of the motor shaft should be positioned to allow the metal block to be reattached to the bolt. You should be able to insert the metal block into the hinge assembly and reattach the bolt. Be careful of pinching your fingers on the hinge. Hand tighten the bolt.
12) Put some threadlocker onto each screw while reassembling the motor. Tighten everything down so that the motor is secure.
Mount the running board back to the truck
13) A helper would be useful, but a well placed box will also work. I placed the rear hinge on a box near the height of the lowest mounting bolts and then lifted the front into place. loosely attach one nut to keep it in place and then finish mounting the rear hinge. Tighten all 6 bolts.
14) With the door open, reconnect the motor wiring. Close the door and wait for the motor to retract the step.
15) Open the door. With the step extended all the way out fully tighten the 10mm bolt.
Gaze at your completed work.


