5thGenRams Forums

Register a free account today to become a member! Once signed in, you'll be able to participate on this site by adding your own topics and posts, as well as connect with other members through your own private inbox!

Bone head move - help

breeves2245

Member
Joined
Oct 25, 2022
Messages
6
Reaction score
3
Installing the OEM brake controller. All going well until I try unwrapping the two plugs and plug into the newly mounted controller. Was being very careful to cut some wrapping off so I could pull the two plugs that were wrapped tightly in some kind of mesh tape. Sure as heck I snipped two of the seven wires from the larger plug in half . Any they are very small gauge. Don't have any length or room to work with to try to splice them back.

Any suggestions how to connect these two back? Not sure I have enough room to shave any wire coating off the wires. Even if I did, they are very small so I would be hard pressed to do it cleanly without cutting into the wires.

Planned on installing the brake controller and head to my Ram dealer and let them do the programming/flashing for $70. Maybe I should hand the issue over to them.

Any suggestions?
 

breeves2245

Member
Joined
Oct 25, 2022
Messages
6
Reaction score
3
Only idea I have is to use those no stripping wire connectors. Don't
need to try to strip the wire and don't need any room to work with those.

Anyone use them?
 

PurpleRT

Ram Guru
Joined
Aug 22, 2020
Messages
1,444
Reaction score
1,358
Post a picture. Would probably give us a better idea for a fix.


Sent from my iPhone using Tapatalk Pro
 

breeves2245

Member
Joined
Oct 25, 2022
Messages
6
Reaction score
3
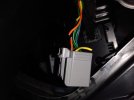
Here is the horror of it all. Not sure how to tell what gauge the wire is so I can get the correct connector. The wires are smaller than the pic indicates. Yellow wire ain't got much to work with. I can barley get them to meet together. Wire Splice.jpg
 

skyhawk42

Well-Known Member
Joined
Mar 7, 2022
Messages
255
Reaction score
213
I would say to solder a small jumper wire to it to give you some more length and then cut to size and solder the other side too. It will make for a more secure connection than the other connectors. Looks like you have enough to work with to solder it
 

Jako

Spends too much time on here
Joined
Sep 8, 2018
Messages
2,808
Reaction score
1,707
Location
Borough of Parks
Here is the horror of it all. Not sure how to tell what gauge the wire is so I can get the correct connector. The wires are smaller than the pic indicates. Yellow wire ain't got much to work with. I can barley get them to meet together. View attachment 145917
I use hobby brass tubing to make connections on the replacement fuses to my coffee pots. I slide the wire and fuse into the tube and crimp.

Strip a small section on the wires to be connected, slide appropriate sized shrink tubing back on wire, make the connection using the tubing, crimp and cover with the shrink tubing.

I've done at least a half dozen repairs on coffee pots.
 

Rick3478

Ram Guru
Joined
Mar 3, 2022
Messages
1,445
Reaction score
1,788
Location
NW OH
Here is the horror of it all. Not sure how to tell what gauge the wire is so I can get the correct connector. The wires are smaller than the pic indicates. Yellow wire ain't got much to work with. I can barley get them to meet together. View attachment 145917
I'm retired from decades of two-way radio, have seen worse (and done worse). ;) Hard to judge scale from the pic, I'll guess 22 ga. but could be wrong. Here's what I'd do for top quality repair:

Measure wire to make sure of size.
Beg, steal, or buy small amounts of matching wire.
Find out who makes the connector.
Buy a pin extractor and a couple new pins for the connector.
Beg, steal, or buy proper crimping tool.
Remove pins having damaged wire.
Solder and shrink tube wire extensions to damaged harness.
Trim wires and crimp new pins to ends.
Insert new pins in connector.

- or -

Befriend one of us old dinosaurs who have done this kind
of stuff for years. Beverages may be required. 🍻
 
Last edited:

gofishn

Well-Known Member
Joined
Oct 12, 2022
Messages
219
Reaction score
503

haisstronica 220PCS Solder Seal Wire Connectors-Waterproof Solder Wire Connectors-Heat Shrink Wire Connectors-Electrical Connectors Kit(20Yellow 40White 80Red 80Blue)


Video showing how to use it.

Looks like you have plenty to work with. If you are not comfortable, find a friend who is. Worst case, remove every wire from the plug , then re-attach every wire to the plug.

If it were me, I'd tin the wire, then use the above connectors, to help form a water tight connection. I would also add heat shrink rubber over all the joins. then, because I;m goofy that way, liquid tape everything.

Can you tell I mess with boats a bunch?
Tin, water tight connections with self melting solder, then shrink tube, then liquid tape?

If you live in Iowa , bring it over, should take about 10 minutes, unless we rip every wire out of the plug, then figure an hour.
 

Seadoorxpguy

Active Member
Joined
Nov 24, 2020
Messages
77
Reaction score
75
Unpin the two wires you cut from the connector. Should give you a little more slack to maneuver and solder then back together. Then reinstall the pins into the connector
 

breeves2245

Member
Joined
Oct 25, 2022
Messages
6
Reaction score
3
Thanks for the tips. I have never used a solder, so I was not up to that task especially in this situation. Was short on time to make the dealer appt. for the programming. Got a very, very helpful tip watching a YouTuber. I was stressed how to splice the wires and not cut into them. Very tight location. If I was on my work bench, no issue. Anyway, he demonstrated to light the insulated ends with a lighter. So I tried that with a stick lighter. Worked amazingly well and quick. So with the tips exposed 1/4" or so I used some butt connectors I had on hand. Trimmed the ends so I didn't need as much runway to get into the contact zone of the connector.

Took it to the dealer this morning to get it flashed. Holding my breath it would work as the bulky butt connectors were not my first choice. They got it flashed and I took it back to my travel trailer and it worked fine. Very relieved. Picking up the new trailer Friday.
 

Users who are viewing this thread

Site Vendors

https://www.jasonlewisautomotive.com/

Staff online

Top