U
User_21361
Guest
Here is a more detailed update of my install of the Addictive Desert Designs Stealth Fighter bumper.
Here is the finished product:

Overall impressions: The bump is rock solid and I love the extra ground clearance. Getting the bumper took FOREVER (18 weeks + 2 weeks for delivery). Time will tell if its worth it. However, I love the look.
For what its worth, I had a buddy with a raptor take a picture of our trucks next to each other and tell me how jealous he was of my setup:

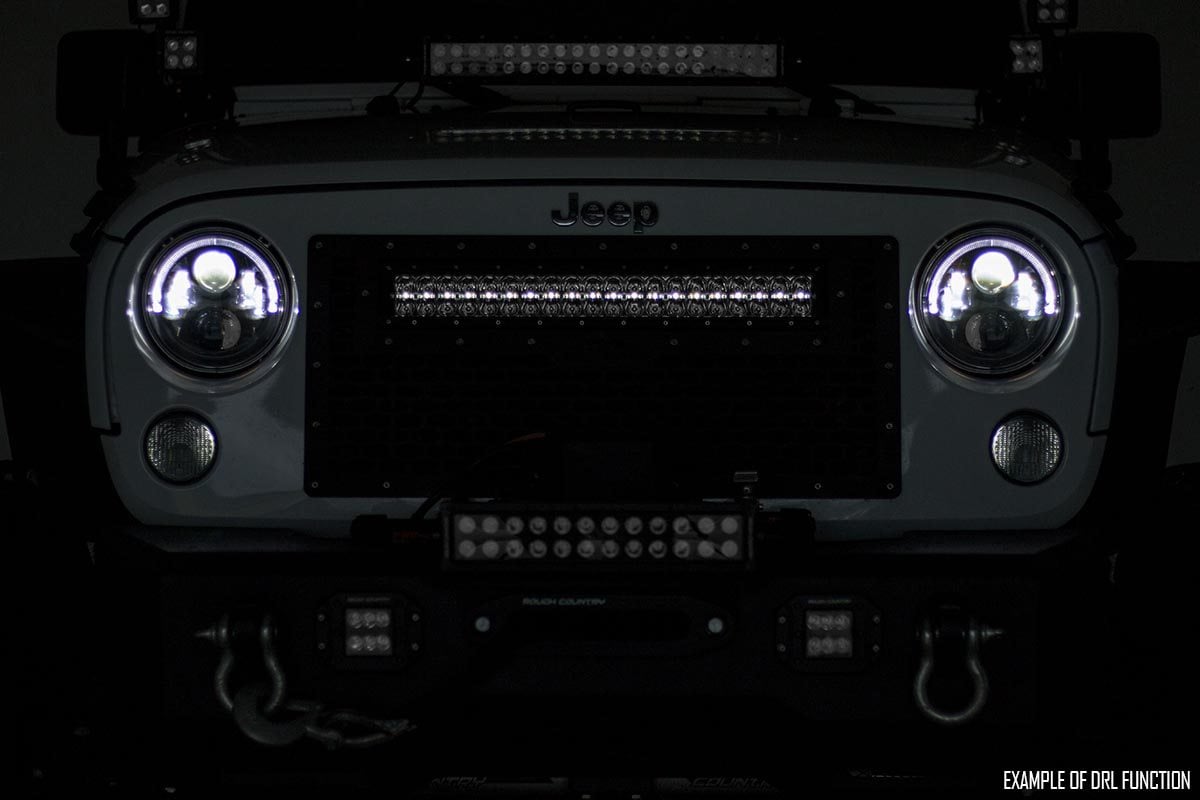
Lightbar
I went with a Rough Country light bar. It was cheap enough but still functional that I felt it was good enough. The light is in fac6t functional. The only things I don't like are 1) the light has a little yellow hue at certain angles and 2) The DRLs are silly (I didn't even wire them up). To wire it, I used the Rough country wireless switch. Rough country says it will not work for this light, but with a little bit of know-how, I got it to work. Overall, Im happy with the performance and install. I will probably use it 3-5 times as I don't do a lot of nighttime driving.
Switch

Now I can just use a wireless switch mounted in the cab with no holes to drill. The big caveat here is that I am wired directly to the battery. I do plan on jumping off a fuse so it will only work when the truck is on, but that will be a project for another time.
Install notes:
I was really bummed about losing my fog lights. Functionally they are great, but I really like the look of fog lights too. I was able to make customer brackets to add in a pair of Baja Design S2 pods.

I made brackets using a Dremel and $10 in parts from Home Depot.

Here are the individual parts for clarity:


Here is the wiring harness:

And here is the mounted version:

The performance is ok, but not great. The aesthetics is exactly what I wanted. I may CNC a new plat to fit in that port in the bumper so I can actually get the full light output.
Here is the finished product:
Overall impressions: The bump is rock solid and I love the extra ground clearance. Getting the bumper took FOREVER (18 weeks + 2 weeks for delivery). Time will tell if its worth it. However, I love the look.
For what its worth, I had a buddy with a raptor take a picture of our trucks next to each other and tell me how jealous he was of my setup:
Lightbar
I went with a Rough Country light bar. It was cheap enough but still functional that I felt it was good enough. The light is in fac6t functional. The only things I don't like are 1) the light has a little yellow hue at certain angles and 2) The DRLs are silly (I didn't even wire them up). To wire it, I used the Rough country wireless switch. Rough country says it will not work for this light, but with a little bit of know-how, I got it to work. Overall, Im happy with the performance and install. I will probably use it 3-5 times as I don't do a lot of nighttime driving.
Switch
- Red: Hot
- White: DRL
- Blue: Light
- Black: Negative
- White: Positive
- Blue: Out to Relay
- pull Neg from the battery cable
- Cut the DRL wire off at the relay (since DRL was not needed or wanted).
- Wire: Neg (white wire below) to Black, Red to Blue, and Blue to White
Now I can just use a wireless switch mounted in the cab with no holes to drill. The big caveat here is that I am wired directly to the battery. I do plan on jumping off a fuse so it will only work when the truck is on, but that will be a project for another time.
Install notes:
- Sensors - Be careful when removing the sensors form the stock bumper. I ended up breaking one of the wires which meant I needed to buy a whole new harness. Annoying but not the end of the world. Also, Make sure you label the wires before you take them off the stock bumper. I ended up hooking them up incorrectly at first which made it seem like the harness was too short. Instead I just did it wrong.
- Install time: Taking off the stock bumper took about an hour. I had to look up how to remove the tow hooks. I didn't need a hammer like others have mentioned in other forums. Instead, I just used the tow hook itself to bang down on the bolt to break the retention ring. It didn't take a lot of force. Prepping the new bumper took about an hour as well. Back to installing the sensors, I used tape on the outside sense mounts to make sure they were seated correctly (and not generating false positives. Gluing them after the fact was trivial and I had peace of mind that they were oriented correctly. Install took about 30 min. The install was 99% done alone. I did need help positioning the bumper to put the mounting bolts in, but that was it.
- Skid plate: I had to remove the front most skid plate in order to install the bumper correctly. I tried doing it without removing the plate and ended up scuffing the skid plate mounted on the bumper. I may end up cutting the stock one to try and re-fit it, but I'm not sure its really needed.
- ADD: +99.12
- Light: +10.56
- Tow hooks: -11.64 (5.82x2)
- Stock Bumper: -70.22
- Skid Plate: -8.8
I was really bummed about losing my fog lights. Functionally they are great, but I really like the look of fog lights too. I was able to make customer brackets to add in a pair of Baja Design S2 pods.
I made brackets using a Dremel and $10 in parts from Home Depot.
Here are the individual parts for clarity:
Here is the wiring harness:
And here is the mounted version:
The performance is ok, but not great. The aesthetics is exactly what I wanted. I may CNC a new plat to fit in that port in the bumper so I can actually get the full light output.
 checked last week and was told it would ship between Nov 5-19.
 no idea why, I didn't even unplug the sensors. I was able to remove the sensors from the brackets and move them over with the harness. I'm also 99% sure they are all correctly oriented.