5thGenRams Forums

Register a free account today to become a member! Once signed in, you'll be able to participate on this site by adding your own topics and posts, as well as connect with other members through your own private inbox!

2019 Ram Big Horn Build

ScottChurch

Active Member
Joined
Sep 3, 2019
Messages
72
Reaction score
67
Hello everyone!

I figured it was time for me to throw up my build for anyone that wants to see. I have done a few modifications to my truck so far and it seems to be a never ending wormhole.

I had an F150 and a Tacoma before this, but decided it was time for a change.
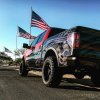
DE999808-6DDB-4836-BAAF-0BD84C5028D2.jpeg
996F2BC1-559A-49BE-ACBA-F902AF47A779.jpeg

Here is a photo of the Ram on day one when we brought it home:
7FB83C80-B12A-4761-9121-B6B81B9149CB.jpeg

First thing we did was throw in a rugged liner:
E7FE607A-A523-4412-B637-71906A209223.jpeg

After that I took the truck to an exhaust shop and had a Borla XR1 welded in place of the giant stock muffler. I don’t have any pictures of this, and I decided to leave the tips stock.
 

ScottChurch

Active Member
Joined
Sep 3, 2019
Messages
72
Reaction score
67
Ok, time to continue the build now that I have some time to update this thread. I knew from day one that I wanted to lift the truck; I of course read all of the threads on here and didn’t really see anything that fit my end goals. I liked the Mopar 2” lift, but it didn’t give me enough height and I liked the readylift 3.5” but I wanted to avoid the preload spacers.

So I decided to piece together some different parts and create my own lift. Here is everything I used:

Mopar UCA (same ones the Mopar lift):
Right 68323530AA
Left 68323531AA

Mopar ORP Front Springs:
Right: 68320250AB
Left: 68320249AC

Motofab 2” Front Leveling Kit: DR-2

Motofab 2” Rear Lift Kit: DR-2R

Rough Counutty Rear Shocks: 23161_J

Here are some comparison photos, stock UCA on the left and the new Mopar UCA on the right. You can see the extra angle that the Mopar UCA accommodates.
1D5C9127-3212-42AA-8962-FAF068403F43.jpeg

Mopar UCA:
92013330-34B2-4FB6-9EE2-B1E2B62725EE.jpeg

Stock UCA:
B7320257-09D7-457B-9B86-2A1870787DCD.jpeg

Stock UCA at full droop:
0E03F6FE-054E-457F-AF47-0F73F1DA2E86.jpeg

Full droop post lift, with the new Mopar UCA:
FF5E2E5D-66BC-4710-B13B-DA4831A2ED44.jpeg

Stock spring left, ORP spring right:
CE93F784-9EA0-4EC6-B10C-B484D326E9C6.jpeg

Stock shock vs Rough Country. It is hard to tell from the picture but the Rough Country shock is much heavier.
BCF2F5C5-D319-45C2-ADD7-BAB1A3D34BFF.jpeg

I did the full install myself in my garage just with some basic hand tools, and I think that most people could do this lift so long as they take their time. Some words of wisdom to anyone that does do this lift themselves, you will definitely need a pass through socket set. I picked one up from Harbor Freight. https://www.harborfreight.com/sae-metric-go-thru-socket-set-21-pc-62305.html

Also, don’t forget to rent a spring compressor. For those of you that don’t know, you can rent a spring compressor from O’Reilly Auto Parts and then when you bring it back they give you your deposit back (so it’s free).

My final tip would be to mark the alignment of the front strut. To get the ORP spring on you’ll be taking the strut apart, so I recommend you mark the orientation of the top hat to the strut itself, that way when you put it back into place your holes line up. I didn’t do this on the driver side and had to take the strut completely apart to redo it.
 

ScottChurch

Active Member
Joined
Sep 3, 2019
Messages
72
Reaction score
67
Once the lift was on I decided that all of the chrome needed to go. I thought about going to black out look, but decided it would be better to do something different. So I picked up some white plastidip from Home Depot and got to work. I started by doing the emblems first and realized the white plastidip wasn’t a close enough white for me. I then decided to try out the rustoleum version of plastidip and that ended up being a much closer white. You will be able to see in the pictures that my front end is a much closer white than all of the emblems are.

9D7D864C-CF75-4F3D-A877-AE4DF78F0EA9.jpeg

This picture was taken before peeling all of the excess off
E1701D27-D0A1-442E-8A87-69C6FC19D5E1.jpeg

Finally after about a month of waiting my wheels came in, once again I decided to go with something a little different. I know some people will love it and some people will hate it, but I personally really like it.

They are 20x10 -19 Fuel Triton wheels in
079B1DA7-C02B-4ED0-BEBF-54993EE26D31.jpeg

Of course I couldn’t wait, so I installed the wheels the same day they came in.
05D4B7DB-C2B7-4A3A-9BB9-5D17495DCD3C.jpeg
ECD27035-64CF-453A-A14D-1767BDB73C92.jpeg
0FE1E758-B38B-4718-BB16-EFCABEED2A1B.jpeg
1369022C-868A-44A5-A947-CFDB3B73521A.jpeg
 

ScottChurch

Active Member
Joined
Sep 3, 2019
Messages
72
Reaction score
67
Another picture for anyone that wants to see:

F56F0144-8981-4ED3-A314-5148F955085F.jpeg

I think that gets us all caught up now. I am hoping to finish my “white out” this weekend so that there is no more chrome left on the truck. I am also going to redo my emblems that were done with plastidip so that they can be done with the rustoleum instead. I also ordered some red overlays for the emblems so once everything has dried I’ll be installing those.

I also just realized I never posted my hub to fender heights, so I’m going to throw those here.

Stock
Front: 21.5”
Rear: 24”

Lifted
Front: 25”
Rear: 26”

I purposely left 1” of rake because I do haul stuff regularly and didn’t want to be left with that sagging look.
 

ScottChurch

Active Member
Joined
Sep 3, 2019
Messages
72
Reaction score
67
Ok, I was able to make a little more progress on the truck. I ordered some vinyl overlays from TVD Vinyl through Etsy since they had the closest red to my wheels. I have to say so far I am extremely impressed with the overlays, they feel like they are high quality and the owner Rich was great to work with.
E8A90175-F3B6-4A44-8716-95A9ED0D9727.jpeg
FF61A907-6A60-4C63-8EB2-931D51F68AB3.jpeg
I still need to pull my front emblem off and spray it white before I do the overlay and I need to complete the overlays on my tailgate.

I thought I might be crazy at first for spraying all the emblems white first and then doing the overlays, but I have to say that I like they way they look way better now. I think the white “border” and red face of the emblems give them a custom appearance.
 

ScottChurch

Active Member
Joined
Sep 3, 2019
Messages
72
Reaction score
67
Very nice build, using color match vinyl to remove the chrome on my truck now!
I thought about going down the vinyl route, but figured I didn’t have the skill to pull that off! Make sure to show some pictures once it’s done.
 

Dr. Jim

Ram Guru
Joined
Aug 16, 2018
Messages
757
Reaction score
553
Great job!!! The red on the emblems is the perfect touch and goes well with the rims. It might be old school, but how about a subtle red pinstripe down the side?
 

ScottChurch

Active Member
Joined
Sep 3, 2019
Messages
72
Reaction score
67
Great job!!! The red on the emblems is the perfect touch and goes well with the rims. It might be old school, but how about a subtle red pinstripe down the side?
Thank you! It’s funny that you bring up a pin stripe, I have thought about adding some sort of graphic to the bed in the same red. But of course I haven’t found anything I like. It’s a tough balance with having enough red to make it look intentional, but not going way over the top.
 

ScottChurch

Active Member
Joined
Sep 3, 2019
Messages
72
Reaction score
67
Just finished up the red overlays on the rear, figured it was a good time to post up some rear shots. I think all of the overlays really helped to bring the red together. Now I’m staring at my exhaust tips and wondering if I should go red or white with them.
DA21791D-164E-40F9-AC47-7242588D5B32.jpeg 6D9EA0E1-530E-4AB8-BD61-D7F95C27A5E7.jpeg E2BDB34B-EB4C-424A-9F45-6CEFB5C958C4.jpeg
 

Users who are viewing this thread

Site Vendors

https://www.jasonlewisautomotive.com/

Staff online

Top