gHiDoRa
Ram Guru
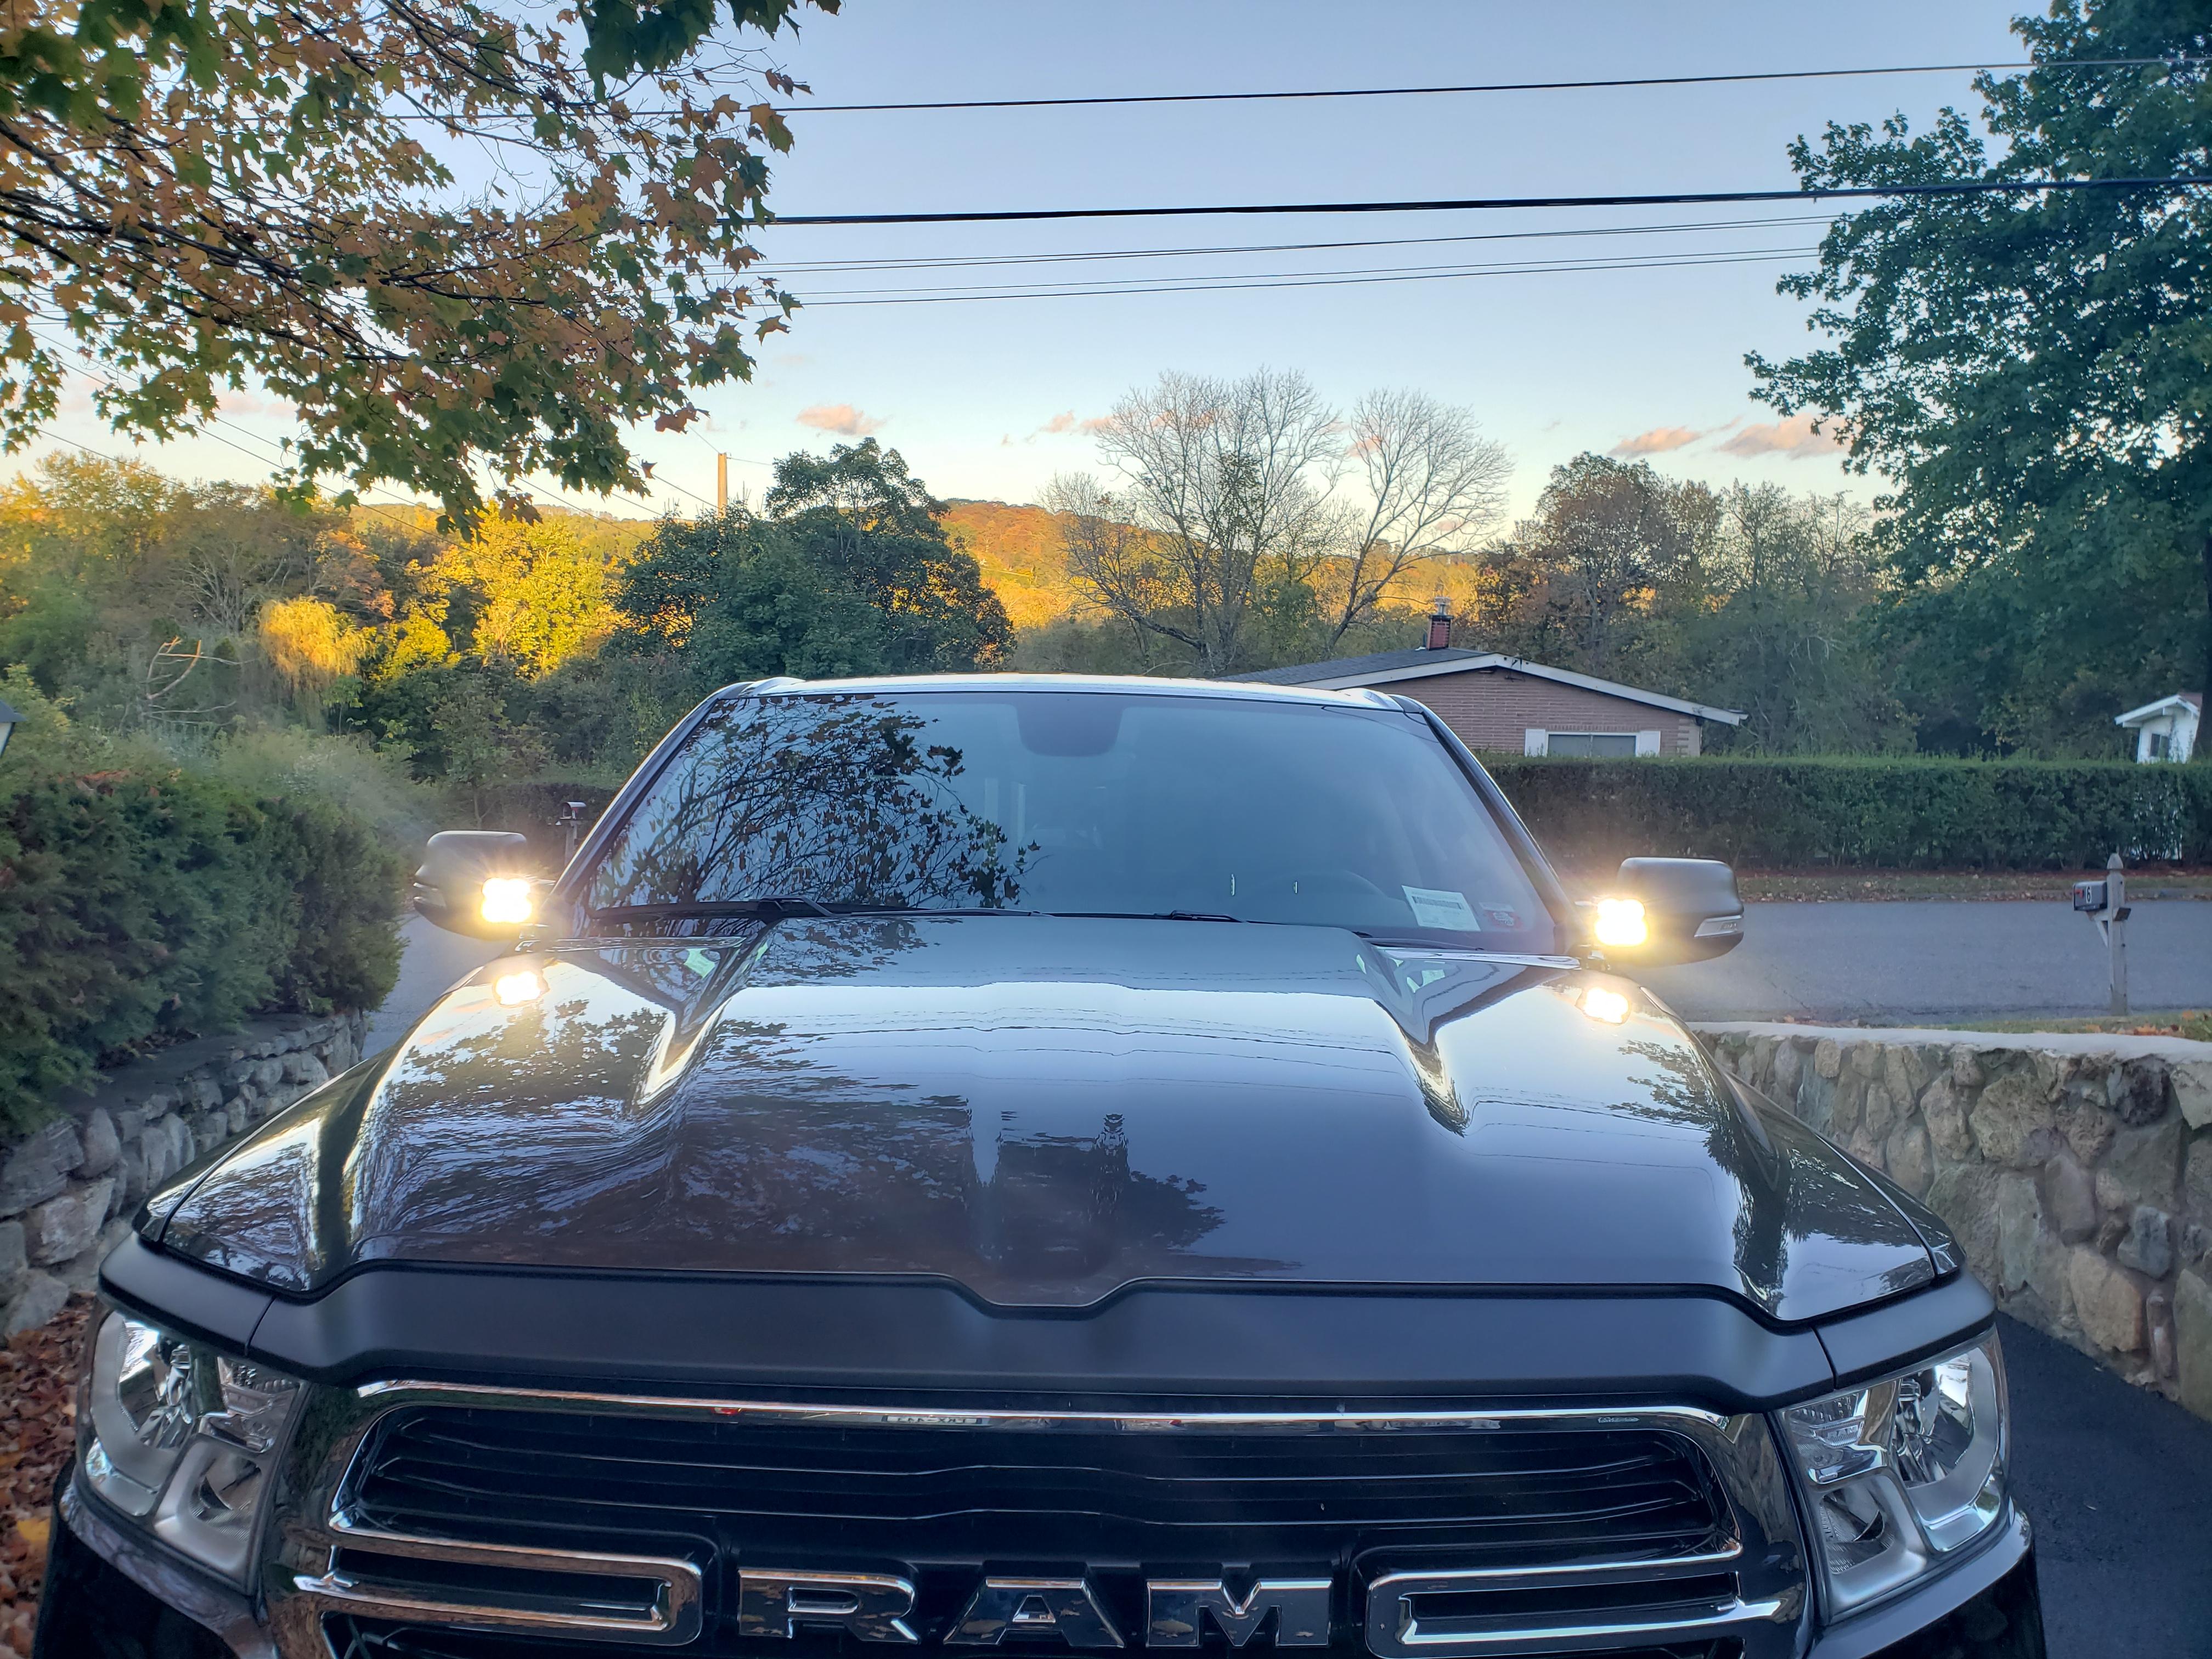
Finished, these are the Rigid Ignite diffused. Made a big difference!
Really would like to see how you mount those on bumper in daylight. Thanks.
Finished, these are the Rigid Ignite diffused. Made a big difference!


thats what i usedOpt7 triple LED light bar fixed it for me. $89 + $25 plug and play wiring harness. If you sign up for the opt7 email list you get a 10% off discount code. There is a string of posts in this forum explaining how to install it.
") !
!


 5thgenrams.com
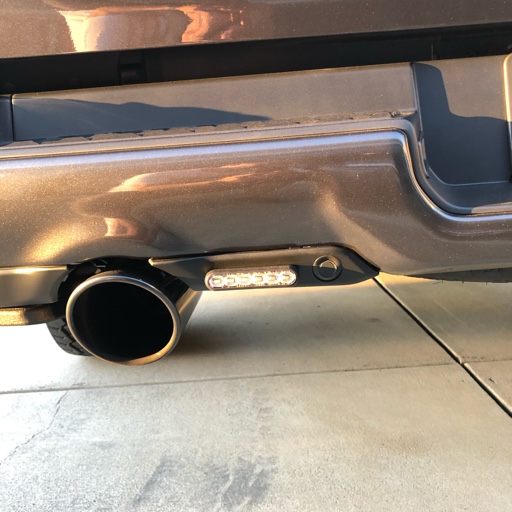
. Cleaned it up and gave it a coat of polish till warmer weather. Paint or rust preventer? and 2 "Utilitech #0292685, 1"x1" mounting pads" (each end).. Had to add a little heat (propane torch) to the frame to insure adhesion. In the lower right and lower left are the lights. They were adjusted about 1/8" behind and 1/8" below the black plastic portion of the bumper. I used a 75 mm bolt which can be shorter but if the preference is flush to the "face" of the bumper not that much. I may also attach a "shield" to the rear of the lights on the extended bolt. - Best I could do with the weather. Snow flakes "got me" for 20 minutes - no complaints.
5thgenrams.com
. Cleaned it up and gave it a coat of polish till warmer weather. Paint or rust preventer? and 2 "Utilitech #0292685, 1"x1" mounting pads" (each end).. Had to add a little heat (propane torch) to the frame to insure adhesion. In the lower right and lower left are the lights. They were adjusted about 1/8" behind and 1/8" below the black plastic portion of the bumper. I used a 75 mm bolt which can be shorter but if the preference is flush to the "face" of the bumper not that much. I may also attach a "shield" to the rear of the lights on the extended bolt. - Best I could do with the weather. Snow flakes "got me" for 20 minutes - no complaints.


Now you tell me.Hey Jako thanks for the shout out I think I was one of the first to do baja but many upgraded since lighting stinks. What I also did though was get the anzo wireless switch and use posi taps into the positive and ran up front to the wireless module and now i can turn them on and off from the switch as well when not in reverse.
Sent from my SM-G965U using Tapatalk
. Good info to pass on. I saw the Anzo after I had all the hardware to do this job. The Anzo got so so reviews on amazon I believe and there was another one that seemed to get better reviews. For whatever the reviews are worth. Posi taps seem to be pretty good, but I have never used them. Yes the write up was very well done and will help people. I took a chance on the anzo and so far for the $25 it has been amazing I got over 400ft and the switch still activated. I even have it hooked up to my baja squadron pro hood lights maybe that's your next project sorry you may have to continue doing some mods.Now you tell me.
I have to be careful with forums as they tend to influence me into purchases and "projects". This took on a little "life of it's own" but well worth the labor of love (sometimes the journey is more important than the destination). I am probably going to add some type of plate shield to the back of the lights.
You and cra1g did a nice job and enthused me to do an install with the Baja lights and would like to extend a handshake and thank you for the info. Hopefully the pics and write up will encourage some one else to tackle the reverse lights.
The Anzo sounds good. I might be tempted to "weaponize" the Bajas with tailgaters. I had a good chuckle about the front lights. Hell, I haven't even put the mud flaps on my 2001 (I think I might have some side moldings also). DIY can be a problem! Hope I can live to a 150 and get it all done.Yes the write up was very well done and will help people. I took a chance on the anzo and so far for the $25 it has been amazing I got over 400ft and the switch still activated. I even have it hooked up to my baja squadron pro hood lights maybe that's your next project sorry you may have to continue doing some mods.
Sent from my SM-G965U using Tapatalk
The INSTALL:
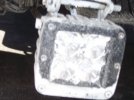
Lower the spare onto a dolly if available. It was good practice and examination showed rust (10/18 build) not happy
The" Curt #56584" mounted flat and neat to the horizontal plastic with a little finagling (zip ties)
The 3rd photo is with the "5 flat trailer side" attached. Note the mounting pad and 2 zip ties on the curt (lower right) . The zip ties are required to keep the curt high enough from resting on the spare.
4th, 5th and 6th show the wire routing and zip ties going to the left side. There is a zip tie attached to the spare tire "horn". Note that the white zip ties were included for the photos. OCD takes over and they will be replaced (black) and "clipped".
7th (left side) and 8th (right side) are of the Baja plugs mounted via mounting pads. The mounting pads were not happy with 20 degree weather and promptly "dismounted" cleanly
9th photo of flat stock bracket right side. I torqued the truck side nuts to 45 ft/lbs. This was based on "my" torque wrench and I used the tightening "click / no click movement". I started at 20 ft/lbs. and increased the torque setting until I did not get a click and the nut appeared to move a hair. It seemed to be 40-45 on all 4 bumper nuts.
10th Finish
Hope this helps those looking to install additional reverse lights.
Obviously:
There are less expensive alternatives to the lights and wiring.
There are other wiring options (posi taps and such).
Don't need Baja - but they are NICE.
On the "Someday List" if I have enough "Tomorrows": Bed lights installed with a DPDT switch so the Baja lights come on with the bed lights. I figure if I need bed lights I could probably use the additional lighting at the back of the truck.
View attachment 44441 View attachment 44442 View attachment 44443 View attachment 44446 View attachment 44449 View attachment 44445 View attachment 44447 View attachment 44451 View attachment 44452 View attachment 44454


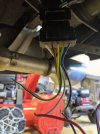
You're dumb based on your current pic. The blue is your HOT or RED. The white is ground or your BLACK. You have them backwards! Get a DVM and check for voltage at your white and blue for around 13.5V or so to ensure you have power at those wires. You will have to have a friend in the truck to put it in REVERSE while testing voltage. Don't know if your RIGID are reverse polarity protected or not. You may have blown the lights by hooking them up backwards. Hard to say.Installed the Rigid diffused for reverse lighting a year ago but they never worked. Never had time to look into checking my wiring till today. Did the curt harness, same as everyone else, tried switching the blue/white and white/black but still no luck. Am I dumb here or did I get some dead Rigids?
That's what I did to. Same spot but mine ingot from harbor freight for $30 work greatI added some extra LED light bars. Helps a lot.
Sent from my iPhone using Tapatalk
Looks nice, but NEVER EVER use 120V home electrical wire nuts on automotive wiring. They are not designed for this application. Just trying to inform others that look at what folks do related to wiring to know what's right and what's wrong. All electrical connections in a car/truck should be soldered and heat shrink wrapped to ensure a connection that will stand the test of time and be fully protected from the weather.The INSTALL:
Lower the spare onto a dolly if available. It was good practice and examination showed rust (10/18 build) not happy
The" Curt #56584" mounted flat and neat to the horizontal plastic with a little finagling (zip ties)
The 3rd photo is with the "5 flat trailer side" attached. Note the mounting pad and 2 zip ties on the curt (lower right) . The zip ties are required to keep the curt high enough from resting on the spare.
4th, 5th and 6th show the wire routing and zip ties going to the left side. There is a zip tie attached to the spare tire "horn". Note that the white zip ties were included for the photos. OCD takes over and they will be replaced (black) and "clipped".
7th (left side) and 8th (right side) are of the Baja plugs mounted via mounting pads. The mounting pads were not happy with 20 degree weather and promptly "dismounted" cleanly
9th photo of flat stock bracket right side. I torqued the truck side nuts to 45 ft/lbs. This was based on "my" torque wrench and I used the tightening "click / no click movement". I started at 20 ft/lbs. and increased the torque setting until I did not get a click and the nut appeared to move a hair. It seemed to be 40-45 on all 4 bumper nuts.
10th Finish
Hope this helps those looking to install additional reverse lights.
Obviously:
There are less expensive alternatives to the lights and wiring.
There are other wiring options (posi taps and such).
Don't need Baja - but they are NICE.
On the "Someday List" if I have enough "Tomorrows": Bed lights installed with a DPDT switch so the Baja lights come on with the bed lights. I figure if I need bed lights I could probably use the additional lighting at the back of the truck.
View attachment 44441 View attachment 44442 View attachment 44443 View attachment 44446 View attachment 44449 View attachment 44445 View attachment 44447 View attachment 44451 View attachment 44452 View attachment 44454
ThanksLooks nice, but NEVER EVER use 120V home electrical wire nuts on automotive wiring. They are not designed for this application. Just trying to inform others that look at what folks do related to wiring to know what's right and what's wrong. All electrical connections in a car/truck should be soldered and heat shrink wrapped to ensure a connection that will stand the test of time and be fully protected from the weather.